Reviewed by Mark Rigby, Faraday Forensics Ltd
Oxygen Forensic Suite 2014 is specialist software aimed squarely at mobile phone forensics. It claims to have the “widest range of supported devices” with over 8,400 models listed and is geared towards smart-phones with a particular emphasis on the analysis of data recovered from them.
It is straightforward to use once you get your head around the way it works, and with some thought you can make it fit into your examination system quite easily. You don’t have to be particularly savvy to use it, but you do to get the most out of it and be able to use it effectively.
There are several license types, such as “Internet” (software key), USB dongle (individual machine) and an enterprise version whereby a single USB dongle is installed on a server and allows several machines to use the software at the same time.There are also three editions of the software which comprise a Standard but feature-limited version, the Analyst version and a Passware Analyst version which is the same as Analyst but has the facility to brute-force password protected iTunes and Android back-ups.
A comparison of these editions is available on http://www.oxygen-forensic.com/en/compare
Oxygen have been around for some time, as have I, and I remember them for excellent recovery of data from [insert expletive of your choice] Symbian phones. For those with not quite so many miles on the clock, Symbian was the fore-runner of smart phones but had certain quirks that made examination difficult sometimes, particularly when the battery went flat and the date reset. Compared to now, examination back then was slow, manual and difficult, with Oxygen being one of the few glimmers of hope if you happened to have a supported phone.
Oxygen still seems to be geared towards smart phones, although it does what my wife calls ‘dumb phones’ too, so although I’ve tried a few different types for review purposes, I haven’t tried every type. Rather than comment on individual phone models, I did two or three of each major OS (iOS, Android, BlackBerry and some other ‘dumb’ models) so my comments relate to the families rather than individual members of them.
Review
Mobile phone forensics is a strange beast. You can examine two phones of identical model but have plain sailing with one and a nightmare with the other. You can never take recovered data at face value and need at least two tools to verify your results, as well as manually checking against what you can see on the phone, assuming the recovered data is live and not deleted. If your evidence is deleted, you are more reliant than ever on using more than one tool to make sure you haven’t just picked up a spurious record from somewhere.
You have to be 100% confident in the evidence you produce. Confident enough to stand before a Judge and Jury to explain your report(s), colour any grey areas and explain how you got your results. My aim when being this confident is knowing that I would be able to switch the phone on and show the jury with a dramatic flourish the relevant messages, contacts calls etc. Although of course this is massively impractical in a court setting, I like to know, for my own peace of mind, that in theory at least, it would be possible.
So, with this in mind, the mobile phone examiner needs more than one tool in the box and in any case, no one tool covers everything. My review uses this context. It looks at how Oxygen fits into the toolbox, not at whether Oxygen alone is the toolbox.
The machine I used for testing was my trusty Field Examination Laptop, a Samsung R519 with 2GB of RAM, dual core 1.9GHz Celeron processor, running Windows 8 on a SSD drive. It’s nothing like as powerful as my day-to-day examination machine, but my thinking was, “if it runs ok on this, anything else will be fine.” I used a USB portable hard drive to store Oxygen’s database, which is where the recovered data resides, in order to simulate a kind of isolated networked environment. By default, Oxygen stores it locally on your computer, but it’s simple to change the location to another drive or your network. Just be aware that if Oxygen can’t find the database location it will tell you and then quit – you can’t get back in until the database location is available again or you can hack your registry if you know what you are doing and change the path here to get yourself up-and-running again.
Data Extraction
Oxygen provides several ways to extract data. You can use a USB cable, Bluetooth or you can import data from other sources. This includes Apple iTunes back-ups, Android Backups, images (back-ups) created by official [device manufacturer] sync software as well as files created by other forensic software such as UFED and XRY. It also has an option for obtaining Windows Phone items from cloud back-ups, although this requires the owner’s Microsoft username and password. The latter also sparked a debate in the office surrounding privacy laws and just how legal it actually is to access someone’s cloud-based back-up. It’s one thing to recover the data from a phone seized legally by law enforcement officers but another to get the same data as that stored on the phone from a remote Microsoft server by using their account credentials.
Oxygen allows for physical extraction from Android devices by ‘soft’ (temporary) rooting on supported devices plus a built-in physical dump and decode from Android MTK devices. Although the range of devices supported for physical acquisition isn’t perhaps as wide as it’s larger competitors, it does, as previously mentioned, allow imports of this type of data from other tools, for example UFED physical dumps. You may take this as a weakness compared to these other tools, but it can also be seen as an advantage. Oxygen are not having to invest development time “re-inventing the wheel” in writing tools and exploits to facilitate native physical memory dumping within the application. It also saves a bit of time as there is no need to wait for physical acquisition to finish before examining data – that will already have been done with whatever tool you used to obtain the physical image – so you just have to import the dump and wait for Oxygen to parse it. Having said that, this can take a while (particularly for big dumps) but at least you don’t have to do another dump beforehand.
It is also possible to parse BlackBerry back-ups performed by BlackBerry Link software, but because these are encrypted you will need the user’s BlackBerry ID password to decrypt them, even if the phone is unlocked and you can see the data. This is similar to the iTunes backup encryption problem, where you can see the data on the phone but because the backup is encrypted a logical extraction cannot read the backup without the password set by the user years ago when they set the phone up in iTunes being available.
I had problems connecting the two BlackBerry phones that I had (Q10 and Z10) via USB (something that Oxygen Support are investigating) so my only option was to do a back-up on BB Link and then import it in, as suggested by Oxygen.
They also advised me that the BlackBerry ID credentials would have been needed if I had connected via USB, presumably because the same extraction mechanism was utilised by this method (i.e. initiate a backup via the phone and then parse the resulting files(s)) which leaves the new BlackBerry 10 OS still (mainly) inaccessible without a BlackBerry ID.
Upon clicking ‘Connect device’ in the main application, the Oxygen Forensic Extractor Wizard starts up
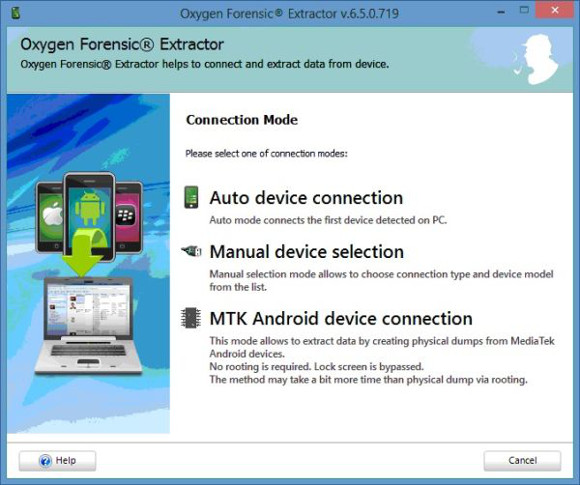
You have three methods to connect a device.
The “Auto Device Connection” worked pretty well for me and most of the devices that I connected were found first time without a problem as long as the connector was clean and not clogged with pocket lint.
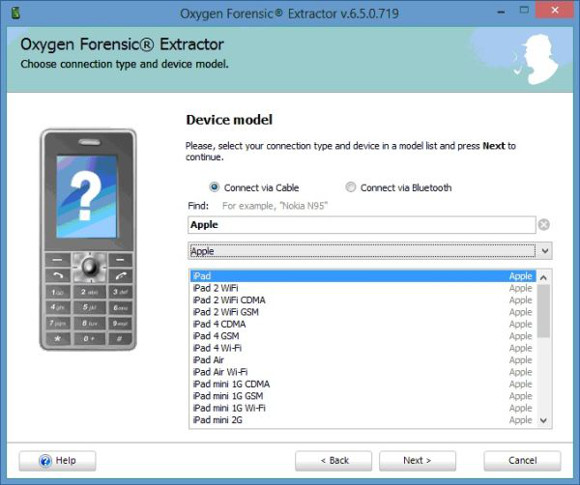
You can select the models manually if you prefer to do this or when the auto-connect does not find the phone. This worked quite well for me also.
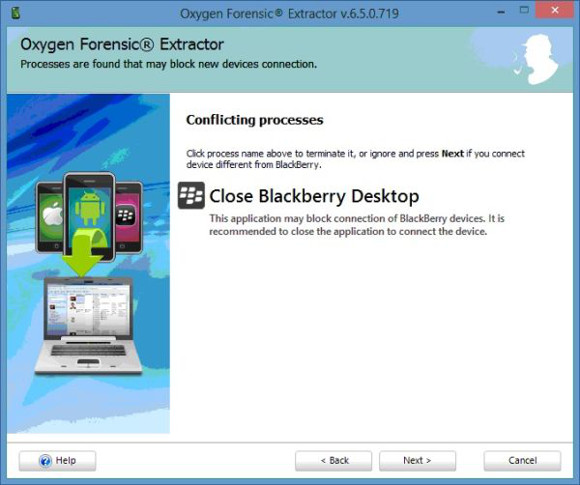
Any conflicting applications that may hinder phone connection are listed so you can close them for the best chance of connection. The only one I found that wouldn’t always close was BlackBerry Desktop, but this didn’t seem to affect the connection.
This is a nice feature that could be beneficial if you have multiple data suites used to extract data with other tools as it can flag up potential problems.
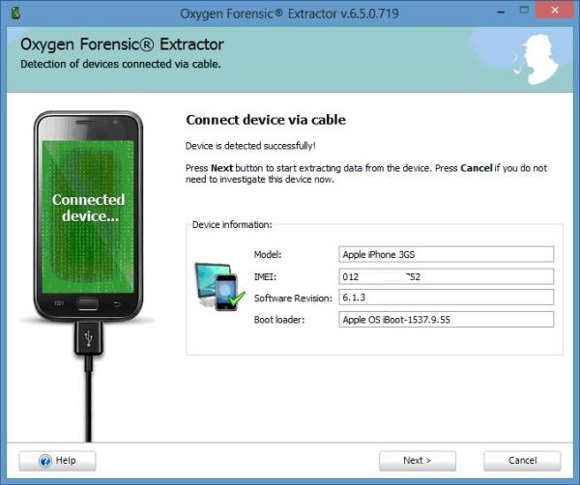
The device should be detected and now you are ready to extract the data.
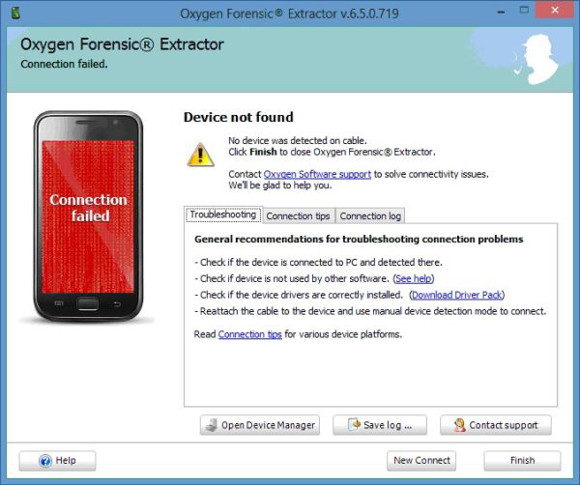
However, if the device is not detected, you are given some helpful tips to help you connect it.
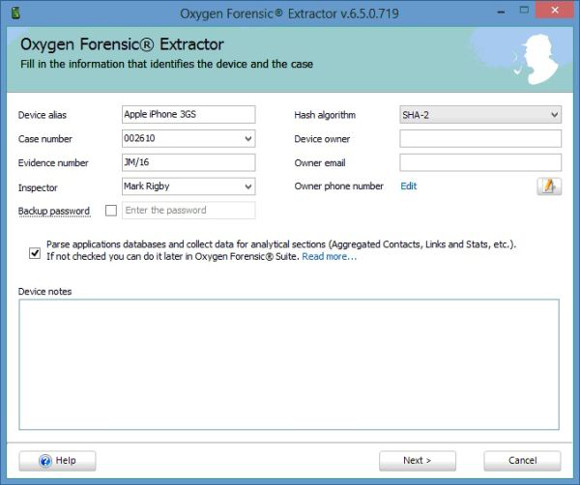
You are now able to enter your case details and any notes here. I would have liked the ability to add or rename fields here, but you don’t seem to be able to do that on this screen. Once extraction is finished, you are able to add photos of the device and owner in the “Device Information” section but there appears to be no obvious way of adding your own customized case fields, for example where the examination took place or an associated incident number etc. The “Backup Password” field on this screen allows you to specify a password for iPhone encrypted back-ups.
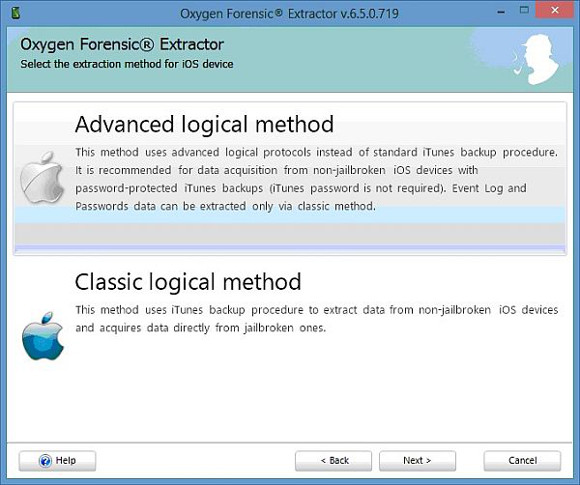
On iPhones, you are presented with two methods of extracting data. The ‘old-skool’, traditional back-up method (‘Classic Logical in the screenshot) whereby the software tells the phone to do a back-up which is then parsed, or the Advanced Logical where data is extracted more directly from the device.
For Android devices, there is still a requirement for the usual “USB Debugging” to be enabled (and the other settings too that support a stable connection) before data can be extracted. You can extract data from Android devices by ‘soft’ rooting (including Physical acquisitions,) the ‘back-up’ method or by use of Oxygen’s Agent. The Agent is installed within unallocated space on the memory card, so you will need a blank card for this unless you are happy to use the one that came in the device. Personally, I like to image the card, clone it and insert it into the handset in order to preserve the original memory card.
There is also an option to obtain a physical dump from MTK based devices, but I didn’t have any to hand which I could use to test this.
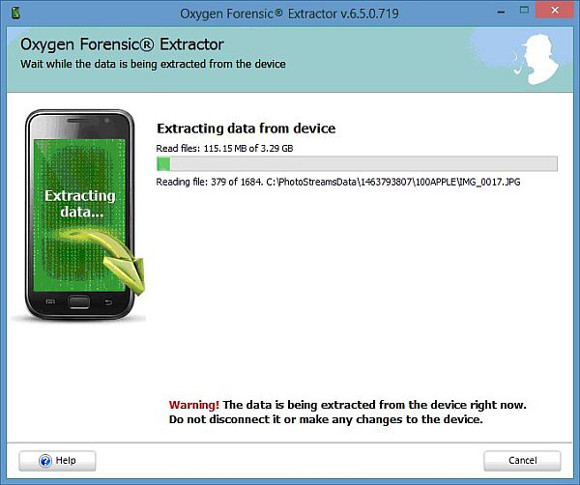
Data is then extracted. This part of the process was quite slow for me, but I was using an external hard-drive to store Oxygen’s database and as previously mentioned, my laptop is not blisteringly fast by any means. Having said that, most smart-phone extractions are slow, with how slow usually dictated by the amount of data being recovered or trawled through as part of the recovery process. You can have identical phones, one of which flies through but has very little data or one that is packed full and takes an age to complete. That’s phone forensics for you – no two days the same, no two phones the same!
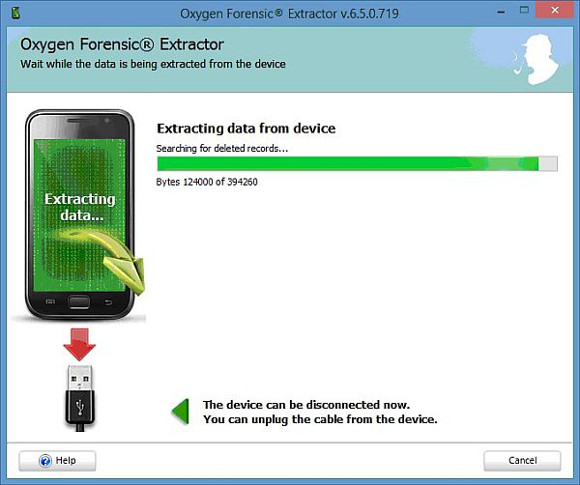
This is the end of the extraction phase, where Oxygen parses the recovered data. Again, depending on the volume of recovered data depends on whether you have time for a quick brew while you wait for this to complete or a seven-course Chinese banquet.
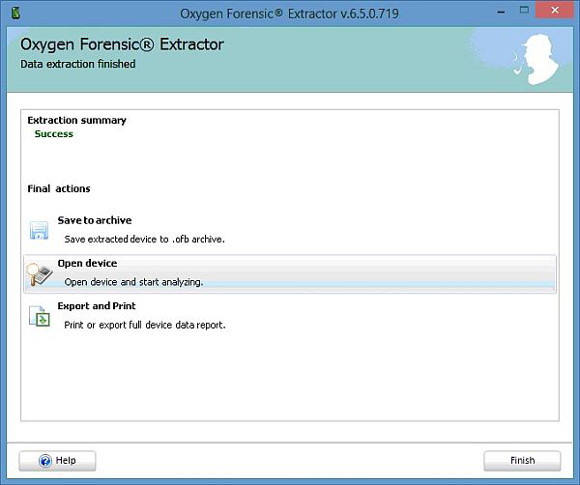
This is the screen at the end of the extraction process. You have three options – save it to an archive, open the extraction in the main program (‘Open device’) or export/print the data. For the vast majority of the time you are going to be opening the device in the main application to see what you have got and start collating the data you need for the case. The other two options puzzled me. I couldn’t see why you would connect a device and then either save it directly to an archive or print/export data without first looking at it.
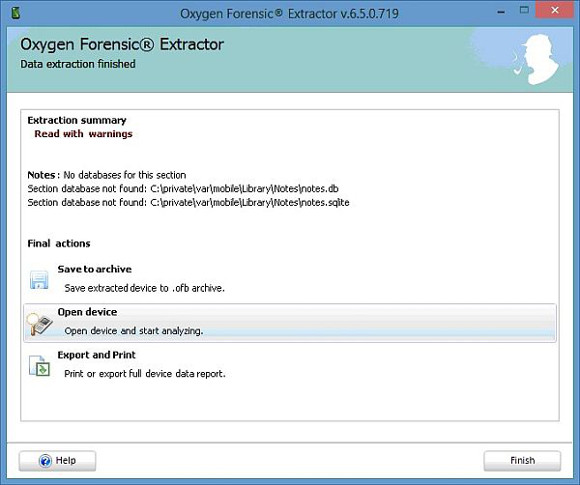
Should any errors have occurred during the extraction process, you will be warned about them here. Take note of this as it will not be shown again and there does not appear to be an obvious extraction log which you can view at a later time as seen on other tools.
Main Interface
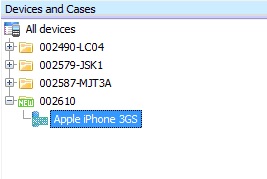
I found the main interface to be pretty straightforward to use and it has some nice features. I like the fact that my cases appear on the left and I can put multiple phone reads in them. You can also treat each phone as a separate case if you like. The only downside I can foresee is when you have hundreds of cases, when it may get a bit cluttered and difficult to find things.
You can archive individual phone reads and then remove the case, but you will have to re-import the archive if you need to analyse it at a later date. Both the archiving and restore can take quite a while (depending on how much data you have recovered) and during this time you can’t use Oxygen. You can’t even open another instance of it because it reports that “Oxygen is already running”.
Once you have archived a device, you get a single archive file that you can import back in at a later date.
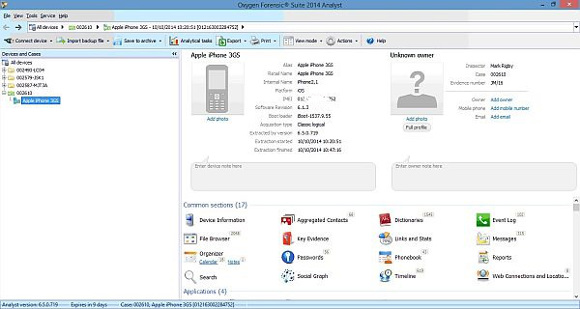
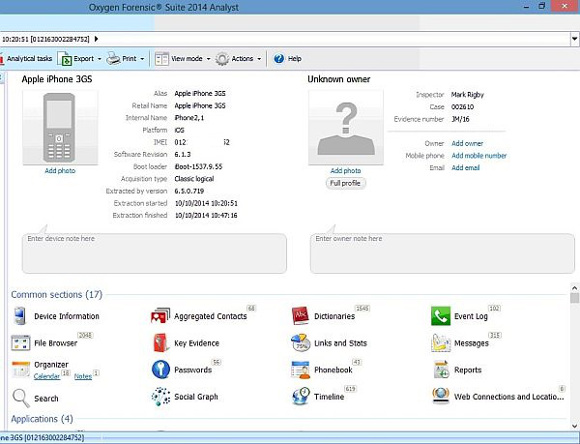
This is our new extraction in the main application. It is marked as ‘New’ until you perform another extraction or close the program in order that you may find it easily amongst your cases. This left-hand pane shows you your cases and the devices assigned to each. You are free to add or remove devices and move them between cases but you can’t open a blank case – you have to connect a device and create a new one as part of the extraction process.
In the right-hand pane you get a summary of each section of your selected device. I don’t like this as much as the tree-views used on XRY and UFED for the simple reason of navigation. Say I want to see the messages, contacts and calls. With a tree-view type of navigation I would just click the relevant node (Contacts, Calls or Messages) on the left of my screen and they would appear in a list on the right of my screen. Oxygen is a bit different. You have to double-click each section to show it and to get back to the summary screen above (in order to switch sections) you either have to click the ‘address bar’ at the top to navigate or use the drop-down lists from this bar. Whichever you choose, it just doesn’t seem as easy or efficient as a tree-view would be. For me, it would be far easier if the items shown in the summary appeared as nodes under the device on the left of the screen. Perhaps this is done intentionally so as to be different to XRY and UFED but it would make things easier if Oxygen were to implement this.
Report Customisation
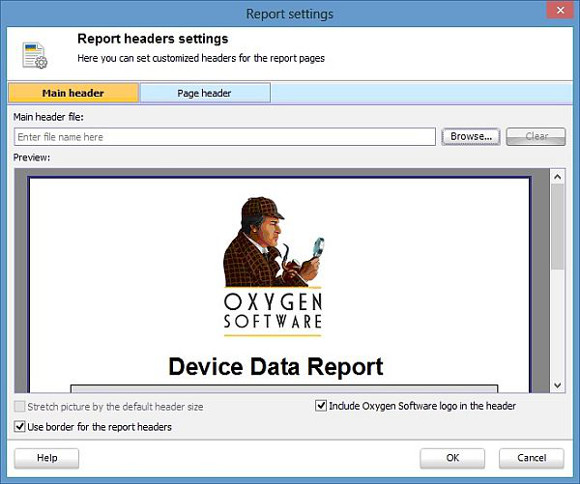
It is possible to add a header to both the front cover of your report and to the other pages that follow. This is something that I didn’t play around with too much.
Data Analysis
This seems to be the section that Oxygen sees itself as being different to other products of the same nature and it is evident that they have spent a lot of time developing this side of the tool.
The data analysis is very sophisticated if it is used to its full capability and has several nice features. I can see it being useful for data analysts, investigating officers and phone examiners to search for, filter and export important data.
First, let’s look at the search.
There are various ways to search – by text, phone number, regular expressions or you can set up one or more keyword lists. Keyword lists are handy because you can specify several keywords, search for them in your current case and then in a week’s time when another device is submitted relating to the same case you can search using the same keyword list. This not only saves you time but ensures a consistent search.
Another application in which I could see it being used is if you want to maintain a list of frequently used terms relating to certain cases, for example a list of common slang terms for drugs and their associated paraphernalia.
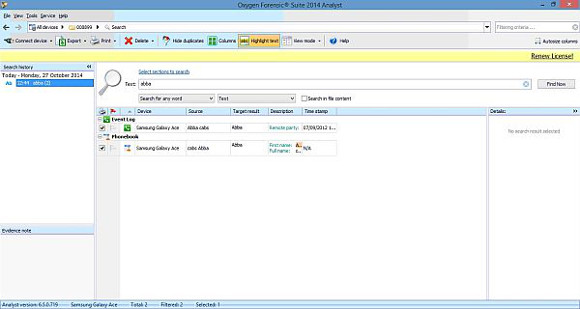
Once Oxygen has found the data you have specified, it splits it into the relevant sections so you can easily see where the data you are interested in resides and export just this data if you wish.
You can search either a whole case containing multiple devices or a specific device within a case.
There is also a Global Search function that can search every device you have ever examined in Oxygen. However, this can be slow and will probably only get slower as you examine more and more devices. I found it better to group devices into a case and then search the case if possible.
Analytical tasks
There are several analytical tasks that can be performed with the button on the toolbar (which brings up the options below) or by selecting an individual one from a case or device via the main screen.
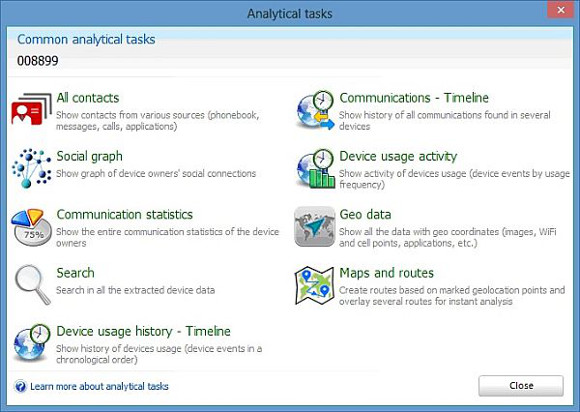
These include:
· Social Graph – a visual representation of common contacts.
· Communication Statistics – Indicates frequency of communication events relating to each contact or number.
· TimeLine(s) – show data (either including or excluding media files such as images) in chronological order.
· Device Useage Activity – Which phone sections are used the most frequently by the user.
· Geo Data – Displays all items that have GPS location data on a map.
· Maps and Routes – Allows custom routs and points of interest to be created on a map.
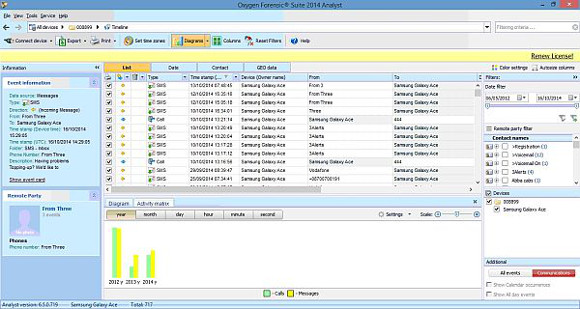
The results can be filtered and sorted by one or more contacts and by multiple date ranges, using the right-hand selection panes. The multiple date range I found a particularly good feature as I have examined lots of cases (for example burglaries) where several crimes have been committed so you are able to narrow down your results to each individual period instead of what may be a long timespan.
Export
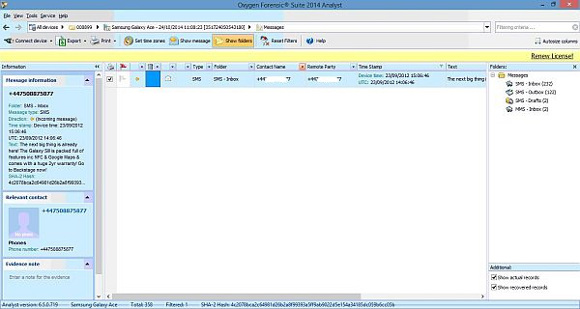
There are two main ways to export. First, you can export just the section you are in, such as messages for example, which is based on the filters you currently have applied from the drop-down lists that make up the heading row of your data. This gives you a quick and easy way to export, for example, all the messages from a particular contact, as shown in the screenshot below. The filtered fields are shown in red by the headings of the columns.
There is also a way to export from all sections at once. You can use the red flag column (called “Key Evidence”) to mark items of interest within each section, as below:
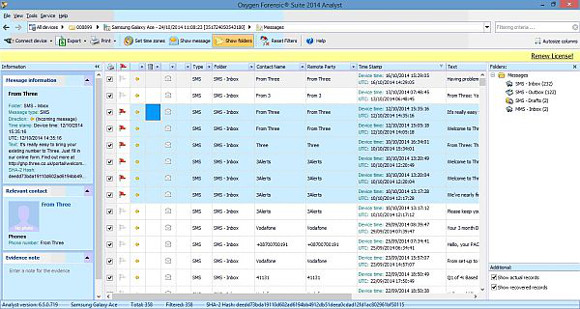
Once you have done this for all the sections you are interested in, you can export just the “Key Evidence” flagged data or any other sections you wish. You can of course not flag anything and then export entire sections containing all the data you are interested in, for example all calls, messages and contacts.
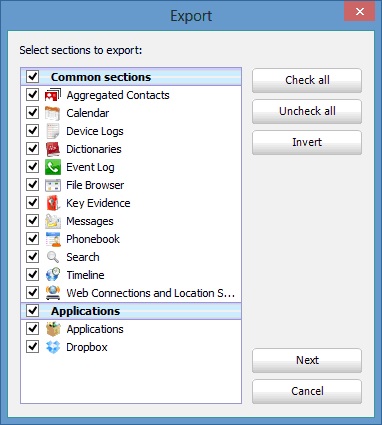
The export formats supported are PDF, Rich Text, Excel, XML, delimited (Tab and Comma) and HTML. The data is nicely presented in a clear, tabular format. There are two options available for Excel and two for HTML so you can choose slightly different looking formats depending on what data you are exporting.
Comparison and Conclusion
Oxygen has two main rivals, Microsytemation’s XRY and Cellebrite’s UFED, both of which do the same things as Oxygen.
As is often the case, all three tools get slightly different amounts of data from the same device, but when you crunch it, most of the time you can see and explain the differences or the differences are duplicate or invalid data that you can discount. What you are left with is broadly the same data from the different tools. Each examiner has a tool that they prefer and this may be dependent on what they are examining. What is first choice for one model is second for another, with the choices being made through experience of what works best.
The output data is presented in a nice way that is reasonable to read. There are occasions when you know what data you are looking for and all you want as an examiner is for the output data to look presentable, which (for me) it does quite well.
Oxygen is nice software to use and it’s longevity is testament to its data recovery capabilities. The results I had with Oxygen were broadly comparable with the other two products although Oxygen seemed to take a bit longer to get them. This could be down to the equipment I was using because in our environment, we use XRY and UFED on more powerful machines.
Oxygen is cheaper than its rivals, and doesn’t offer some of the advanced features that they have, although the Passware Analyst version does additionally allow you to crack locked iPhone or Android back-ups using brute-force techniques. In cases where Oxygen doesn’t support a Physical Acquisition, it does allow physical data recovered from other tools and techniques to be imported, analysed and reported upon. Just based on the latter, the fact that this feature is present at all seems an acknowledgement by them that they will not always be the tool of first choice, which I think, shows their mature understanding of phone forensics. No one tool does everything, although that is what each of the vendors aspire to, and a skilled examiner uses each tools strengths to build an accurate picture of the data for any examination.
Oxygen is not seeking, therefore to replace XRY or UFED as a tool of choice for most mobile phone examiners, but to both complement them and offer a good verification tool for when something doesn’t look right, which can happen quite often in this game. This software is another reliable tool you can try to get the results in the presentable format you want and one can never have too many tools with which to examine mobile phones.
About the reviewer
Mark Rigby has been in the mobile phone industry for a slightly sobering twenty years and is currently a forensic examiner of mobile phones for Faraday Forensics Ltd, a job which he loves and has been doing for eleven years. Prior to this role, he worked for nine years as a mobile phone engineer repairing phones down to component level before moving into IT support for the various flashing and test equipment associated with this field in what is now the O2 network.
Faraday Forensics Ltd is an independent company specialising in Digital Forensics for Law Enforcement, Solicitors, Private Companies and individuals. Their website is www.faraday-forensics.co.uk