Reviewer: Richard Bunnell, Digital Forensics, LLC
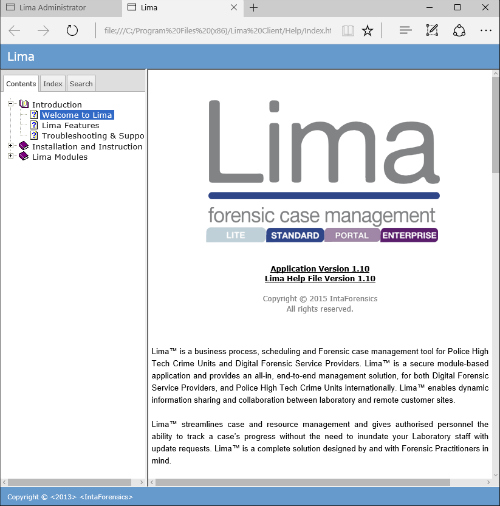
Executive Summary
Lima Laboratory is an amazing product. If I was on a medium to large digital forensics team, I would not hesitate to recommend that this product be purchased and used. A good selling point would be the compliance with the international standards ISO 9001, ISO 27001 and ISO 17025 and US Standards such as ASCLD accreditation. One of the goals for us when I worked in a large corporate environment was to bring the lab up to these standards. We had two obstacles: finding the time to research how the standards applied to us, and then actually setting goals to move from where we were to processes and procedures that would meet the standards. With this product, most of that work is already done.Basic Functionality Requirements and Summary of Results
There are several basic functions that any laboratory management software should perform.
1. Enable the investigator to follow consistent methodology throughout the investigative cycle.
Every case entered in Lima has a number of tasks. These tasks include entering the initial case details, evidence collection, exhibit processing and tracking, examination progress, expenditure tracking, materials generated, quality checking, dispatch (for checking sent or received materials). Each step has a time and date that needs to be completed. These times are entered into a timeline so that the progress of each case can be tracked. By making these steps easy to complete, the investigator can follow a consistent pattern of steps to complete each case. Since everything is logged in the Lima database, the investigator does not have to remember details that happened six months or a year ago. The information is all there!
It is also possible for the case administrator to track the progress of a case throughout.
2. Enable the investigator to track time usage for billing and for development of standards for specific job functions.
The case administrator and the investigator can track the progress of a case throughout its life cycle. He or she will know the state of a case, determine how many cases are being worked and whom they are assigned to, and how long each step might take for all investigators. From this information, standard times for jobs and billing can be developed. It will be possible to manage exceptions to the standard process.
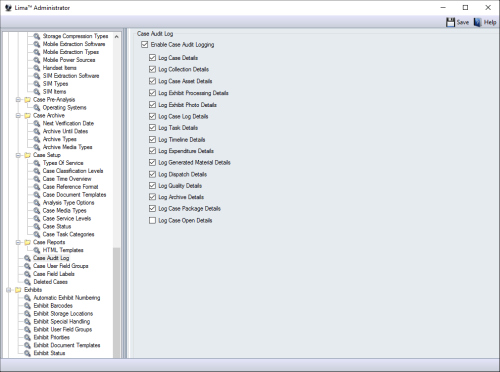
3. Logging for all activity done on the system.
Granular logging can be set in the Lima Administrator application. There are many types of events that can be captured in the case log.
Each case has a case log tab where the investigator can review his or her notes on the case. There are many ways information may be entered into the log. Phone call information, emails, meeting notes, file uploads, and entries by a user-defined method can all be completed. As each type of entry is selected, a screen changes to accommodate the type of information to be entered. As each entry is added, a time and date stamp is added. If the log entry is modified, another time stamp and date is included. It is also possible to do searches through the notes through a keyword or RegEx search. Other case events are entered into the log when entries are added as the entries in the other case tabs are completed – the initial case details, evidence collection, exhibit processing and tracking, examination progress, expenditure tracking, materials generated, quality checking, dispatch (for checking sent or received materials).
The Case Dashboard allows a graphical representation of case activity. Graphs can be generated for Collection and Dispatch, Cases by Sector, Hours by Sector, Average Exhibits by Sector, Exhibits by Type. The sectors and exhibit type can be defined to meet the needs of the lab.
4. Enable the investigator to produce consistent and understandable reports for technical and non-technical people.
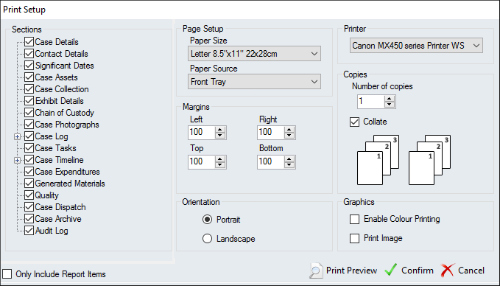
The print setup screen shows that there are many possible sections to a forensic report and each of them can be included or excluded. If the investigation is in progress, only those sections that are completed can be in the report.
There is also a check box for each exhibit that allows the exhibit to be included in the report so even more customization is possible.
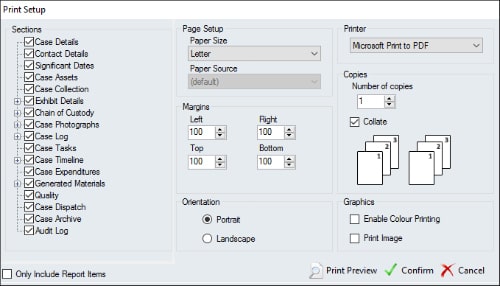
5. Enable different reporting formats such as PDF, Word documents, Excel, and others.
By using the various reporting options available in the Lima Laboratory it is possible to create reports in several report formats. The PDF option is shown above. Other options are to export the report in XML, TSV or CSV formats. As in the PDF option any of the report sections can be included or excluded.

Once Confirm is selected, the user is prompted for a location, and the report is generated. There is a video on the IntaForensics YouTube channel that shows how to create HTML reports but the details are fuzzy and it moves very fast.
6. Enable all of the results of various activities to be logged and noted in the reports.
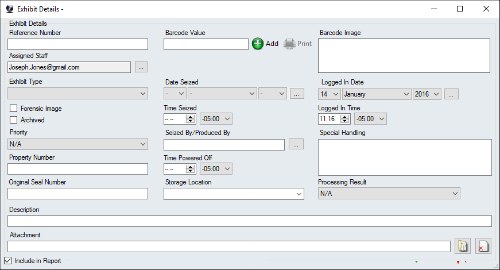
As is shown in the following screenshot, there are many types of evidence that can be added to a case.
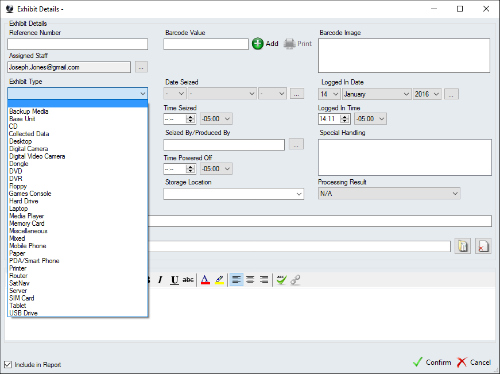
In addition, it is possible to import files to supplement the fields captured for an individual evidence item.
It is possible to add data from FTK Imager, EnCase, Tableau, X-Ways Forensics and Logicube Forensic Falcon. I tried to import a log file from my Logicube Forensic Falcon and was unsuccessful because the log was from a wipe and not an imaging operation. After an email to IntaForensics, they responded very quickly that this imaging type will be supported in version 2.0. I was impressed with their speed of reply, regret for not being able to import this type of artifact, and the fact that the issue was noted and will be fixed in a future release.
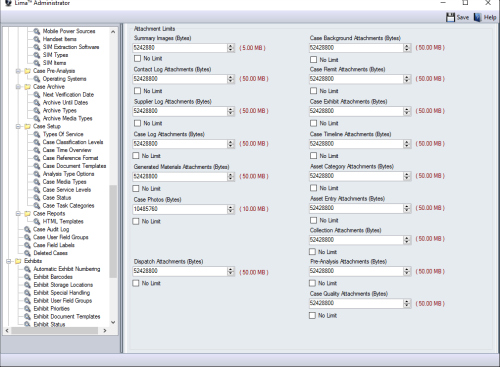
It is possible to set limits on the sizes of evidence that can be added to a case. It is also possible to disable the limits on the evidence sizes – forensic images can be quite large. This can be set by the Administrator.
7. Be customizable to be able to fit any standard investigation procedure or format.
The emphasis here is on a standard, repeatable process.
Case numbering / naming can be configured to almost any naming scheme. The name can be any mix of static data, date data, contact data, and numeric data. Here is an example:

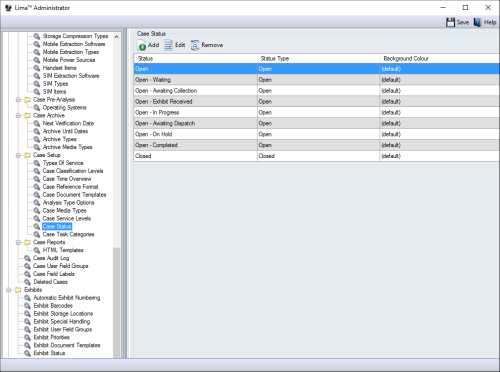
There also a number of pre-defined possible Status items. These can be added, deleted, or changed.
The case naming scheme, the case task categories, and the status for each can be customized to fit the requirements of the forensic lab.
The Lima Laboratory follows guidelines set by the standards ISO 9001, ISO 27001 and ISO 17025 and US Standards such as ASCLD-LAB accreditation. In general Lima can be configured by adding templates through the Lima Administrator function.
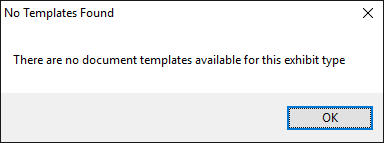
Here is one of the items with which I have had trouble. To quote the Help files:
Lima™ can generate documentation based on pre-defined templates, such as a "Receipt Form" which will automatically populate database fields using mail merge, ready to print and sign. The document template is added via the Lima™ Administrator application. To create a "Receipt Form", select the "Generate Form" button as illustrated below.
I could find no clear examples of this template creation process. Clicking the Generate Documentation icon produced this message. If one is trying to generate the documentation and receives this message, the next logical step would be to create a template. There should be a link or some documentation that clearly indicates how this should be done.
8. Enable department images and/or logos to be inserted as needed into the report.
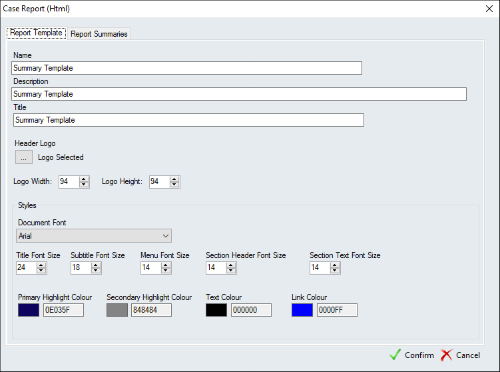
Within the Lima Administrator application, it is possible to select a logo for the report template. Go to Case Reports –> HTML templates. Select a template and then Edit. Although the logo does not show up, it is noted here.
9. Enable a clear path to successful installation and customization.
After the initial installation steps, wizards take the administrator through most of the steps needed for a successful installation. There are extensive Help Files, a YouTube Channel, and a very responsive email support team. My email questions were typically answered in thirty minutes or less.
I did find myself going between the Lima Administrator application, the Lima client application signed on as Administrator, and the Lima client application signed on as a user trying to find answers to my questions.
The basics and initial customization were lengthy but straightforward. It was when I tried to refine the installation that I found myself jumping between applications.
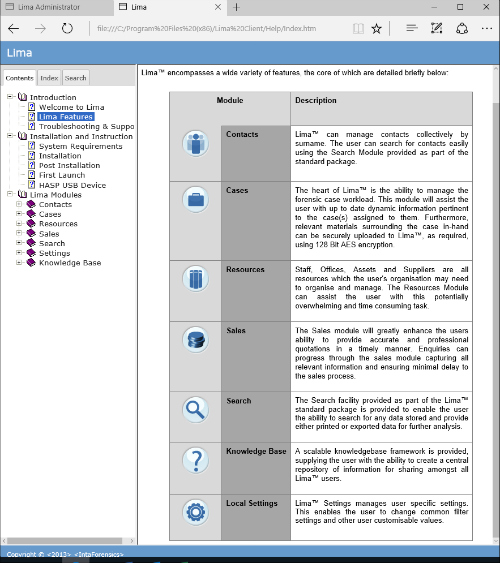
Product Components
Lima Laboratory consists of three components.
The first is that the product is configured and run from a SQL database. This comes with the product and requires no additional licensing.
The second is the Lima Administrator. The Administrator module sets up and configures the database and then a wizard runs and allows configuration of the product for use by the administrator and the Client module.
The third is the Client module. When the database is configured, this module allows the administrator (logged into the Client module) to customize the software so that all of the staff, the offices, the hardware and software, can be configured, tracked, and managed to completely fit almost all forensic labs. When the setup is complete, it is possible to log in either as a client or as the administrator.
Installation
This software will be installed on a dedicated digital forensics investigation computer running Windows 10 Professional. This computer is only connected to the Internet to receive software updates.
The package is labeled “Lima Laboratory” and contains a CD and a Green dongle. The basic installation documentation that came with the CD is a one-page sheet titled “Thank you for purchasing Lima Forensic Case management software”.
The documentation says:
– The red dongle is the server license.
– The green dongle is for “offline client use only”.
The following should be downloaded:
– Lima Administrator
– Lima Client Applications
– Decompress the ZIP files and install the “Lima Administrator”
The CD contained two folders:
– Lima V1.10 Client Install containing LimaCLientSetup.exe
– Lima V1.10 Server Install containing LimaAdministratorSetup.exe
Lima Administrator Setup
The LimaAdministratorSetup.exe file in the “Lima V1.10 Server Install” folder allows for easy setup of Lima Administrator. For the first few steps, I simply chose the default settings and selected ‘Next’ at each step.
An excellent page can be found here:
file:///C:/Program%20Files%20(x86)/Lima%20Adminisrator/Help/Index.htm
Very complete instructions for all following steps can be found by selecting an item from the Contents in the left pane.
There is a lot of information on how to set everything up in the Setup Wizard item in the left pane so it is not necessary to cover it here.
The Wizard advances through the following screens:
– Contact Sectors
– Contact Status
– Analysis Type
– Media Types
– Types of Service
– Service Levels
– Case Classification Levels
– Staff Security Levels
– Case reference Format
– Task Reference Format
– Login Information
– File Transfer
– File Upload Limits
– Email Settings (not configured)
– Time Offset
– System Creation
The Lima Administrator is started with the main and sub-fields in the left panel. Any of the options can be edited.
The options can be saved and the Lima Administrator can be exited.
When the Lima Administrator is restarted, the previously set password is required.
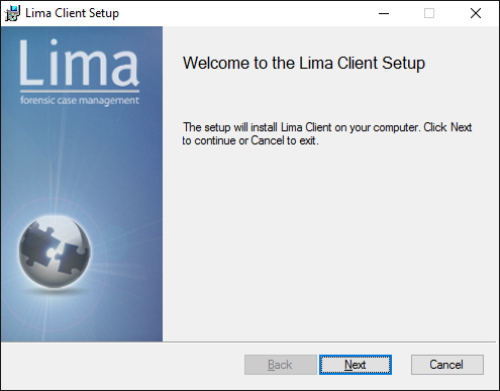
Lima Client Setup
The program, LimaClientSetup.exe, is run from the folder Lima v1.10 Client Install.
Next is selected.
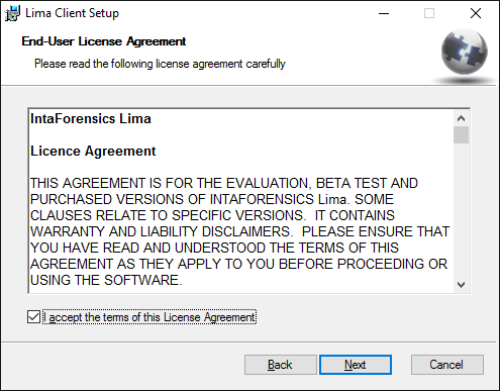
Accept the License Agreement and select Next.
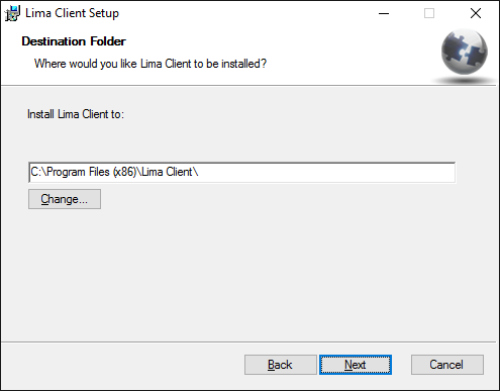
The default Client location is not changed and Next is selected.
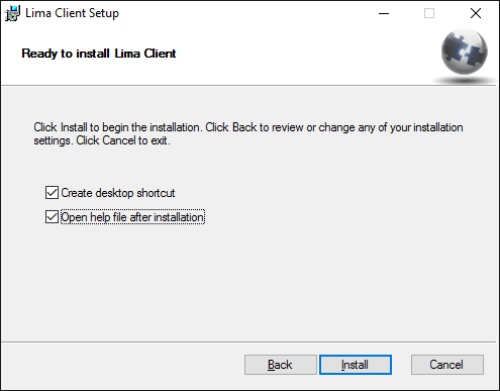
The defaults are selected and Install is selected.
Finish is selected.
Here is the location of the Help files.
file:///C:/Program%20Files%20(x86)/Lima%20Client/Help/Index.htm
At the first launch of the Lima Client, the administrator username will be required. Note that Active Directory can also be used.
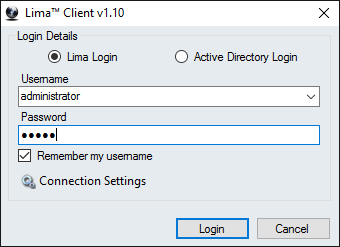
Verify the connection settings.
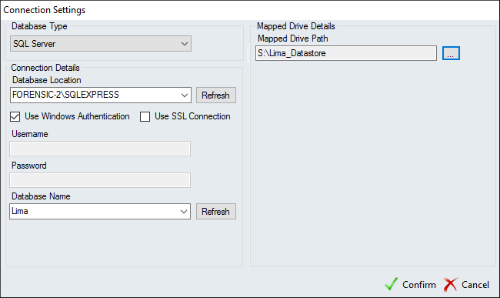
The Lima Client starts.
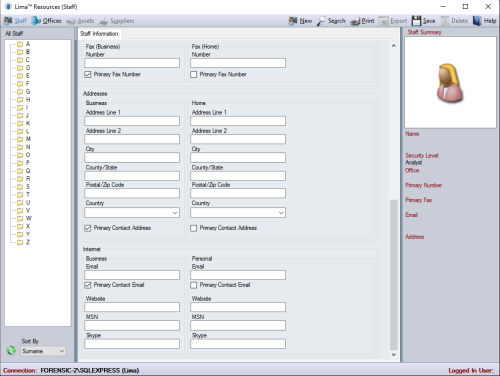
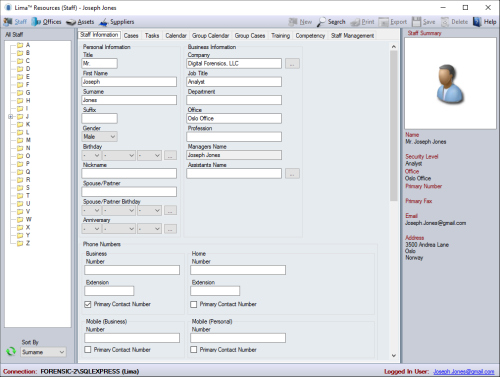
The screen for Staff information (top):
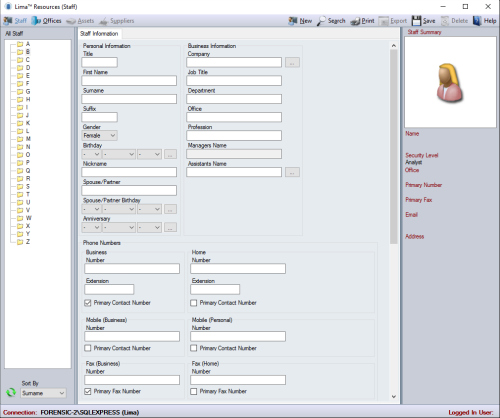
And the bottom half of the screen:
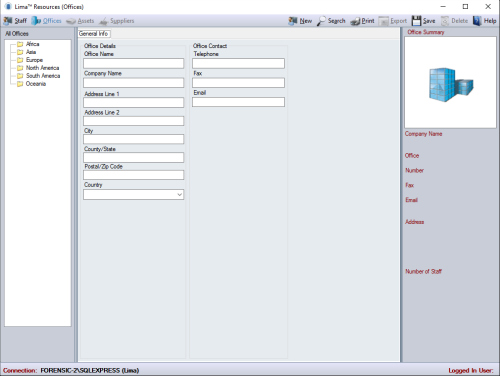
Information for global offices can be entered.
After a staff member has been added, more screens become available.
– Cases
– Tasks
– Calendar
– Group Calendar
– Group Cases
– Training
– Competency
– Staff Management
Note also, that since the administrator account has logged in, the Assets and Suppliers tabs in the top menu bar are not active.
A new user, [email protected] was created and in the Staff tab –> Staff Management tab for this user, it is possible to reset the password (generated by Lima) so that the user can log in.
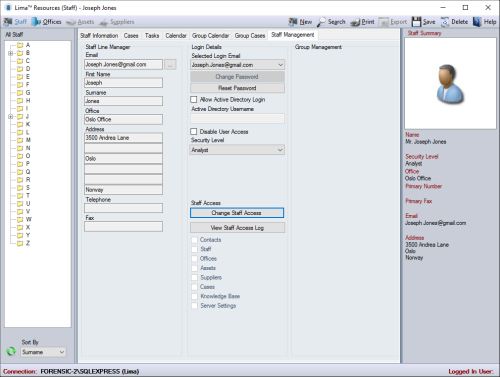
An automated password was set up and sent to the clipboard.
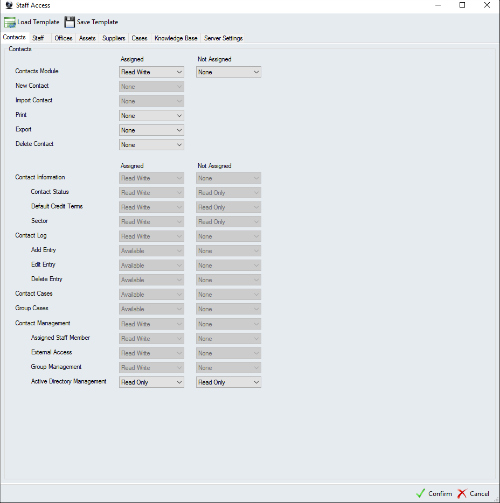
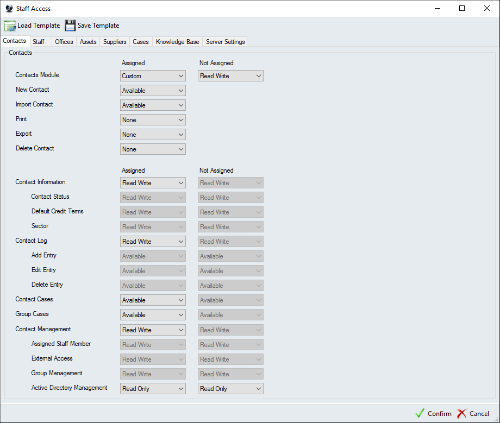
Access can be controlled for this user in all the modules. This user will be given access to the Contacts, Staff, Offices, Assets, Suppliers, Cases, Knowledge Base modules.
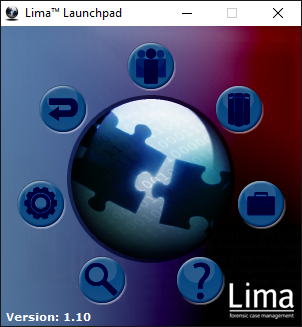
The user can now login. When they do so, the Lima Launchpad appears.

The icons are as follows:
– Search (Magnifying Glass) and then clockwise
– Settings (Gear)
– Logout (Bent Arrow)
– Contacts (Silhouettes)
– Resources (Computers)
– Cases (Briefcase)
– Knowledge Base (Question Mark)
Now the user has access to the Staff, Offices, Assets, and Suppliers modules.
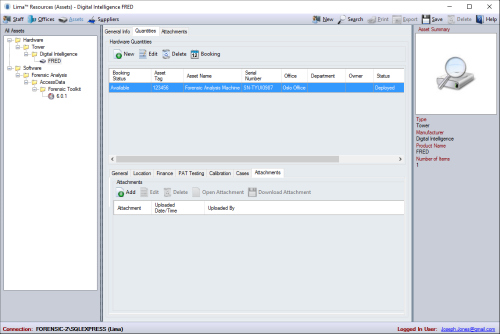
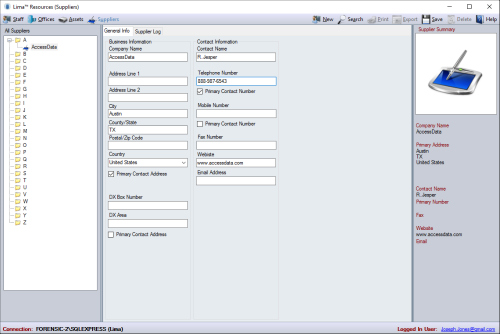
Addition of assets and supplies is a simple menu driven operation as shown below. Resources should be selected from the Launchpad.
Contacts must be added before addition of a case.
In order to add a Contact, the permissions must be given to do that by the Administrator.
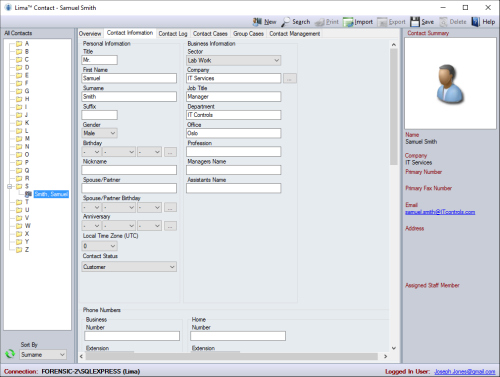
A new Contact can then be added by clicking New on the menu bar above.
Addition of cases can be done by logging in with a Staff ID and selecting Cases from the Launchpad. The New Case Wizard allows the addition of cases. Contact Selection is the first step.
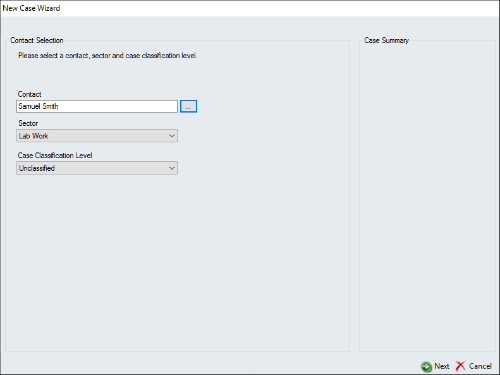
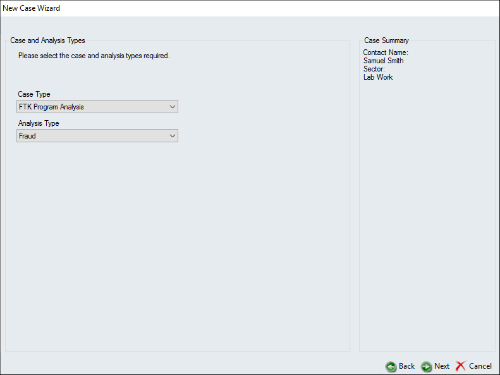
Click Next. The Case and Analysis Types window is next.
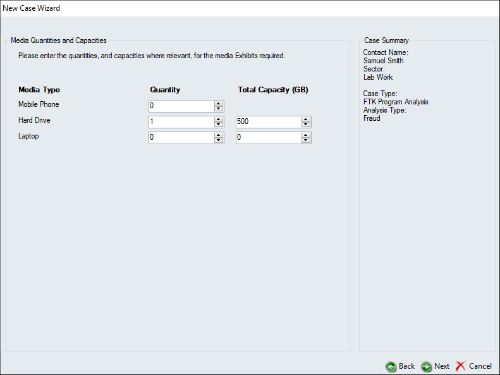
Click Next. The Media Quantities and Capacities window is next.
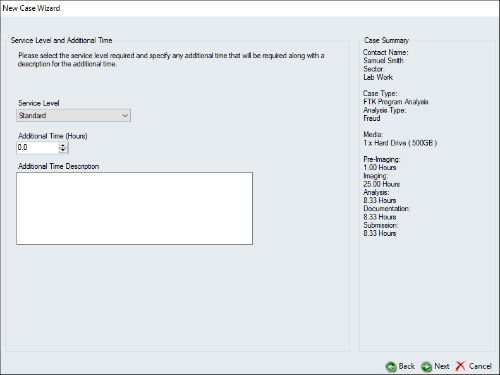
Click Next. The Service Level and Additional Time window is next.
Click Next. The Complete Case Creation window is next.
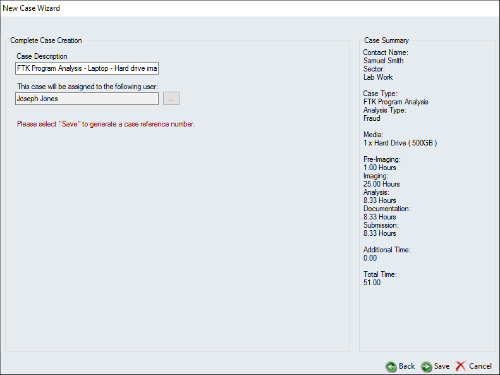
Click Save to create the case. When the case is saved, it will be assigned a Case reference number.
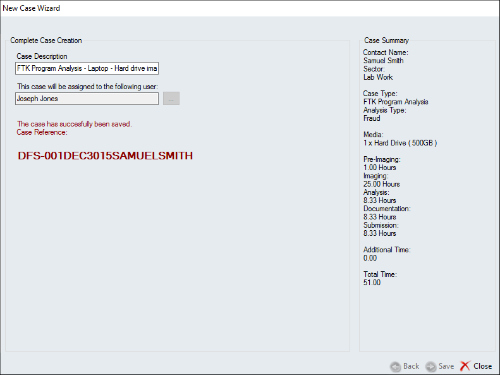
Click Close.
There are many Case tasks that can be logged and a timer in the lower right corner that can be used to track times.
The tabs are:
– Collection
– Exhibit Processing
– Case Log
– Case Tasks
– Timeline
– Expenditures
– Generated Materials
– Quality
– Dispatch
– Archive
– Document Templates
– Audit Log

Usage Scenarios
Now that Lima Laboratory has been installed, what can we do with it? Here are several scenarios where this product will be useful.
Scenario One
February 4, 2016 there will be a vendor presentation. Who will miss it?
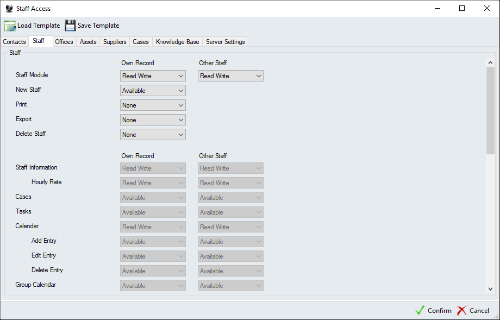
As with any operation in Lima Lab, the proper rights have to be given. This is done by logging as Administrator to the Lima Client –> Resources –> Staff –> Staff Management –> Change Staff Access –> Staff and ensuring that the desired staff member has the calendar access enabled.
The Staff Module should be Read Write for Own Record and Other Staff. This will enable the staff member to be able to add entries to the Calendar and the Group Calendar.
Each staff member should login and book the desired event. After two of the staff have booked a Cellphone Forensics class for February 4-6, 2016, it is easy for the manager to see who is out on any given day.
Go to the Manager of the Group’s entry in the Staff listing –> Group Calendar –> and select the month and the day.
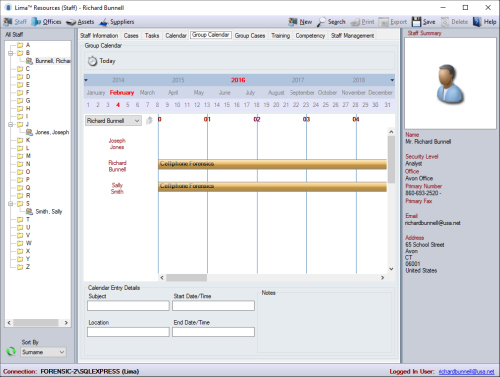
The answer is that Richard Bunnell and Sally Smith will miss it since they are in a Cellphone Forensics class.
Scenario Two
Several employees have requested an upgrade to their skills in 2016. What should the priority be for them taking their classes? How big would the training budget have to be?
As with any educational planning, the manager must know what classes have been taken and passed and when did this happen. This scenario will focus on Cellphone past and future training.
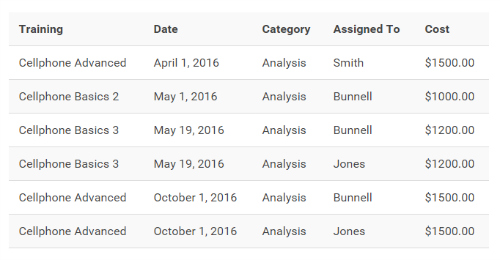
Past events were:
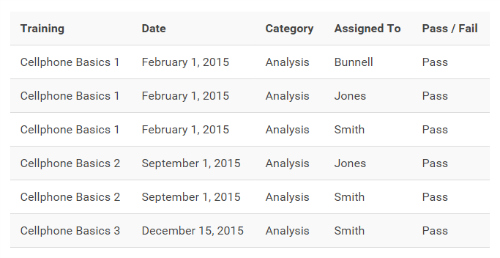
Future Events will be:
To add these competencies go to resources –> Staff –> Select a staff member –> Competency –> New Entry and then fill in the appropriate fields.
After the entry is complete, by looking at any of the employees and selecting the proper date range, it is possible to show which competencies they have passed and which ones are scheduled in the future.
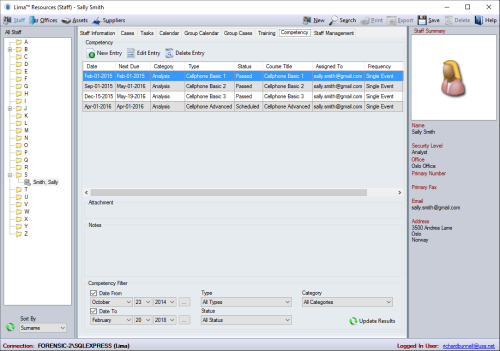
We see that Sally Smith has passed three and has one more scheduled in April 2016. It is possible to export all of the individual competencies into a CSV and then combine to develop a schedule.
When defining training, one of the questions is the cost.
When the training events are exported to a CSV, the field for cost is not included. Logging on to the Lima Administrator gives no option to add a field. So the second part of the question cannot be answered with Lima Laboratory unless it is done manually.
Scenario Three
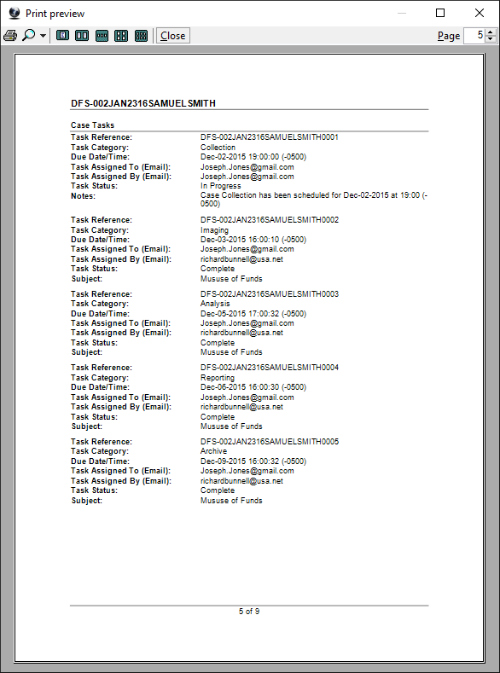
Follow a case throughout its lifecycle and show the logging in Lima Laboratory.
Each step in a case has its own tab where all the important information can be entered. This information can be as granular as desired. It is possible to print as many or as few details as desired.
If it is desired to print the case, then the options can be a PDF or a printer. No matter which option is chosen, all or only a few of the sections can be printed.
Page 5 of 9 is shown below. Note that at each step there is a new task reference, who the task is assigned to, who assigned the task, and the task status.
As the tasks are completed, an audit log is created. The next screen shot is a partial listing of the Audit Log. There is much more detail in this log.
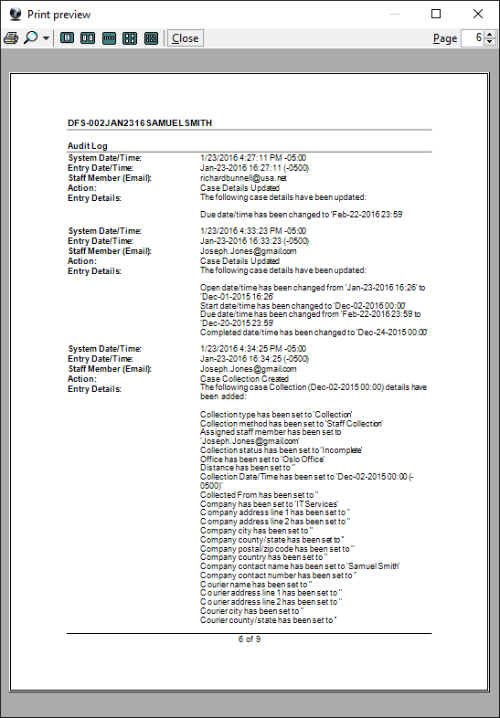
As can be seen, there are many steps to go through when updating records, the proper permissions have to be in place, and most but all of the information can be used to help the lab manager manage her lab more efficiently.
My Recommendation
Lima Laboratory is an amazing product. If I was on a medium to large digital forensics team, I would not hesitate to recommend that this product be purchased and used. A good selling point would be the compliance with the international standards ISO 9001, ISO 27001 and ISO 17025 and US Standards such as ASCLD accreditation. One of the goals for us when I worked in a large corporate environment was to bring the lab up to these standards. We had two obstacles: finding the time to research how the standards applied to us, and then actually setting goals to move from where we were to processes and procedures that would meet the standards. With this product, most of that work is already done.
I now run a small forensic lab – only five computers – and cannot justify the price of Lima Lab. Ideally there should be an intermediate product between Lima Personal and Lima Lab that included the Assets and Suppliers modules – with an intermediate price. I have forty-eight suppliers and firms that I deal with to keep my business running. Along with keeping track of everyone, I need to keep track of what software is on each machine, the license costs, and when the next payment will be due. Being able to use these two modules would be a terrific help to project costs into the future and understand the cost benefit of some of the more expensive software that is used.
If I chose to implement Lima Personal, I would still have to manually track all the supplier, equipment, and software information somehow. Since I want to have repeatable, accountable, accurate processes in my lab, I would implement this intermediate product.
I commend Lima for this unique product. They saw a need and implemented it in a way that, although the implementation time is not just a few simple “OK” clicks, is a well thought out, quality product.
About IntaForensics
Since 2006, IntaForensics has grown to become a leading provider of Digital Forensic Services within the UK. The company has a total of 260+ years combined experience in Digital Forensic Analysis, with a further 200+ years of combined Criminal Investigation experience, an annual laboratory capacity of 60,000 hours and prides itself on offering the highest quality digital forensics to the legal sector, police forces, local authorities, commercial organizations and private individuals internationally.
About the Reviewer
Richard Bunnell is a co-owner and a digital forensic investigator of Digital Forensics, LLC, a full service digital forensics firm which provides imaging and data collection, analysis of digital media, decryption, data recovery, media wiping, and training for private and publically held organizations. Mr. Bunnell has extensive experience as a digital forensic examiner for the MassMutual Financial Group, is a founding member and previous chapter president of the Connecticut Chapter of the High Technology Crime Investigation Association, and has done digital forensic team building and training to enable him to be an effective investigator, trainer, and presenter. He has held the following certifications. GIAC Certified Forensic Analyst (Gold), GIAC Certified Incident Handler, GIAC Reverse Engineering Malware, and AccessData Certified Examiner. He also is qualified as a Cellebrite Certified Logical Operator, Cellebrite License 2034982000, and a Cellebrite Certified Physical Analyst, Cellebrite, License 20204982000.