Bruce: Hi there, I’m Bruce Wilson and welcome to Cyacomb’s demonstration of Cyacomb Examiner and Cyacomb Offender Manager Tools. We’re gonna talk a bit about our technology today, the principles behind it, why it has such advantages over other technologies in existence when it comes to triaging suspect devices for known dangerous and illegal content. Then I’m gonna show you some demonstrations of both our flagship and original tool, Cyacomb Examiner, and our stripped down plug and play tool, Cyacomb Offender Manager. The talk today will take no more than 30 minutes and there’ll be contact details at the end.
So who are we at Cyacomb? Well, we are a company based in Edinburgh in Scotland and our technology is a spin out of some academic research done at one of the universities here, Napier University. That technology is around block level hashing. More about that later. The reason that we are now a company is because of the technology that has spun into the tools that we’ve created and the advantages it gives: speed and detection of deleted data being the main ones.
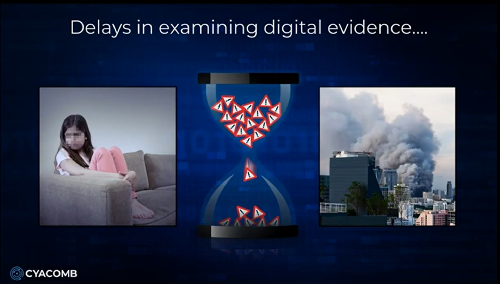
We’re about 16 to a 100 times faster than traditional hash based scanning methods, and our main use cases are in tackling child sexual abuse material (so safeguarding children), and encounter terrorism, so preventing terrorist attacks. In both of these scenarios delays have devastating consequences. If you’re watching this video, the chances are you work in one of these spaces. It’s not to say there’s not other use cases for our technology, but in our experience when it comes to finding that one image or video file on a suspect device, this is where we see such advantage to using our technology.
When it comes to paedophiles and tackling them, we understand that it’s not just the danger they pose to children, but also the dangers of absconding, because they’re not under remand, but also self harm and suicide. And the extreme example of terrorist investigations not being able to get a hit of a bomb making manual or a beheading video means that potentially a terrorist attack takes place.
So why triage? Well, triage is a term most of you in the audience will be familiar with. When we think of medical examples, you’d use triage to assess the priority of patients. Using experience as investigators and tools such as our own, you can do the exact same thing with digital forensics: prioritizing devices relevant to an investigation and discounting devices not relevant. This is what we call the triage in and triage out scenario.
Our technology allows you to rapidly sift through vast quantities of data far faster than anything else, before you get to a full examination. So, if we think right at the front of an investigation that first knock on the door at scene, you’re able to prioritize devices relevant to investigation, discount those not relevant, and then at lab, it saves you the capacity of looking at every single device that possibly comes in having been seized.
You can also prioritize in the lab with our technology so you are able to get that first hit on a device most relevant, which allows you to build up that case with lab-based tools. Remember: our technology is triage, it’s not designed for a full investigation.
If we think of the classic use case scenario, in the UK, or US, or European law enforcement agencies, some kind of cyber tip comes through that someone’s been downloading something illegal from the internet, you’re then, I guess in 99 times of 100, going to be looking at the eldest male when it comes to child sexual abuse. When you get into that home, you’re not necessarily aware of which devices they have and haven’t had access to. You may be confident they’ve had access to their own mobile phone and laptop, but what about the daughter’s school computer, the wife’s work laptop or the countless USBs and SD cards around the house.
So you want to be able to take that suspect, get his devices and get that hit early. And this is where we can say we’re 100 times faster because if there’s something to find, we’ll genuinely find it in the first few seconds of a scan. When we say we’re 16 times faster is in conducting a whole scan of a device. So, 16 times faster is still so much faster than an standard MD5 hair scan and that allows you to put a statistical probability on the likelihood that maybe the wife’s computers had some data on it or the suspect may have had access when she wasn’t aware.
Equally, when it comes to that classic example of opening a drawer and finding it filled with USBs, you can scan multiple devices at once, discounting those not relevant and getting that hit on that known content on those ones relevant to an investigation.
When we think of that family home scenario then, you seize the suspect and their devices, get them into the evidence chain and speed up the judicial process and then you make an informed decision on what you can feasibly leave behind. This isn’t just using the tool but also your investigative experience. When it comes to ports and borders (so we work with counter terror police in the UK and other countries), we understand that time is limited with what we call potential suspect at that stage.
So, how are you able to get a bit of confidence or a statistical probability on that device that you’re seeing for the first time, whether it’s someone that’s just got off a flight or is heading over on a ferry and you’re able to decide and make an informed decision at that point rather than detaining someone completely irrelevant to investigation or missing someone that is relevant?
Now let’s talk a bit about our technology and the fundamentals behind Cyacomb examiner and Cyacomb Offender Manager. I mentioned block level hashing. We don’t just do block level hashing. It would allow you to scan an entire drive agnostic to the file system, so you’re able to scan every single bit of the drive including unallocated space, but we get our speed through statistical sampling. That gets you a meaningful result fast.
Where I can say we’re 100 times faster is in finding that thing on that device quickly. It’s a simple trade off between time and confidence and it has been verified by both police trials (most important) and also academic trials. So, we understand that it’s not just operationally focused, but it’s also understanding the fundamentals of the technology we’re using.
Now I mentioned we’re not the same as a classic file hash like an MD5 or SHA-1. In that scenario you need an entire file, you ingest it in some kind of algorithm, like an MD5, and it gets you an alphanumeric key unique to that file. It’s an excellent piece of software that allows global markets to function where they can be assured that one file is identical to another file. However, you need to read the entire file and it’s limited by disc speed. With our technology, we hash every single block that makes up files.
So, if we think of how a directory works in a computer, when you put a file on your file system, it doesn’t just hold that file in the same location, it splits down the blocks into different parts of the directory to more efficiently use the space in the computer. The standard block size is 4K (so four kilobytes). If we can hash every single one of those blocks, it gives you far faster results because you’re not needing to read the entire file.
You can also find partial and deleted files and files from damaged or deleted file systems. It’s important to note at this stage that that’s one of our massive capabilities, but similar to any kind of file hash, we still need the original data. So, if you’ve got data that’s been altered in any way in the exact same way as with a file hash, we won’t find it. So, if it’s been deleted that’s fine, but if someone’s cropped it, added filters to it or done anything to it that will change the nature of that file, it won’t match the original data that we’ve built that contraband filter from. So it’s important to note the capabilities as well as the limitations. And we use statistical sampling to get our speed.
In a classic scenario where you’re scanning a drive, usually it starts at the front and finishes at the end. What we do is we dip sample drive, so we use a scientific approach to sample the entire disc. Remembering we’re not just looking at the live file system, we’re looking at deleted data as well. The advantage of speed is huge. If we consider the example I’ll give shortly, I’m gonna scan the 80 gigabyte spinning this car drive (the old kind of thing you’d find in your old computers) that would normally take 40, 45 minutes. Pretty confident I’ll do it in about 3, as well as scanning other devices at the same time. The challenge is always in understanding how the technology’s working and what its limitations are.
At this stage I should say what we do is we answer the question, “find me something on this device”, not “find me everything on this device.” Remembering what I’m showing you today is a triage tool: it’s not designed for an entire lab examination.
And underpinning this technology is our contraband filters. If we think of a conventional MD5 hash list, you take a load of known illegal content, you put it into MD5 hashes and you make a list out of it. That’s great, it gives you something that’s open source and it’s easy to use. However, if you were to lose an MD5 hash list (which has been done in the past), what you’re giving is effectively a catalog of known harmful content to a paedophile or terrorist. If you lost that list, it would be of grave concern to agencies. Whereas if you lose a contraband filter, because it’s only containing block level hashes, there is no way of recovering that data or reverse engineering the technology.
So, it’s effectively useless for any nefarious actors. So, it’s both a secure but also an efficient way of sharing data. We’re very open in what our aims are. We want law enforcement agencies to share this data once it’s in contraband filter format across borders so they’re able to tackle this global crime using all the resources of global law enforcement as opposed to relying on agency or national data sets. The challenge is that you need an existing contraband filter to set up and work so that you’re able to scan those suspect devices. You take original data, put it through our technology and then you’re able to get such faster scan times and also detect deleted data.
Now our technology works on a standard Windows machine and runs, as I’m running today, on my standard Microsoft Surface Pro and it can scan any drive that can be mounted as a physical disc or logical volume on a drive. So, if you’ve got an Apple computer and you put it into target disc mode, you’re still able to scan that device using our technology. The difficulty is it will only run in live mode on Windows machines or bootable mode on Windows machines. Things like running in live mode on Mac or Linux is something that’s down the line in our product development.
When it comes to partitions and file systems, it scans and supports previewing files on a range of popular desktop file systems. However, where there’s partitions in file systems, it may slow down if it cannot identify the partition type. What it’s doing is it’s scanning above its standard statistical sample to try and understand exactly how much of that is partitioned. If it can identify greater than 10% of the disc, it will give a warning to that device. ]
When it comes to file types, our technology’s fairly agnostic. If you can make a conventional hash out of it, you can make a block hash out of it, which is to say a contraband filter. So you can ingest PDFs, documents, text files, MP4s, PNG and JPEG, and it’ll still work. The only limitation is in our desktop viewer only supports the most common kinds of video and images to preview.
When you’re detecting live and deleted files, you can detect it throughout the file system in the live, the recycle bin where the metadata remains, where the metadata doesn’t exist and in unallocated space. So literally the whole drive is fair game. And Cyacomb Examiner can function in three modes: in installed mode, (which I’m gonna show you today where you can run it through a write blocker), in bootable mode and in live mode. In installed mode, which is the most forensically sound, it allows you to scan through a write blocker and scan multiple devices whilst the software is installed on your computer.
It may require an experienced user and it may also require you to remove hard drives from suspect devices. In bootable mode, which is the second most forensically sound, there’s no need to remove HDDs. It is obviously less forensically sound than installed mode and it doesn’t require much use experience with the exception of trying to get a computer into bootable mode, which is often something I find challenging when I work with my own computer, which is a Microsoft Surface. I know most law enforcement officers will be used to using bootable mode, but each different computer will have a different way of getting that device into bootable mode.
Remembering when in bootable though it won’t identify certain kinds of encryption, unlike in live mode. Live mode being the least forensically sound in that it is not, but it will detect encryption such as whole disk encryption on a device, as well as certain kind of file encryption and zip files. But as I said, it’s not forensically sound. What we do is we list the changes that device will make on your target. So, when you run the software, we have a list of the changes that we’ll make to a standard Windows machine, and they’re detailed in annex G of the user manual.
Finally, I’m gonna talk a bit about Cyacomb Mobile Triage, which you can get in another video. This is the exact same fundamental technology underlying our software but applied to mobile devices. It allows you to scan Android and iOS devices through the MTP interface and Apple equivalent, being fast, accurate and easy.
Now bear with me as I show you a demo of Cyacomb Examiner and then Cyacomb Offender Manager. Here we have Cyabomb Examiner. This is our flagship tool and it’s for use both at digital forensics labs and at scene. As I mentioned, it can be run in live mode, installed mode and bootable mode. Over on my left side you can see a list of devices in the computer. Here we have a quarter terabyte drive. You can see it’s 238 gibibytes or 256 gigabytes, and we have an external 74 gibibytes or 80 gigabytes HDD. The top internal drive is SDD, the bottom drive is HDD, and right at the bottom you can see my license key that’s plugged in, it’s a 30 gigabyte USB flash drive. You can also scan E01 images detailed here.
To run a scan there’s just three steps that you need to do. You select the drives you want to scan. I’m gonna scan my internal drive and an external drive. We load the contraband filter and then we select scan configuration. I’m gonna stick with 99% confidence, but this is a simple trade off between speed and thoroughness. You can also configure your own scans for incredibly high confident ones, however, this will impact the speed of the device. For the purposes of the demo today I’ll do it at 99%. And that is it.
From there we can press “start scan” and after six seconds the tool has turned red. You can see the progress bar moving around in a circle, but also you can see on the device list that my internal drive has turned red. To note, I have about 50 to 60 megabytes of contraband on my internal drive. At this stage, you can also see the 80 gigabyte HDD has also turned red at around the 20 second mark. There’s 50 megabytes of data on that.
The example of data we give today is of space travel, so rockets and shuttles, nothing too onerous. Now it’s turned red: red bad, we’ve detected something, we’re at 46 seconds and I can view results. In this instance I’m gonna enable file preview, understanding that in the real world this will be exposure to potentially illegal and harmful material.
You can see on my internal drive it’s detected “images” and “other”. In the example of images: you can see it’s found image “shuttle”. Here’s a file path, here’s a located blocks and here’s a preview of that. So in this example image of a shuttle, in real world it’ll be image of child abuse or terrorist material. Now we’re at 1 minute 30 seconds. I’m gonna quickly put in some detail and allow the scan to progress further. Today I’ll be the analyst. We’ll call this “001” as the case.
And when it comes to what we’re scanning, 80 gigabyte HDD and 256 gigabyte SSD. Now my laptop’s not particularly powerful. This is a 16 gigabyte Microsoft Surface Pro. It’s, as you can see, a quarter terabyte, but it’s certainly not the most powerful computer in the world. Our technology is designed to work on a RAM of around 4 gigabytes and needs some capacity to run. However, I have heard it run on older versions of Windows, the health warning that comes with that is it will run slower. I’m gonna go back into the “view results”, see what else we’ve come up with. So here on that 80 gigabyte HDD that’s plugged in, you can see it’s detected five images.
Here you’ve got an image of an astronaut, and when it finds deleted data you get this message: “these blocks do not correspond to any file in the file system”. We cannot preview these images or videos because they no longer exist, but here’s a block and sectors which you’ll see more of in the PDF report where they sit on that drive.
Now in just under 3 minutes (2 minutes, 58 seconds), you’ve scanned 336 gigabytes of data, quarter terabytes SDD, 80 gigabytes HDD. I hope you appreciate that this is significantly faster than any other tool on the market. We’re not finding suggestive data, we are finding actual data that is illegal to have on a suspect device. This allows you to quickly take that device and get it through the judicial process. You saw me enter the data so now I can create my report. I’m gonna call this “123” and I’m gonna save it here.
The most exciting bit of the demo, the PDF report at the end. This is a standard report that comes out from any of our tools. It allows you to say “contraband detected”, big red box at the top, some license information, who owns it, what the purposes of it are, the case information you saw me enter plus when the scan started and when it finished, as well as how long the scan took. It also singles out the drives that I’ve scanned.
Here’s my internal drive, here’s the external drive. You’ll see scan progress was a 100% and when I put in that first data of 99% confidence, it’s now null and void because it’s detected something matching our contraband filter, we’ve previewed it with our own eyes, and so it’s got “n/a”, not applicable here. The scan configuration I mentioned was 99% and that was for a target size of data of 20 megabytes, or 20 mibibytes. So it’s far less data than actually you’d expect to find on a suspect device.
We also detect encryption. It’ll…at the end of any report give you a percentage of how much of that device is encrypted. However, it will turn amber on a device at 20% and give a very high encryption warning at 40%. In the example of anything at 40% that’s most likely some kind of full disc encryption where you’re only able to scan the data that is not at rest. You can see details of the contraband filter I used and then you can see more technical data of individual drives I’ve scanned. In the example of my internal drive, you can see how many sectors were detected and the block size, it determines what the required sample is and then gives an actual data on what the sample sizes it needs to scan are. So it scanned 100% of the samples, actually slightly more, and it detected about 4.9% of my drive is encrypted with zero device errors.
When it comes to detecting encryption, we link it by file type. So in the case of images you can see the file path of the image that I had here and you can see that I did review that image. This is for two reasons: first, from a judicial perspective to say, “yes, I did review that image”, but also from a law enforcement perspective to preserve user safety and limit the number of harmful images or videos suspect…officers have to see.
You can see now this is the 80 gigabyte or 74 gibibyte HDD that was plugged in, more specific data around that. When there’s no file, it can’t give you detail of a file path because it no longer exists. And then here’s ones with images as well. And when we get deleted data, what you get (and I’m gonna get an example of some deleted data here) where there’s no file, so this is data sitting in unallocated space or a partial download. It doesn’t correspond to any file in the file system, but here’s a sector and here’s a block. You can copy and paste this into your standard lab tool and carve out that data, recovering the image or video. And that in a nutshell is Cyacomb Examiner.
When it comes to standard officers using that in the lab or in the field, what we wanna do is be able to say, “right, this is a tool you can use, you can configure yourself.” However, we got asked, “what can you do about officers who are working with sex offenders or extremist offenders who have been released and we want to be able to monitor them? These are not technical people, so we want something that is (and I hate this term) plug and play”. So, for that we worked in a tool called Cyacomb Offender Manager. What I’ve done now is I’ve plugged a USB into my device, I open up my file browser, scroll down to my external drive, so Cyacomb Drive E, open up my applications and here’s my offender manager tool. This will only run in live mode and it’s designed to have all that configuration stripped away so that you plug in with a national data set and you scan against that national data set quickly.
So what we’re gonna do here is when it’s loaded, it’s also done all the configuration and it’s loaded a contraband filter, it’s gonna scan everything the device touches. So, how I’ve got my tool configured is anything currently plugged into my machine will be scanned. (Let’s maximize that there.) And all we have to do is press “start scan”. So, no configuration. The only information any officer would have to add is the details.
So, “Analyst: Bruce, 002, All Drives”. The benefit of this is it doesn’t allow configuration so there’s a consistency between use. Understandably, this device will be possibly used multiple times a day on multiple devices. We’ve thought of that and we’ve put both log in tools into it as well as dongle validation. So if something changes on the dongle, you can have it so it automatically disables itself so the dongle can be wiped and rebuilt, or it can warn you where you’ll be able to see the file that’s trying to change the computer.
Again, that turned red incredibly quick. We do not game our demos, that is actually how fast the tool is. I can view results, enable file review again, and then you can see here on my internal drive it’s detected a load of images and we can preview them in the exact same way. Like I said, we can actually disable file review. Understandably, this may be used in a family home context. It may not be the kind of stuff you want to open up on the kitchen table.
It’s also scanning that external drive that’s still plugged in. You can disallow this functionality so it will only scan the internal drive of a device. The reason being for this to try and limit the forensic change that that will make on any suspect machine. When it detects a video (I’m using a slightly different contraband filter here), we can open up the file and then we can click through the frames of that image. Again, you don’t even need to wait for the scan to finish. This will probably finish in about three minutes and there you can create the report. It’ll automatically save to the dongle, and that is it.
For further information on Cyacomb and our tools, go to cyacomb.com. I’ve been Bruce Wilson, I work on the sales team within Cyacomb. If you have any questions, email me at [email protected] and we’ll be happy to help. Really appreciate your time today and if you’d like a trial, please email me at the address that I mentioned or in the link provided.


