Welcome everyone. My name is Jenna Czaplicki, and today I’m going to walk you through a feature called ‘Promote to Discover.’
Promote to Discover is a feature available in both Nuix Workstation and Nuix Investigate, but today we will focus on Promote to Discover from Nuix Workstation.
Promote to Discover gives users the ability to process files and documents in Nuix Workstation, and with the click of a button, add those documents – or promote, if you will – to Nuix Discover.
Before we get started, we will need an account for Nuix Discover in a SAS environment, and a license for Nuix Workstation version 8.4 or later.
In Nuix Discover, we’ll create a case for our promoted documents to land in. In our case, we’ll configure our settings to deduplicate documents promoted from Workstation across the documents in our Discover case. In the ingestion default settings, we can choose to deduplicate across the entire Discover case; across each custodian; or we can select ‘none’ for no deduplication at all.
Next, we’ll copy the Discover API token to be linked to Workstation. Now let’s open Workstation to connect it to the Discover account.
In Workstation, we’ll navigate to global options and select ‘third-party connections.’ Here, we’ll click the Nuix Discover tab and add a new account. We’ll copy in that API token copied from Discover. Once we have the API connection configured, we don’t ever need to repeat those steps again.
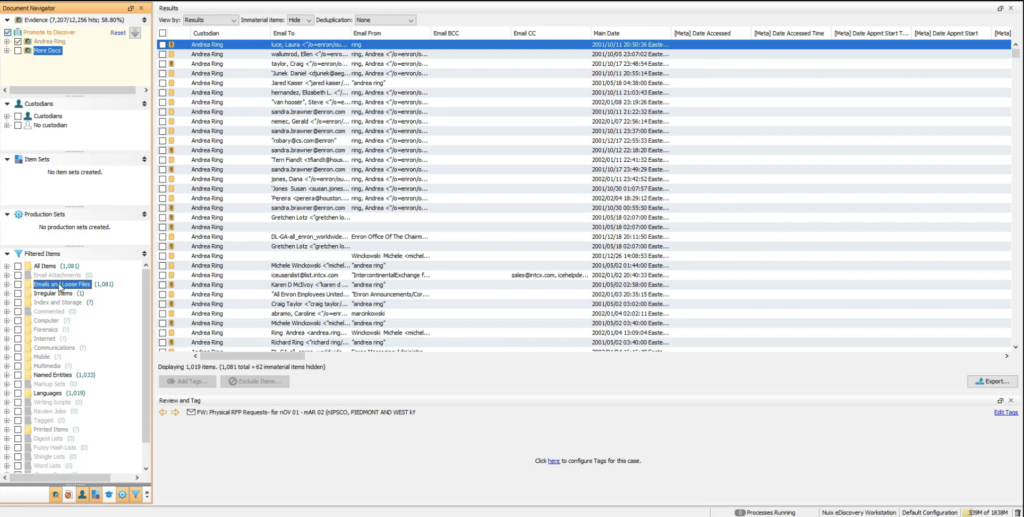
In Workstation, we can add new evidence and do whatever searching, tagging and [indecipherable] that we want.
We’ll select only the documents we want to be available for review in Discover. Once we’ve selected the documents in our results, we’ll right click, move over to Export, and select ‘Promote to Nuix Discover.’
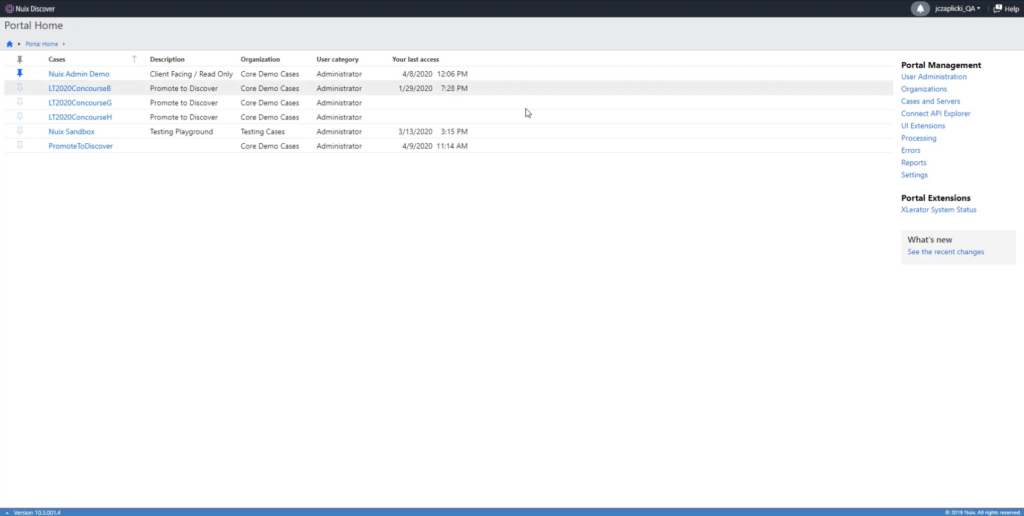
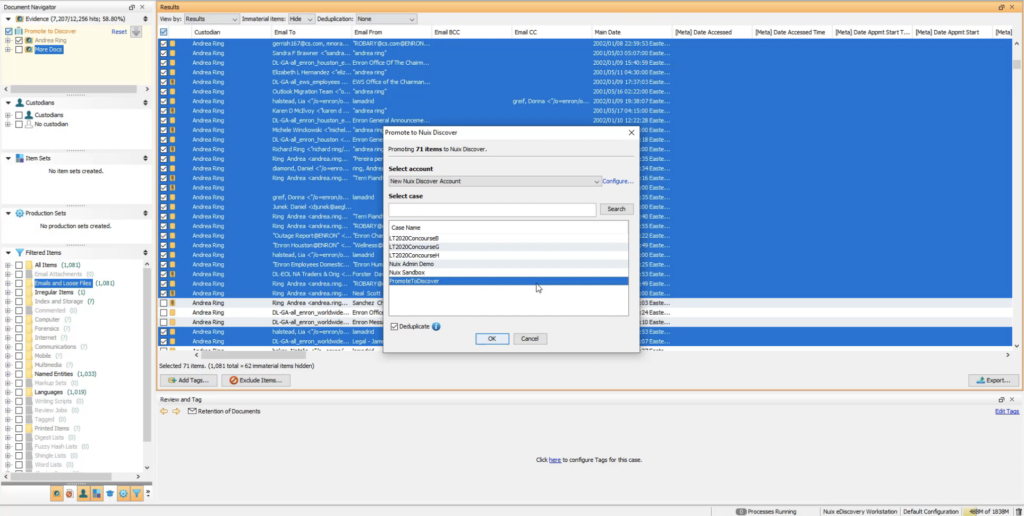
Here we can select the account we’ve just created, or select from multiple. We will see all Nuix Discover cases that our user is assigned to. Let’s select the case that we created and configured earlier.
Selecting the ‘deduplicate’ box will tell Discover to follow the deduplication settings that we configured in Discover earlier. Let’s keep this box checked.
Once we hit ‘OK,’ our selected documents begin transferring securely to Discover. The metadata fields in the Discover default metadata profile will also transfer over and populate those fields into Discover.
I think it’s worth pointing out that these documents can be made available to any other Discover users that we add to the case and grant security permissions to, not just the account that we linked. This enables us to quickly ramp up a project for a large number of reviewers without any hardware investment or installations.
When our job is complete, these documents will come into Discover as an import job. We can click on our document count to see if these documents are now indexed and ready to be searched, reviewed and coded. You’ll see we originally had 71 documents, but because of deduplication, 7 came through to Discover.
Discover gives users the easy-to-use interface with robust security options, so you can easily control who has access to what documents, features and administrative privileges.


