Justin: With the recently released 7.4.2 of FTK, you’ve probably seen a lot of webinars, presentations and demos regarding the new buffed features of system summary. We’ve shown you all the artifacts it gets; we’ve shown you how to use it. But now in this video, we’re going to show you how to report on it, in episode two of feature focus.
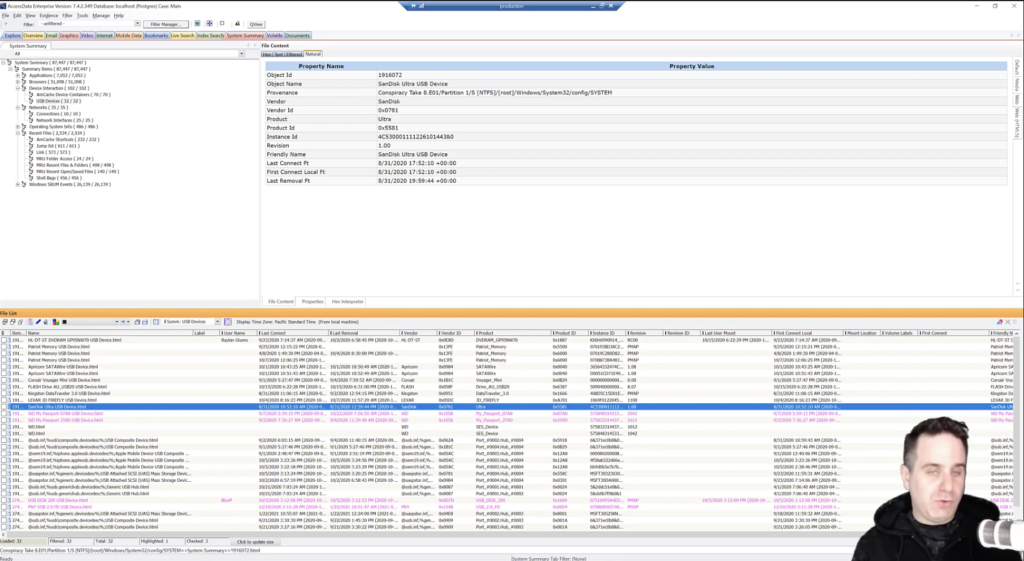
All right, welcome to episode two. I’m Justin Tolman, the Director of Training for AccessData, an Exterro company. And we’re talking about system summary today, and we are going to jump right into the interface. We are on the system summary tab, and we want to report on a few things that we’ve found in our case that we think is important. And so we’ll show you how to do that.
There’s two main ways that you can do it, and you can even mesh those two ways together if that fits your workflow. So the first way that I’m going to show is exporting file list info. And you can see that I have a couple of things here bookmarked by the pink color. So what we’re going to do, we’re going to activate a bookmarked filter on our items.
What we want to do is we just want to export this out. So we’re going to right click and we’re going to go up to export file list info. That’s going to give us this export dialogue. We’re going to choose CSV, but you can notice the different export options. Not all export options apply to every type of file. For example, exporting these to KMZ or KML probably isn’t going to do much good because that’s a Google earth file. And you know, it’s just information. So we’re going to do a CSV file here.
We’re going to select all listed: a key thing. If you’re like me, you’ll forget to check that. You’ll go check your CSV and you’ve only got one because it defaults to all highlighted. We want to change it to all listed. We do want to include a header row. And notice that the column automatically changes to the one that we had displayed in the interface. If you want it to change that to something else, you could.
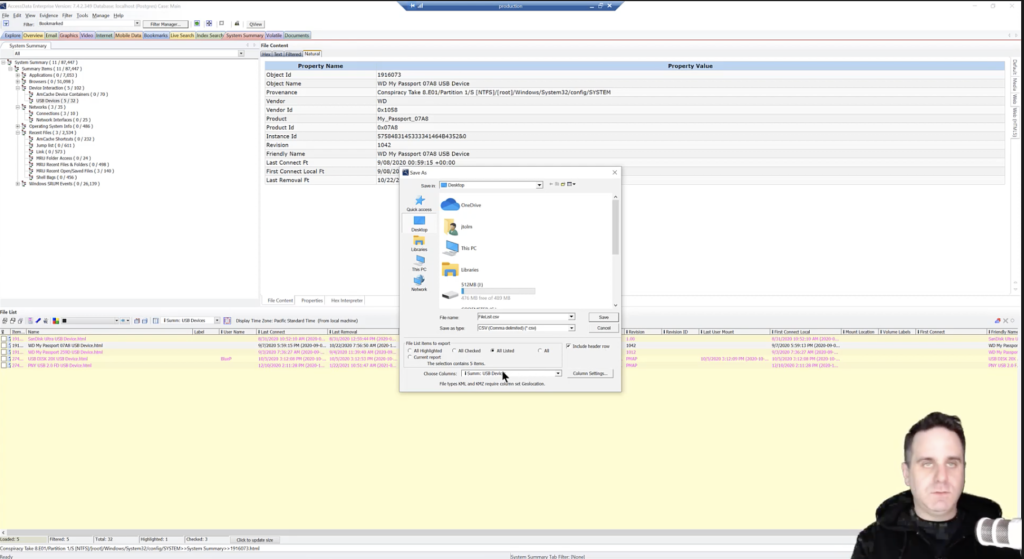
Now we’re going to give it a name of USB devices, and we’ll click save. Save that out to our desktop. Minimizing FTK, we can see USBdevices.csv. We can open up Microsoft Excel or OpenOffice, whatever you were going to use. Okay. We can go to a blank workbook and you can go to the data. Bring that in.
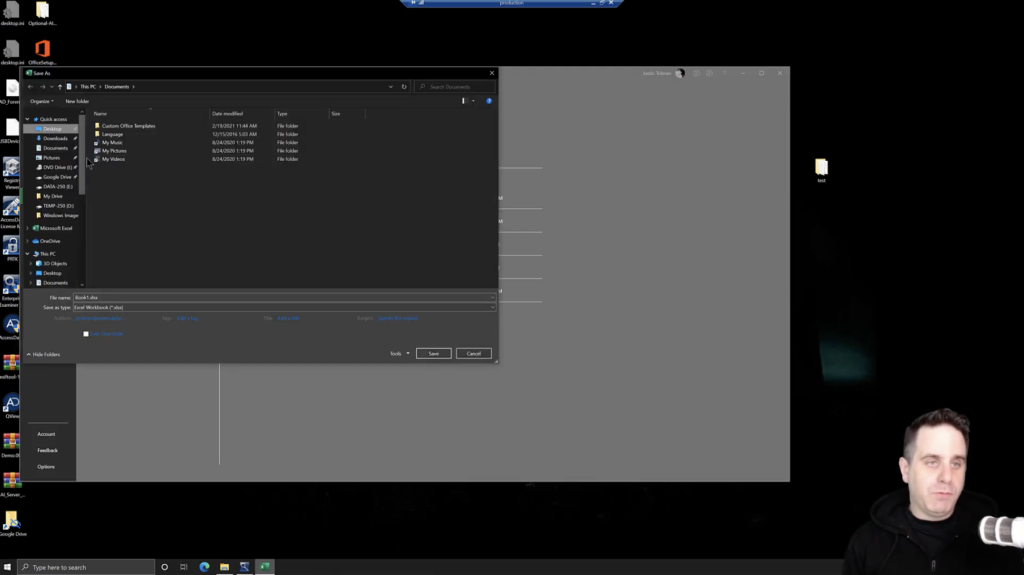
Once we’ve imported our CSV into Excel, one thing I like to do is go up to file, save as, and browse to wherever you want to save it. We’ll throw it on the desktop with everything else, and we want to change it to an Excel workbook. We’ll give it a name of USB devices. Same thing. It doesn’t matter. And we’ll click save.
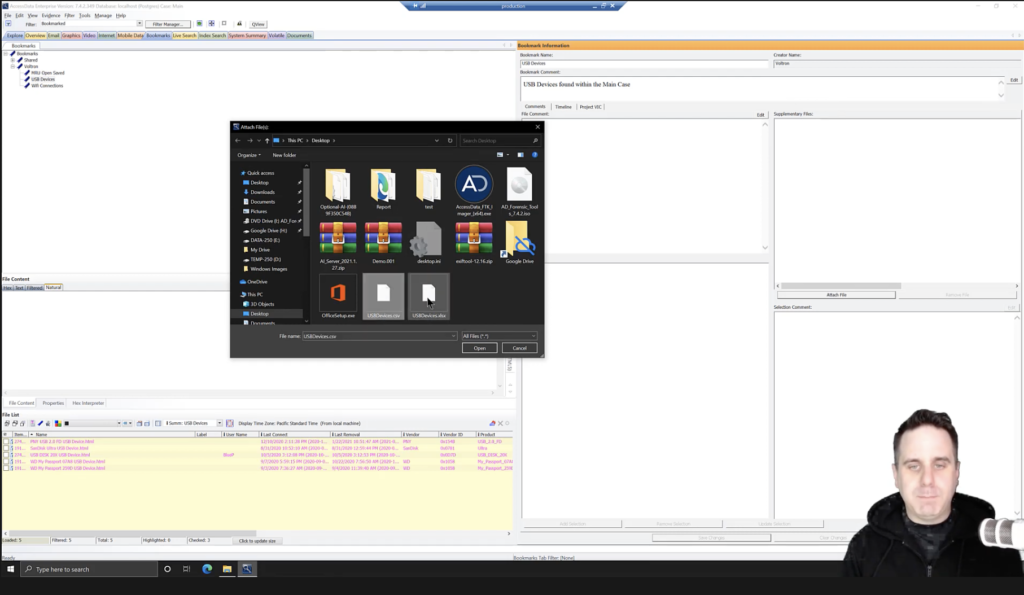
Now, this is an important step for what we’re about to do next. You want to close Microsoft Office Excel in this case, before we go to the next step. So we’ll close down Microsoft Office, we’ll jump back into FTK. So we’ll go over to the bookmarks tab and we’ll select our USB devices. And we can see the same list here. Now I can attach a supplementary file if I’m going to include these things in my report, and I can add both the CSV and the Excel workbook as supplementary files.
And the one place you need to save in FTK is in the bookmark information pane. It’s the only place that requires saving. We’ll save our changes. When I select this, I can see it in table mode. And what we’re going to do is we will append this to our report, so that you have both the HTML view and you have a table view from the document that will be appended to the report.
We can export that out. You don’t have to bring it back in as a supplementary file. If you write your own reports or have some other formatting thing, you can just ship it. Or if somebody just asked for the information and you just need to get it to them, export file as info, ship it.
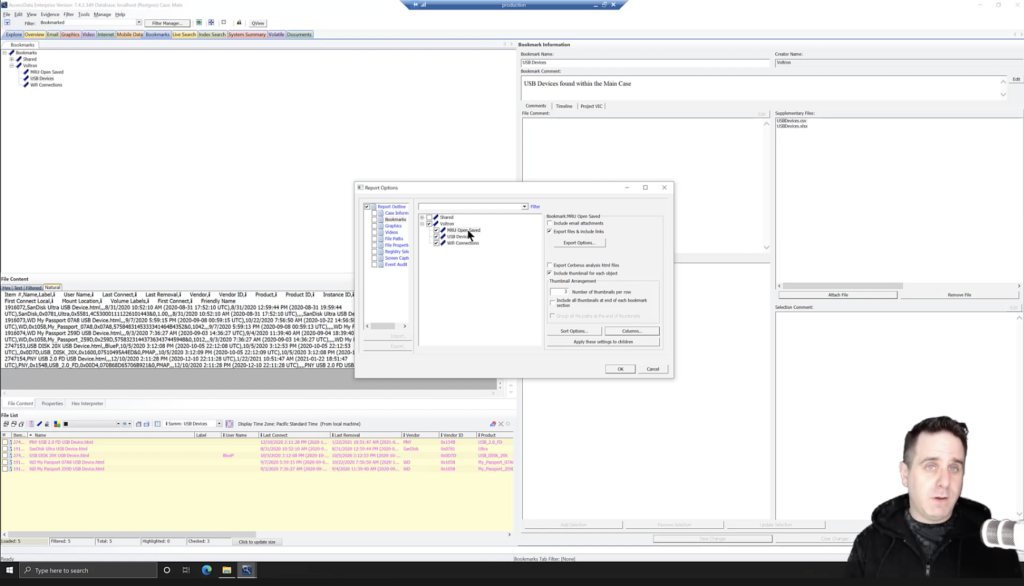
The other way to report out information from the system summary tab is by using the report wizard built into FTK, we go up to file and click report. Once the report wizard loads up, you can start to configure the report. For the purposes of this video, we’re going to jump straight to our bookmarks where our information is. We’ve bookmarked MRU Open Saved, we’ve bookmarked some USB devices, and we’ve bookmarked wifi connections. Three different items out of the system summary. So we’ll go ahead and include all of those in our report.
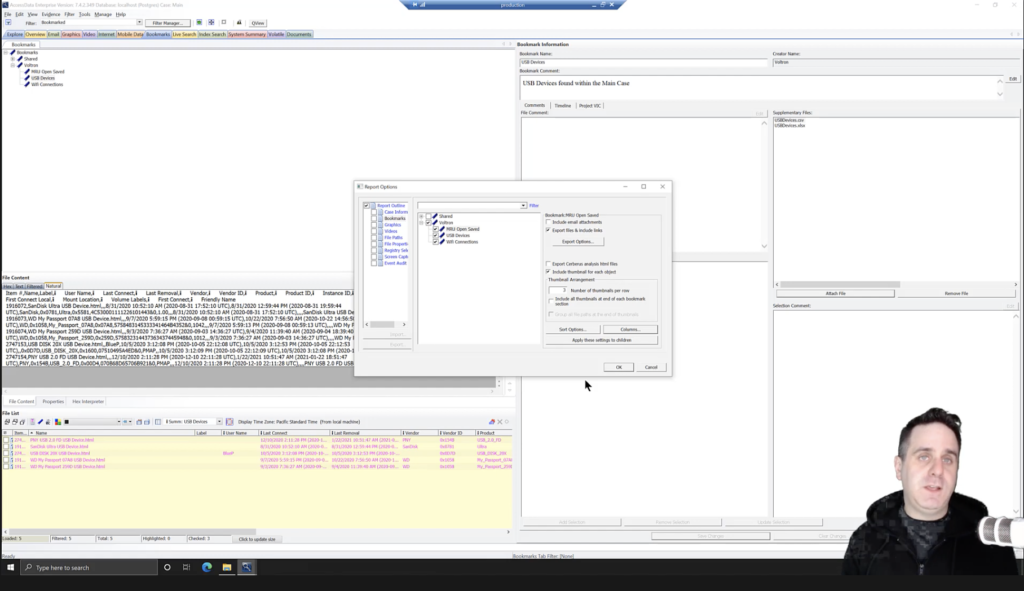
Once you’ve selected the bookmarks that you want to include in your report, we have a few things we need to configure for each of our bookmark categories. If I select MRU Open Saved, and then I click columns, the manage column settings window will open up, and by default, the report wizard will be set to a column set of reports standard. For your general files and things like that, that’s probably fine. You can change it if you want, which is what we’re going to do here.
We’re going to drive it down just a little bit. We’ll expand out our column here, and we’re going to select MRU recent open saved files, and click close. And what that’s going to do is apply that column set to that, so that all the data we see in our interface will be included in your report. This is an important step. If you leave it on report standard, when you get your report on the other side, once it generates, you’re only going to have the columns that were in report standard, and you’ll be missing a lot of that information that you want in your report.
So once you’ve done this for each of the system summary bookmarks that you have, you want to set those columns, go ahead and select bookmarks to include in your report. It’ll apply to the ones that you’ve checked, and click OK.
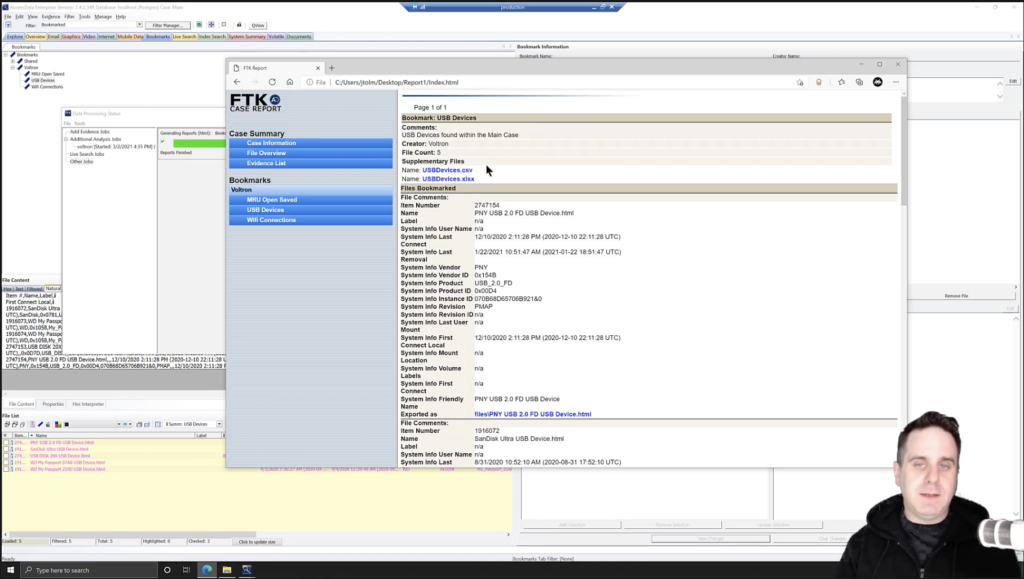
From here, you choose your format of your report, the location that you’re going to send the report to, and you generate it. When the report generates, we can see our MRU open saved. We have our columns that we want to see with the information populated in our images in our MRU open saved, and we also have our files that have been brought out as well.
If we go to USB devices, remember we exported that information out to an Excel workbook. We can see those supplementary files appended here. If we select one of those, it’s going to download it, which means it’s going to copy it out of the report directory as a download to our downloads directory. You can do that, or you can go to the report directory, report files, and you have all your files in here, and you can view them that way as well.
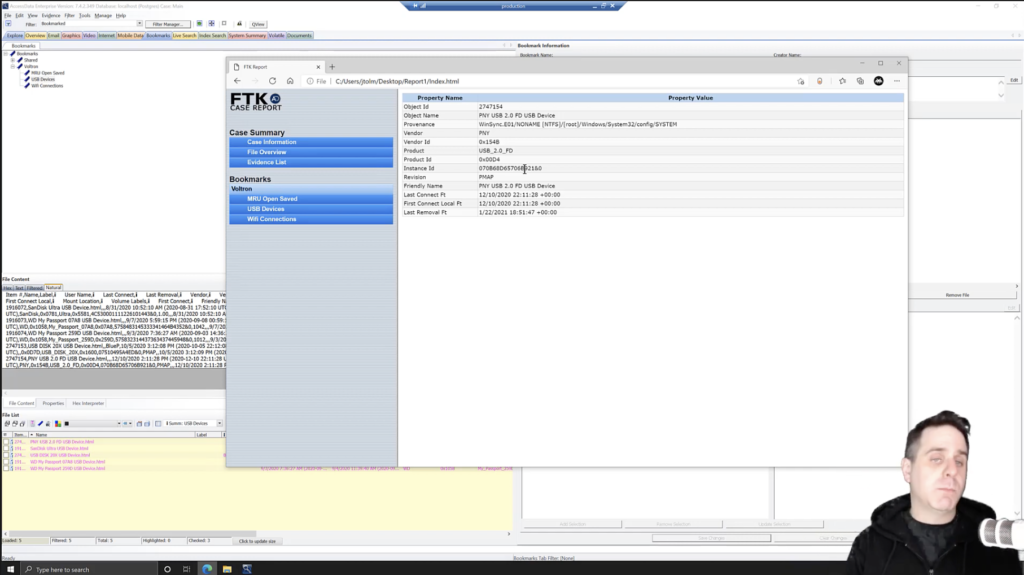
With the report comes an HTML view that you would be familiar with within the FTK interface. If I go ahead and click this files PNY USB, notice that it is the view that you would normally see in the view pane within FTK. These can be used used for demonstrative purposes, whatever you want. More of a pretty laid-out table view of the information.
Okay? So that’s the basics of reporting on system summary information. You’ve got a couple of options on how to get that data out and deliverable. If you can’t deliver it, then there’s no point in doing it.
Okay. So last week we talked about FTK Imager and specifically creating custom content images. So what we’re going to do is answer some of your questions regarding FTK Imager from last week.
Nicola asks: does all versions of FTK Imager support both 32 bit and 64 bit systems?

No, all versions of FTK Imager do not support both 32 bit and 64 bit systems. The current version, and the last couple versions of FTK Imager, are 64 bit system only support, however FTK Imager 3.4.0.5 does support 32 bit systems. Yeah. You can download that version by going to the website on the AccessData website, product downloads, past versions, you can scan down within the FTK Imager section to FTK Imager version 3.4.0.5, which is the last version that supported our 32 bit operating systems. So that came out in October of 2015. We’ve made some updates to Imager since then in speed and the little features here and there, but it’s… it’s an older code, but it checks out. Okay? It’ll still image your drives, that sort of thing. If you need to load it up on a thumb drive, plug it into a target machine and image out. You can still do that with FTK 3.4.0.5 on 32 bit systems. Anything past that, and you’re into the 64 bit only support. Okay, great.

Fernando noticed in the last video that I was using FTK Imager 4.7. This was an oversight by me when I made it. And yeah, product gives me software versions that they have been testing new features on, optimizations, and other things like that, so that I can help run tests and different workflows through those tools. All the features we talked about in the last video, though, are in the release version of FTK Imager and work just like I should. So no worries there no secret sauce, but again, we’re still hard at work at it.
Thanks for watching another episode of Future Focus. We’ll be back next week with another topic. If you have questions about what we covered today, drop them below the video, whether it’s on social media, YouTube, whatever, you can reach out directly to us with your questions, and we’ll try to answer some of them in the next video. Thanks for watching. See you next week.