Amped Software has announced the introduction of its extraordinary audio display and redaction features now available in Amped Replay! For those of you not familiar with the software, it is an enhanced video player that allows police investigators, detectives, frontline officers, first responders, security personnel, and CCTV operators to conduct a first-level analysis of their video evidence, bridging the gap between a player and a forensic analysis suite. It empowers investigators to view their video footage quickly and expedite their case, ruling out what is and isn’t pertinent footage in the first instance.
This new addition has been developed and tested after numerous weeks of effort, which they take great pride in. Amped believes you will appreciate how simple it is to eliminate confidential audio from your evidence.
In the past, removing sensitive and/or unwanted material from digital media evidence was considered a niche editing skill that only a specialized video unit could undertake in a law enforcement agency. And there was a good reason for it, of course: the process required ingesting the evidence, editing the material and exporting the processed media to a forensically acceptable standard. This is a delicate workflow that requires specialized training and skill sets in forensic video processing and analysis.
Now with Amped Replay, forensic integrity and quality is taken care of for you in the background. Meanwhile, you can focus on removing visual, and now aural, content that is inadmissible in court, or not fit for public disclosure.
Without any further delay, let’s now load a video with sound and begin the process of redacting!
Viewing the Audio Plot
When Amped decided to create an audio redaction feature in Amped Replay, they soon realized the need for a visual representation of the audio plot. This would enable users to quickly and intuitively identify portions of speech or sound that are relevant in shorter clips. Although dealing with longer recordings may be more challenging, this visual element will ultimately prove invaluable.
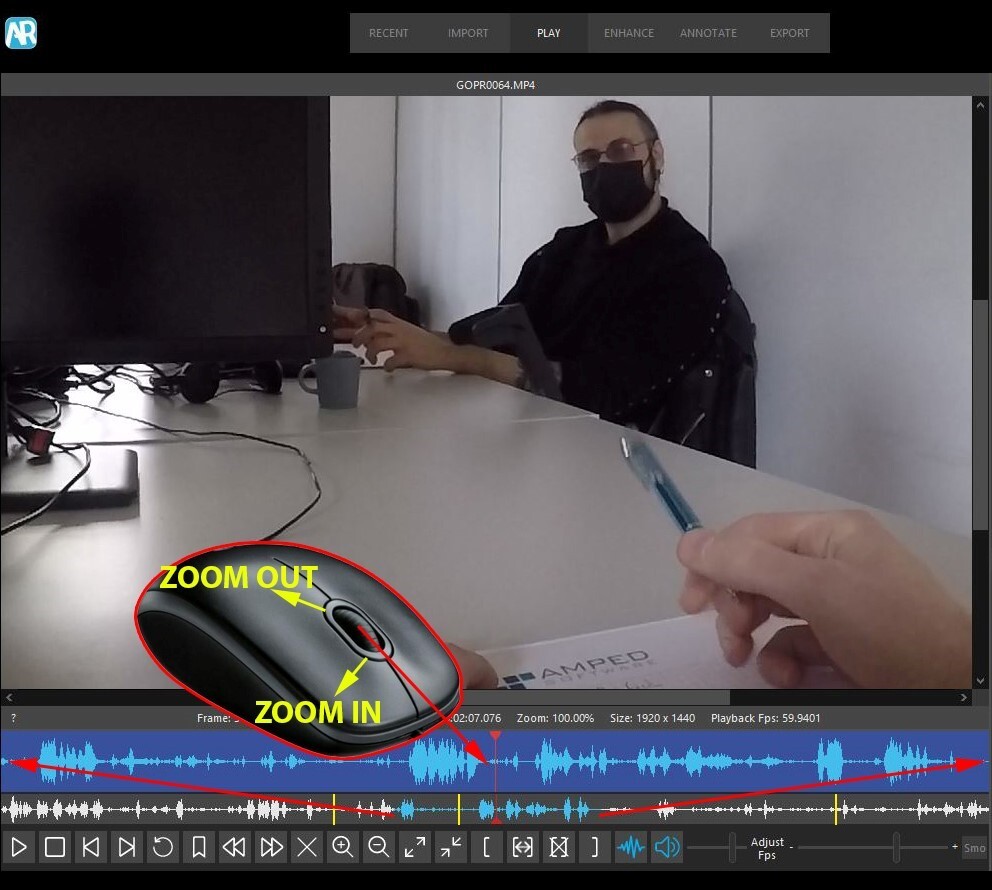
It is now possible to view the audio plot clearly and zoom in and out of it by simply utilizing the scroll wheel on your mouse. This functionality makes the navigation of the plot significantly easier.
Upon loading a clip with sound into the program, you will be presented with two waveforms by default. This phenomenon is immediately visible and serves to demonstrate the capabilities of the program.
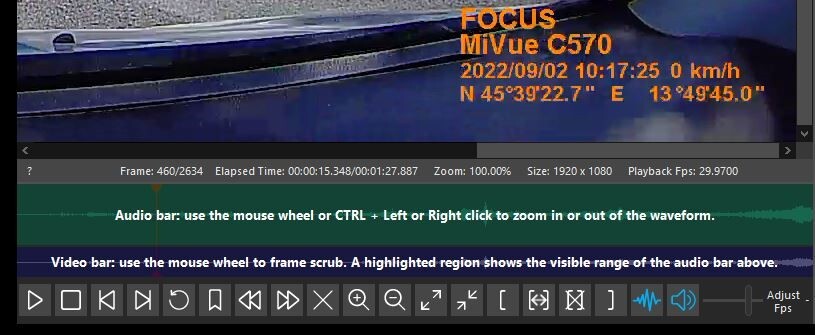
The top bar (or Audio bar) displays the audio plot for the zoomed portion of the video only. Simply hover over the area of interest within this bar and use the scroll wheel on your mouse to zoom in and out of that area, as required. You can also hold down the CTRL key and click the left and right mouse buttons to zoom in and out instead of using the scroll wheel.
The bottom bar (or Video bar) now displays the waveform for the whole clip, however long that may be. And, it will still contain other video idents such as bookmarks, any range selections and, of course, annotation markers and keyframes, where present. Furthermore, it also now displays a blue-highlighted range to indicate which portion of the audio plot is currently displayed in the top bar.
You can still click anywhere on the plot to move the bottom play head and the corresponding range to that position or you can just click and drag the highlighted range left and right to display that full range in the top Audio bar. Of course, you can also click anywhere on the top Video bar to move the top play head to that location.
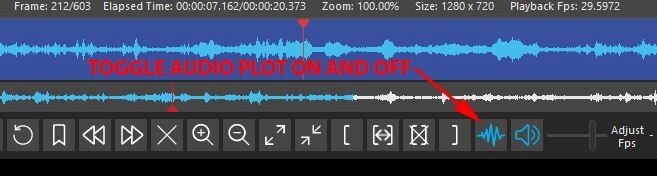
Of course, there is an option to hide the waveform if one is only interested in video. This function can be enabled through a new Waveform button that has been added next to the Mute button for convenience. Furthermore, this feature may prove useful when undertaking activities such as enhancing and annotating video as it eliminates any potential distractions from the plot.
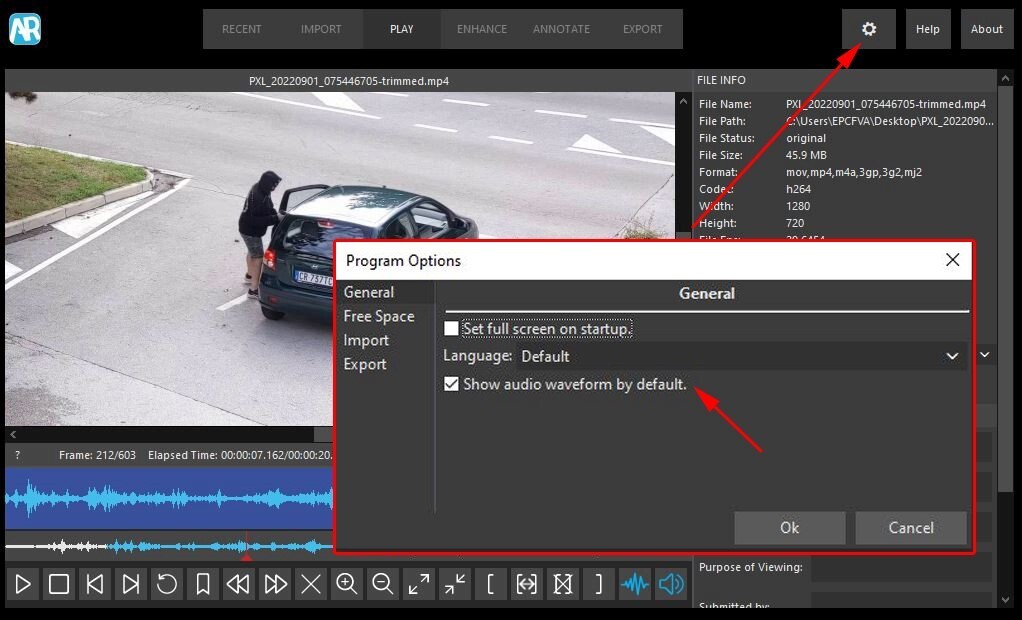
But Amped has even gone a step further. With the introduction of the new Program Options menu, accessible by clicking on the cogwheel button at the top right of the interface, you can now also set Amped Replay to always show the audio waveform display, or otherwise, in the Play tab. When switching to the Annotate and Export tabs, however, the waveform will always be enabled by default. This is to remind you that the video has audio and that you may need to perform some redactions prior to export. If you wish to hide the plot when in these tabs, you can still do so by clicking on the Waveform button.
Remove Sensitive Audio
Now that you’ve learned how to view the audio plot and how to customize the waveform preferences, let’s start to remove sensitive audio. There may be some confidential information (such as a witness’ address) that needs to be omitted for court presentation, or perhaps some profanity that needs to be removed prior to release by the media. With Replay, doing this is now as easy as holding the ALT button down and drawing on the relevant portion of the waveform with the mouse.
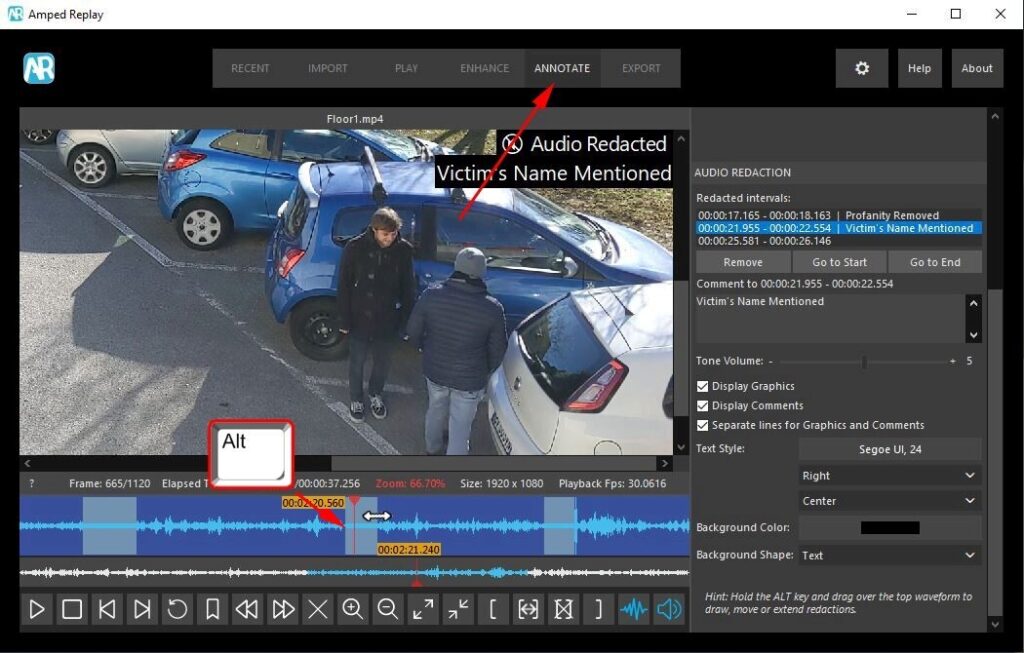
First of all, load your clip and select a range of frames (if required). Then, click on the Annotate tab to enable the Audio Redaction features. Although you can preview the audio plot in any tabs, you can only actually remove sections of audio when the Annotate tab is selected.
Identify the first portion of the sound to be redacted. Zoom in on the waveform to help you locate the beginning and end of your redaction. This is especially useful when working with long clips and/or when redacting very small portions of the sound.
Hold down the ALT button on your keyboard and notice how your mouse cursor changes to a double arrow. As you hold down the ALT button, left-click at the beginning of the redaction in the top Audio bar. Drag the selection all the way to the end of the redaction.
You can then release the mouse button and the ALT key. Please note, however, that you cannot create redactions by clicking on the bottom Video bar.
You can trim an existing redaction by holding the ALT button again and by dragging the edges of the redacted range as required. You can also delete a redaction by holding the left mouse button down on it while pressing DEL on your keyboard.
The redacted sound will be replaced with an industry-standard 1 kHz tone. There will also be a textual slate displayed on the video for the duration of that redaction. You can change the volume of the tone by moving the Tone Volume slider left and right. This is located in the Audio Redaction panel, underneath the Annotate panel. If you move the slider all the way to the left (“Volume 0”), the redacted sound will simply be replaced by silence. This is also a smart way to remove short segments of unwanted sound.
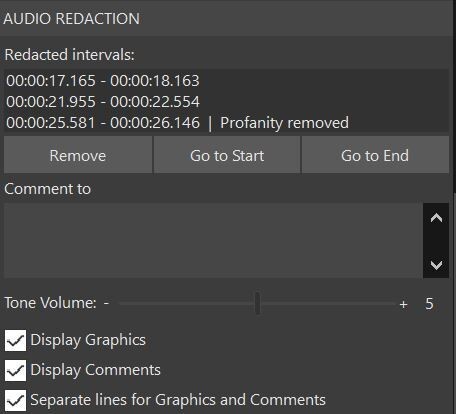
As you add multiple redactions to your clip (and you can add as many as you like), you will notice they will be listed by timestamps in the Redacted Intervals box in the Audio Redaction panel. You can go back to the beginning or end of any redaction you have already created by selecting the relevant entry in the list and by clicking on the “Go to Start” and “Go to End” buttons, respectively. With an entry selected, you can also delete it by clicking on the Remove button.
If you wish, you can add a textual comment to any of the redactions by first selecting one in the Redacted Intervals list and typing the required textual content in the text box underneath.
Also available in the Audio Redaction panel are further customizations on how to display redactions on the screen. For example, you may want to display the standard textual redaction graphic and the individual textual comments in two separate lines of text or you may simply wish not to display these at all. All you need to do is tick and untick the relevant options available to you.
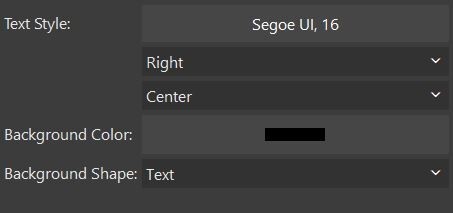
And finally, you have, of course, the option to change the location, font, size and color of your textual content. Additionally, you have the ability to add a background underneath the text and to change the color of the background as well. These options should already be familiar to you as they are identical to those pertaining to textual annotations.
Once you’re finished, all you need to do is click on the Export tab. Then, click on the Export Processed Video as MP4 button to output your redacted video. Of course, before you do so, you can still enhance and/or annotate your video, as required.
If you generate a report, a list of all the redactions you have done on your video, as well as their corresponding timestamps and textual comments, will be included. As a result, you will have an auditable account of what you have removed from the original video and why you have done so.
Congratulations! You have now obtained a clear grasp of how to navigate through the waveform of an audio clip and delete any confidential or undesired sound from your evidence. Please share your opinions on Amped’s Discord channel regarding this fresh feature, and if you are not already signed up – don’t hesitate to do it today!