Presenter: Mark Stringer, Manager of the ACE (AccessData Certified Examiner) Program and Senior Instructor at Syntricate
Join the forum discussion here.
View the webinar on YouTube here.
Read a full transcript of the webinar here. Transcript
David Cliff: Hi. Good afternoon, everybody. Thank you so much, everybody, for joining. We have quite a few callers on the phone, so if anybody has a question and we miss it down in the chat box, I will be providing an email address at the end of this slide presentation. That way you guys can reach out to me directly, and I can route you to your rep, who will be getting back to you pretty quickly with whatever answers you might be looking for.
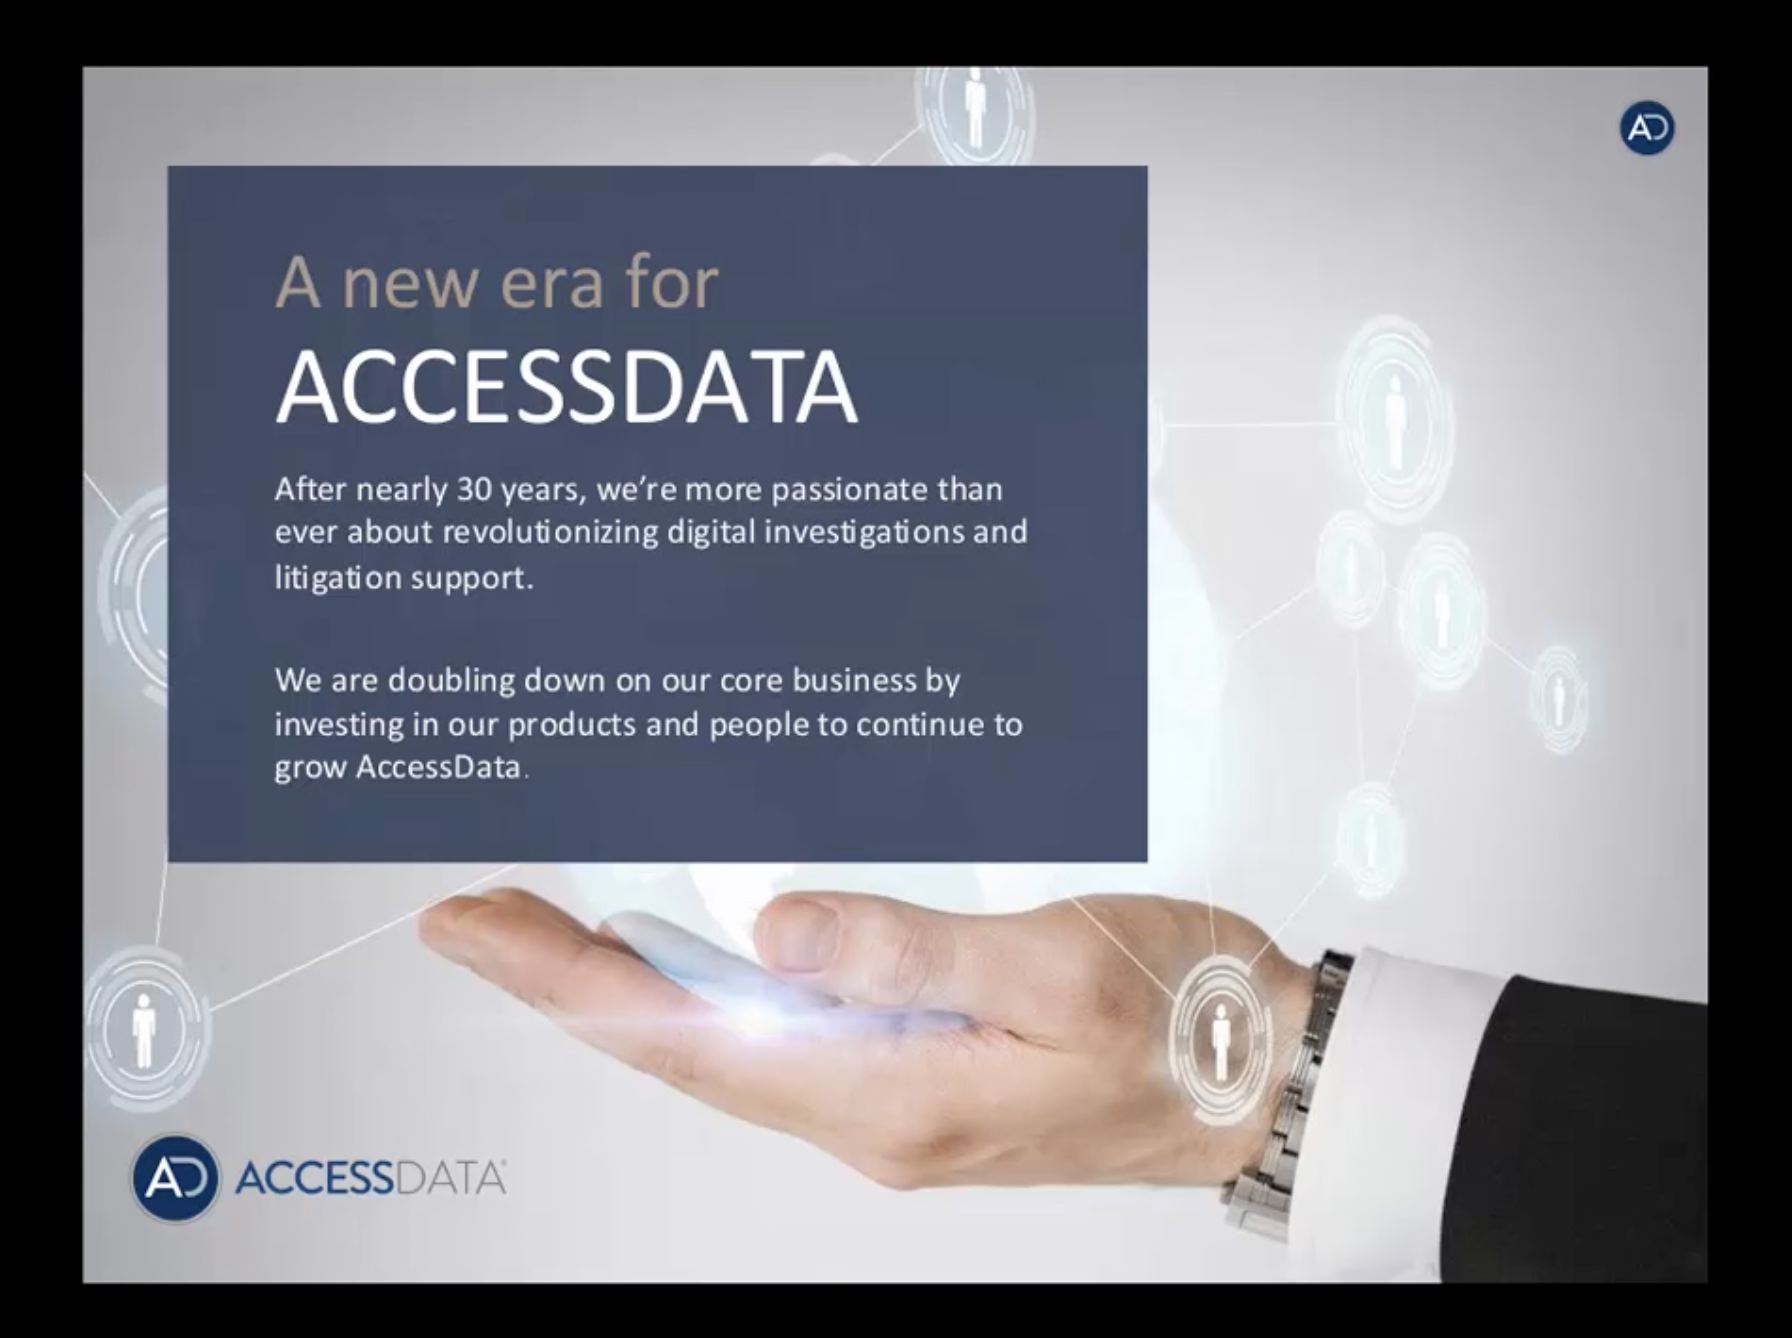
Alright, so I’m going to go ahead and get started here. I know everybody’s here to see version 6.0, [indecipherable] version 6.0 live. But many of you, actually most of you, have already made quite a bit of an investment into AccessData. So I think it’s worth your time to take about five minutes here to actually hear about the direction that AccessData is headed in, give you a little bit of insight as to what’s going to be happening in the future.
So AccessData is a company that’s been around for nearly 30 years, and for the software companies that have that type of longevity, it’s because they have a product that works well. For us, that’s our forensics, and we’ll tell you a little bit more about why here. Many of you know that, recently, AccessData have moved into the automated, IR space. We learned quite a bit as we did that, and I think it’ll work well for you, what we have learned. We’ve recently divested the IR. We’ve taken a lot of those resources and we’ve poured them back into forensics. So we’ve invested in the people that are going to be developing our software and making it better for you as well as the people who are supporting you and the people who are going to be communicating with you, opening up the channels of communication to be able to take your feedback and [write] it back into the software to continue to make it a better product and to keep it relevant to what your needs are.
So our focus continues to be, like I said, to fit your needs. So that is the e-discovery and forensics space. We do that quite well. We can walk you all the way through the EDRM to litigation [indecipherable] from collections, and to [review] and production.
Like I said, I’m moving through these pretty quickly here. I want to hurry up and get you to the live demo. But for us, you’re always making an investment into your production, into your environment, your forensic team, and for everything that you purchase from AccessData, it’s always going to be an investment into what you already own. And what I mean by that is we have a foundation, which is our database – and I’ll get into that in a little bit more detail – but depending on what your needs are, you can add any component or functionality to that unified database. If you need mobile collections, we have that; endpoint collections, obviously that’s FTK. We also have the ability to help you collect cloud data from YouTube, Facebook, SAP, we have structured connectors, we have a long list of structured connectors to help you get to that.
So it’s much like building a house – you have the foundation, which is the unified database, and then, depending on whatever your needs are, you can scale up to that. So any component that you add on to that, you’re continuing to essentially build equity in your investment, which is your forensic team and e-discovery team.
So by doing this, you’re always going to be adding functionality, depending on what your needs are. If currently, today, all you need is endpoint forensics, but you may need mobile forensics or you may need full-scale e-discovery, which means litigation [whole], which means collections and review, all under one platform, under one single database, essentially there’s no other company that’s doing that today. Your critical evidence will never have to be moved from product to product. You will never have to risk any corruption by taking evidence and moving it from one database to another. You have full-scale visibility and access into all your evidence, as an organization, absolutely zero chance of corruption.
I think that pretty much handles what our vision is currently. I’m going to go ahead now and hand that over to Mark Stringer. Mark is a very accomplished [trainer] here at AccessData. He has an impressive resume in forensics. So Mark, I’m going to go ahead and let you take over. I’m going to pass the ball to you to go ahead and [get the] [indecipherable] started.
Great. Here we go.
Mark Stringer: Well, I did want to show you just a couple of things. Let’s start off with what is sometimes referred to as the ‘Easy’ button when you’re creating a case. Normally, when I create a case of course, I would go to the Case menu here, then choose ‘New’, and when I do that, I name my case and that sort of thing. But one of the new [wrinkles] we’ve put in here are these processing options. We sometimes refer to these as templates. This is where we get into the ‘Easy’ button thing. It should default to this ‘Forensic processing’ option. And all this is is this is a preset template that has a bunch of processing options.
Just to remind ourselves of what this is, I’m going to click my ‘Create’ button here, and when I do that, it shows you all the processing options that are part of this one. So this is your basic forensic processing option, FTK standard if you will. So it does the normal kind of things you would expect, some hashing, some other options, indexing, expanding compound files, and basically those kinds of things.
Now, if I go back, you can see we’ve also added in templates for e-discovery and Summation processing as well, so non-forensic type operations there. So just to show you the difference, I’ll take a peek at this e-discovery template. And when I do, you can see that it doesn’t have all the hashing options here, it’s turned off a lot of the forensic processing options. But instead, over here, where our Lab e-discovery options are, you can see there’s extra email de-duplication going on, and other email related options that would come into play with the e-discovery or the Summation kind of processing.
So we’ve done that. Also, you can see we also don’t include File Slack and that sort of thing for that option. So those are some of the options we have, and similar things for Summation you would see as well. Not too much of a forensic emphasis. But over here again, more the operations that you would really need for a Summation type processing.
So that’s what we’ve done here, and then back on the forensics side we’ve still included basic assessment and field mode. Field mode we’ve had, of course, in FTK for a while. Basic assessment is… think of it as maybe just one step up from there, and with that we’ve turned off almost everything, processing-wise, except for expanding compound files and deleted files. So those are options, and just keep in mind too that just like before, if you want to create your own template customized for your own consistency and your work… I’ve just checked a couple of options here. I still have the ability to save that to a profile, name it, put some notes in there, so that I can create consistency in my own work or in my agency’s work.
So that’s a little bit about our ‘Easy’ button options there. Let’s keep on going though, and let’s look at some of the features, some new features in this version 6.0 of FTK.
Now, just before I forget – later on we’re going to get back to this, but I’ll just mention it here – one of the things that we will cover here is our options for optical character recognition. So OCR there. And one of the new little [wrinkles] we’ve placed in there is that OCR is available for different languages now. And I think there’s about 33, 34 different languages that are available for OCR now. So we’ll actually do the processing later on and check that out, but I just wanted to point that out for the moment.
Anyway, the first order of business I wanted to cover was volume shadow copies. So let’s do that. To do that, I’m going to jump into my demo case that I have already created. It just has a couple of pieces of evidence in it. Again, I’m trying to keep you guys from watching digital paint dry while things are going on here. So in this case though – you can see I have four pieces of evidence here – so I am going to add in another piece of evidence to give you an idea of what happens with shadow copies. Shadow copies, just a couple of words there, would be like restore points. When you add software or hardware, sometimes you might want to create a restore point, give you a place to roll back. So forensically, that can be significant or us. We can see a previous state of the computer. So for example, here, I have a piece of evidence that doesn’t have a restore point, and when I’m in this window, if I click on the button for choosing my restore point, I can see FTK will say, “Hey, there’s no restore points there!”
So I am going to add in a piece of evidence which does have a restore point here, a little small one. So I add this in, and now, with that highlighted, VSC.E01 file, when I click on my option for restore points, I can see that there are restore points. FTK tells me that there are these restore points and when they were created. So in this case I want to process all those and have a look at them. So FTK gives me a choice on how I approach these. VSC, by the way, is standing for ‘volume shadow copy’, part of the service that Windows uses to do these.
So anyway, here are my choices, three choices to process these. Now, this is to give you flexibility, and also maybe according to how your brain works. My brain works best this way, choosing this option – oldest to latest with deltas. So as the hint gives you there, it tells you that the oldest state of the computer will be shown as the full file system, and then any changes – in other words, the deltas – any restore points from that point forward in history, are only shown as deltas. Deltas meaning it only shows you the changes that have been made from one state of the drive to the next.
So anyway, I’ll choose that oldest [indecipherable] deltas as we move forward in time. So I’ll do that and get that to processing.
So this will probably take, I don’t know, 40 seconds, something like that. Eventually I will see it populate up here in my evidence tree. So as I said … and while that’s going on, actually, let me do this as well. In support of this function, we’ve also added in some column settings. So I’m going to go to my ‘Column Settings’ button and I’m going to create a custom column setting to support some of the things that we want to do here. I’m just going to call my column setting ‘VSC’ for ‘volume shadow copy’, and I’ll add in a couple of columns that I need, like… how about the name of the file?
And then, there are some specific volume shadow copy features, which will be very useful. And I’ll run down to these, and I’m going to add all of these in. They all start with ‘VSC’. This really is a huge help in figuring out what’s going on for your various changes in the drive. So I’ve created my new column setting, and I will apply that so I can see what’s going on immediately. And let’s see – it looks like in the meantime… I think I am done with my processing there. Yes, I am done.
So now, let’s just give you an example of what this function does. If I expand this out, I have the original state of the drive shown here, and I’m just going to open up the root folder. We made this very, very tiny, just so you could see what’s going on. So here, there’s a folder called ‘First’, and inside of there, there’s a file called ‘First.txt’, and you can see here is the content of the file, “This file was first in the first folder.”
So then, I’ll go to the first restore point, this is the first delta… so just keep in mind, I only see things that have changed from the first state of the drive to the second one. Let me just move this down a bit so I can get a little more real estate there. So you can see the first folder shows up in the first delta, which means something happened, some change to that. And then also, of course, there’s a new folder which wasn’t there at all, called ‘Second’.
So if I’m trying to get an overall snapshot of what happened, what’s actually different between these two, I can do this. I’m going to … just so I don’t show so much information, I’m just going to highlight the first folder here for a moment. And when I do that, this column really helps me – VSC Delta State. So what was different? So I have the first folder and the first restore point highlighted there, and it tells me this file First.txt was modified from this. So this was the original text that was in the file, and then it was changed to this. That’s why there are two occurrences of the same file name in the file list. And you can see from the text we added in here, “This was added after the first restore point”.
So that’s what happened. So by looking at this, you can get a pretty good handle on what’s going on. I can also see there was a file that was added. It didn’t exist at all in the first state of the drive. And there’s another file, [similar manners] to that.
So by using this in larger cases, the whole idea is that I can get a quick idea, by looking at this column, what kind of changes were made, and also, as far as when those changes occurred. That’s why these other timestamps are here, these other columns, so restore point date, and when it started, and that sort of thing. So that’s what we’ve added as far as volume shadow copies go.
I’m going to keep on stepping here, and the next thing I want to talk about is some new capabilities we’ve added as far as some more internet-based applications, and one of those is Dropbox. So I’ve already added in an .ad1 logical file that has some Dropbox information in it. So I’m going to just make my way to the user – I have a user here, a Windows user called “rbadguy”, and under AppData and Roaming, there’s a Dropbox folder here. I’m going to go down to this folder called “instance1”, and in the instance1 folder, now I can see two databases of some sort up here, in the tree. But notice when I highlight the instance folder here… let me just relocate here for a moment. When I highlight the folder though, I can see that there are some .dbx files, some database files that are red, indicating FTK is telling me these are encrypted. And you can see when I click on config, deleted, and filecache, FTK reports back to me that these are encrypted.
However, we have the capability to get at that information if we know the Windows user’s password, which, in this case, we do of course – this is a demo. So if I want to decrypt this Dropbox information to actually see what’s there in FTK, similar to what we did before, we still have the Tools menu, ‘Decrpyt Files’ option. And as you can see, we’ve added in this option here for Dropbox. So that’s what I want to do here. I don’t really need EFS. And with the checkbox for ‘Perform Automatic Decryption’, I’m going to click my ‘Set Passwords’ button, and input whatever the password for this Windows user is.
And in this case it happens to be abc123. That reminds me of the Jackson 5 song. So I click that, and now I click my “Decrypt” button. And FTK gives me some feedback and says, “Hey, I was able to decrypt seven files with that!” Well, that’s cool stuff of course. So I’ll acknowledge that. Now, there’s still some processing going on, I think there’s some indexing and optimizing the database going on. But let’s also have a look at what that’s done for our Dropbox install. Notice now, instead of just the two files that I had up here in the tree, I have a couple more databases, including the ones that we were trying to decrypt.
So now, let’s go back up here. It’s still doing a couple of things. But let’s go back up here and look at a couple of things. Let’s start with the config.dbx file. So now, notice it’s got a child item that is a decrypted version of that database, and I can see that there is some information in the database. So I’ll jump down into my tables now that I can expand that, and have a look. And when I do, now I have access to the basic Dropbox information about this user, his email address, his account information. So I can see that kind of information there.
Also, there’s another database called “deleted”. This would have any files that this user has deleted. That also has been decrypted now. So if I jump down into the tables here, it shows me that there is a video file of some sort that was deleted here. And then, one more thing – I’m going to jump into this last database that was decrypted, filecache, and that is quite a few more tables there. Going to look at a couple of things here. Go to this database, and this just gives me an overall idea of the files that are in that person’s folder. So here’s a listing of all the different types of files that are in the Dropbox folder for that user. Another table in this same database, this mount_table table, if I look there it tells me these are the folders that are being shared on Dropbox.
So those are just a couple of examples of what you can do with Dropbox now in FTK6. So pretty cool options there, just assuming you’re able to obtain the Windows user’s password – that’s the real key for that.
Okay, let’s get out of there. Another option we’ve added in FTK is some Skype information – being able to interpret some Skype info. Skype of course is the messaging, phone utility now owned by Microsoft. So for example, if I go to the Internet/Chat tab now… and here’s a note for Skype. And right now I just see two things – I see the Chatsync DAT files, which do many times contain some messaging content. Now, basically, what you’re getting here is just a filtered text view of what’s in here. It’s a database, so there is readable text, but it’s also mixed in with a lot of other things. You have that by default, and then here is the Skype database, the main.db file, and you can see that this is a SQLite database.
So this… with FTK, you can process that as a typical SQLite database, but now, with the extra functionality, we can do a couple of other things. So I’m going to run additional analysis on that and under ‘Expand Compound Files’. With ‘Expand Compound Files’, not all the processing options are on here, so… and one that’s not on by default in this profile is Skype SQLite. So I’m going to run that one, and I will run that on the one highlighted item. And what you’ll see if you keep watching the containers here for Skype files, you’re going to see another container appear once we get far enough along in our processing.
This is going to do something similar to what you’ve seen with, I guess, Internet Explorer, the index.dat files, for example, and also something we do with the later versions of Internet Explorer. It breaks out the content of the tables and creates individual items. Hopefully it’ll give you a different perspective.
So notice now I have a new item here called “Skype Data”. And if I expand that, I have a couple of things here. Here’s my Skype account information, I’ve got Skype conversations, which is going to give me dialogues back and forth between my two users so I can see a whole thread of conversation there. And then I’ve got another container for messages, which can be individual posts, they can also be some phone type contact information, etc. So that’s been added functionality to version 6.0 of FTK for Skype.
So a couple of things there. Next on the list to show you is we’ve made some enhancements in the realm of column settings – column settings that will be very helpful for you. So let’s start here. I’m going to go to the overview tab, and I want to make my way under File Category to the Documents container, and more specifically I’m going to list my Microsoft Documents. I’m also going to move this pane over here, give me a little more real estate. And I’m going to take a look at a file… some of you who have had our classes have probably seen this file, Confidential Business Letter. “Great business opportunity for you.” It is a Microsoft Word document, and as you’re probably familiar with, if we go to the Properties tab at the bottom of that viewer pane, one of the areas that is parsed out is this Microsoft Office metadata. So I can see things like the title of it, the subject, the author, statistical information, last saved by, time and date stamps, etc. So that has been in FTK before, but what we’ve added is this ability to see this kind of information in the column settings. So I’m going to create a new column setting to show you that. I’ll just do a new here. And I’ll give it a name of… call it “MS Word Metadata”. So I’m going to grab a couple of things out of there.
First of all, I need the name of the file. Add that in. And then, we have a special node here for Office-specific features. I’m going to go there and get most of the things that I need there. I want create time, I’ll add in the last saved time, saved by, revision number, there’s a last printed metadata field. So those are some of the metadata-specific options for Microsoft Office. So I’ll save that, and then I want to apply that right now so I can have a look, and show you how that shows up.
Now that I’ve done that, all of these columns show up… for example, if I expand out the Last Saved By column… and actually, hey, there’s one that has my name in it. There’s a couple in there. So I can see this kind of information. How many revisions, that sort of information, the internal time and date stamps as well. So keep in mind with FTK I can send that out to like a delimited format, send it out to a spreadsheet, just to capture those properties, if I chose to go at it that way. So those are some more column setting specific to Office metadata that we’ve added in there.
Now, let’s look at a different type of metadata as well. I’m going to go up to the container for Adobe documents, and I’m going to create another column setting there. And let’s see. I’ll just call this one “Adobe Metadata”, and just three things I’ll grab here to show you that. I’ll put the name there, and then, let’s see… I’ll go the whole way down here, and there’s two column settings that specifically say “metadata”. Metadata Date Created and Date Modified.
I will add those in, and I want to immediately look at those as well. So here I have some timestamps created and modified as far as the metadata. So this would be internal to the document. This would be separate than the normal created, accessed, modified timestamps that the file system places on there. So that way, if there was maybe some question about the person changing time and date stamps, you might be able to compare those. And certainly I could just add in… for example, if I add in another column to this, if I add in the normal ‘Created Date’ column, for example, and apply that again, then I could quickly compare the file system’s time and date stamps to what was internal to the documents, see if there’s anything suspicious that pops out at me.
Okay, so that’s it for Office type metadata. Now, I did mention earlier the OCR option that we’ve added in. So let’s have a look at that as well. There are some column settings and some processing options here. So I have a little small folder here. Let’s see if I can find it there. Here.
So I have a folder here that has four graphic files in it. And so, as you can probably see, I’m going to focus on this one – meatloaf.jpg. So it looks like this was a printed document that somebody scanned, and it became a jpg file. Actually, let me go back to my normal column setting for this. So I can see FTK is reporting that indeed it is a jpg file.
So this is my view of the file right now. Also noting, if I go to my filtered view of this file, there’s really not a whole lot to see right now, because it’s a graphic file. So I don’t expect to see anything else. But let’s run OCR on this, optical character recognition, and let’s see what happens when we do that.
So I’ll go ahead and run that under Additional Analysis, Indexing Tools, OCR, and again, just mentioning here that we do have all of these other languages, 34, 33 or so languages, that are now supported by the OCR function. I can also choose what type of graphic files I want to process. Here I want everything that’s currently in my file list, and I’ll go ahead and run that processing. While that’s going on, while that’s cooking, so to speak, one little OCR-specific column setting I wanted to show you… again, I’ll choose Name, and then… OCR Graphic.
This OCR Graphic is a new one… and I’ll just name my column, and let’s see, let’s find that in the list, and apply that. So this OCR Graphic column – if you have a lot of files, this is going to give you feedback on how accurate it was or how well the conversion went, because your conversion is partially going to depend on the quality of the document that you’re scanning in here. So for the one that we talked about, the Meatloaf.jpg, it said 99%. So we should have most of the text OCR’d now.
And the way that I view that is, if I go back to the document, if I go back now to my Filtered tab, notice now I’ve got readable text that has been OCR’d. But you can see a couple of things that didn’t quite transfer – like here, it says, “% cup milk”. Now, if I go back to the original document, you can see it says, “3/4 cup milk”. So somehow that didn’t quite OCR. So that’s why I don’t have perfect score for that. Didn’t get everything, but certainly that’s pretty good.
So I have this document now, and now that I have that in an OCR format, if I needed to do some searching, this is now subject to the normal index search in FTK. So, for example, if I type in the word “eggs”, and search for that – let me move this down just a bit, there – if I search for the word “eggs”, I will see it does show up in graphics, and specifically in that file that I just OCR’d there, Meatloaf.jpg. So I can do index searches for the OCR text. So that’s a nice little thing there.
So that’s a couple of little tricks that we’ve added, a couple of little things as far as OCR processing. Next thing I want to show you is regarding Cellebrite. For that, I’ll need to close out of this case.
I have another case in which I’ve brought in a Cellebrite image. So, with the Cellebrite produce, you can create these .ufdr type images. So this is a result of your imaging in Cellebrite. Now, just looking at the file using the default processing in FTK, I get a listing of what’s in there, just filenames, and that’s pretty much it in this view. However, there is an additional processing option in FTK to let you actually view the contents of this. So with that file, that image file highlighted, once again I go up to Additional Analysis, and this would be under Expanding Compound Files again. There’s a processing option here for Cellebrite UFDR. So I’ve checked that, so I’ll go ahead and run that on highlighted items, which is only one. And we’ll let this processing go.
So as this runs, you’ll… once it gets far enough along the course, keep your eye up here in the Evidence Items pane, and you’ll see that will begin to populate with the structure, the directory structure, if you will, from the image. This will go pretty quickly – as in, now.
Now that I’ve done that, I can see two broad areas here – Analyzed Data and then there’s a second folder that says Data Files. So I’ve got that kind of information now. Let’s look at a couple of things, what we’ve done here.
What I’ll do here is… let me jump down to Calendar, for example. If I click on Calendar, now of course I can see individual calendar entries, and they come out in a pretty nice format. I feel like I’m doing one of those made-for-TV commercials, “But wait, there’s more!” In addition to that, we have a preset of mobile phone columns here. So, for example, I’m looking at the calendar, I’m going to choose the column setting Mobile Device Events. And when I do, then notice, here’s the name of my event that shows up here, and then Summary. So specific information to that – when it starts, when it ends, etc. Same kind of deal for calls. If I look at the calls here, there’s a column for call log, for the contacts that are on the phone, same kind of function as well, mobile device contacts, column setting. So I can see the different contacts there, MMS messages, the multimedia type messages. I can see these in this format.
However, you’ll notice that these also appear up here, and, for example, if I click on this one, I can see that there’s of course a graphic file that has been sent by way of an attachment in that mobile message. And in this case also, keep in mind, FTK will do its normal thing of also making a child item of the graphic file if it has excess information, and… let’s see, it looks like that doesn’t, for some reason. But that’s the kind of functionality that FTK will give you though.
So you’ll have whatever graphics or other files were sent that way, you’ll be able to view those as well. So nice functionality. So if Cellebrite is your tool choice, you’ll be able to see that pretty easily. There’s a different container there for SMS messages as well, and of course there’s column settings to go along with that. So if you’re trying to see the regular messaging, you can see that.
Then, lastly, to support that over on the Overview tab, under File Category, there is a Mobile Phone node or container there – Mobile Phone Data, Mobile Phone Files. So there’s the overall file that we looked at, the UFDR file to begin with, that image file, and then up above, I have all of the different breakout of the different types of data that we looked at just a second ago in the Explore tab.
Okay. Then my last order of business here is… David talked about the idea of being able to integrate the different tools, from working from the same database. So I wanted to give you an idea of how that works. To do that, I’m going to jump out of this case, and I’m going to go back to my demo case here. I’ll just open that up, and then I’ll leave that cooking there for a moment. So that’s where we looked at most of our information so far. I’m going to minimize that, and now, you can see on my desktop, I have a shortcut for launching Summation.
Summation is also installed in here. It’s sharing the same database as FTK is. And now I’ve already launched it down here, just to get to the login screen, to save a little bit of time. Now, I’m going to login the same account that I’m currently logged into FTK with. And give it a moment to do its thing. And keep your eye on the left pane there, or my… you can see the different cases I’ve created in FTK, they all show up here. Just to kind of reiterate, here I am back in FTK, and I’m currently in the FTK6 demo case, and if I jump back to Summation, I can see here’s my FTK6 demo case as well.
So it’s here, and I want to show you a couple of things from here, and I do need to do a little quick indexing, just to play along with that. If you notice here, in the middle pane, I get some overall information about my project or my case, there’s some statistical information that will start to be populated as I do things in Summation here.
But for the moment here, I want to open this up in Project Review mode. I’ll click on that little icon. Give that a moment to populate. Now I’m going to click on… I’m going to make my way to where different containers are, so under File, File Category… I am going to make my way to Documents, and more specifically, Microsoft Documents. So right now I’m viewing everything in the case in this file list. I want to see Microsoft Documents only, for moment.
I want to show you that if you do something here in Summation, it will show up in FTK as well. So it’s not like you have to duplicate your work. So now I’m listing just these 16 files that are Microsoft Documents, and I’m going to label some of these. So I’m going to go down, make my way to the label function here, I want to do labels. So I’ll create a label – I don’t have any yet. And let’s create a label for that. I’ll call this… let’s say I want to bookmark some things in FTK. So I’ll call this “Bookmark This”. I’ll choose a color for it, maybe blue. And I’ll save that. So I’ve created the label, but then I have to actually apply or actually tag some things and label those.
So in my file list, I’ll chose a couple of files here, and check those. I have three items selected. And let’s see – I want to assign a label to those files. So I’ll put the little check mark there to assign those labels. Oh, and the other thing – I probably should have done this, but I didn’t – is… oh, I forgot to add that to my column. That’s right.
So I’ve done that, but there’s… under here, I actually want that to show on my… they are labeled right now, but I did forget to do this part. So under Columns here, I want to make sure that the Label column actually shows up on my list. So let’s do that. So here’s Labels, I’ll move it over here, and just to make it easier to see for us, I’m going to move it up there to almost the beginning. So once I do that, I will refresh my view, and now, notice, here are my labels. “Bookmark This” for those three items. So my label shows up here.
So now that I’ve done that, I’m going to jump back to FTK. So here’s the same case in FTK, and I will make my way over to the Documents container. And that was Microsoft Documents. And notice this – here are my three files with that label on them. So pretty nice, just a seamless integration between the two, works pretty well that way.
Now, you can also go the other way as well. So let’s say I want to do something in FTK, and I want that to show up in Summation. So let’s do that. For this one I’m going to go up to the Adobe Documents container, and let’s say I want to create a label for all of these files.
So I’ll create my label, let’s create a new one. And I’m going to call this one “Please Review”. Call it that, give it maybe a nice, bright green color. So that’s my new label. And I want to label all the listed files with “Please Review”. So now they’re labeled in that green color there. Now I’ll hop back over to Summation, and let’s get back to… go back here. Oops. Let’s go here. So, my files again, and… give me just a second there.
Reset that. Okay.
And now… oops. Sorry, I think I kind of goofed that part up here. Let me go back to here. There we go. So I’ll clear away my Microsoft Documents, and let’s go back up here to Adobe, I’ll highlight those. And there’s my labels. So again, seamless going back and forth between the two. Pretty cool stuff there.
And then, the very, very last thing I want to show you is this – and I need to go back to my Home view for this part here – one of the cool things that you can do is what’s called a multi-project search. So as you can see, right now I have three different projects or three different cases here. And I can do word searches, keyword searches, for all of these that I select here. Let me do a search here for the word “badguy”. It’s running the search.
And I can see in my FTK6 demo case, I got 14 hits for that. Not bad. And you might see the other case, it says “LOTR”, as in Lord of the Rings. If I do a search for the word “Frodo”, notice I get a ton of hits in my Lord of the Rings case, but I also get some in my FTK6 demo case as well.
Anyway, let me go back to my original search, which was “badguy”. I’ll do that one again. And once I get my results here, I want to look at these search results in the review mode. So I’ll click on that. And this is actually going to let me see my hits in context, just like you would in FTK. So once my viewer pane updates and populates, it’s going to show me the hits and a little bit of the context around those. Just like you would do in FTK, it will highlight those but also show m the surrounding text.
And there it is there. This happened to be in an email, and badguy was part of that person’s email address or screen name. So it shows up that way.
So it’s really nice that you can have multiple cases, and because of the way the database works now, your searches will span those multiple cases if you choose to do that. Pretty nice feature.
Okay, so I’ve given you pretty much a whirlwind tour through here of FTK, some of the new features here. So I will get out of there, stop sharing my screen. And I think I am done, so I am going to kick the ball back to David – let’s see – by doing that.
Okay, David. I think you have it again.
David Cliff: Great. Well, Mark, thanks for the information. I’m sure that helped clear up a lot of questions that people had. For those that were asking questions in the Q&A box, we will be following up for anybody that we couldn’t get to today. We do have those questions. And for everybody else, if you do have any questions come up later on, or if you have any questions about pricing or you need to see a demo for any of our products, feel free to reach out to me. You can see my email address hopefully on your screen. I’ll give you a minute to write that down.
If I am not your direct rep, I will route that to the person who will be taking care of you. Like I’ve said, we’d be happy to get you pricing for anything with regards to malware, e-discovery, mobile forensics, endpoint forensics, enterprise forensics – which is multiple concurrent collections and e-discovery.
So thanks again, everybody, for joining. I hope you all enjoy the rest of your day.
End of Transcript