A mobile device is a goldmine of data; in an era where 98% of investigations involve some form of digital evidence and data volumes continue to grow exponentially, having the most advanced mobile forensic tools at your disposal – from the first extraction, to analysis, to management and eventually, in court – is critical. But with dwindling resources, time, and the ongoing challenges impacting today’s law enforcement operations, how does your agency keep up in a forensically-sound, efficient manner now and heading into the future?
Join us for an exploration of how MSAB’s complete mobile forensic ecosystem can dramatically scale up your forensic operations while automating and simplifying your workflow. In this session, we’ll look at ways examiners, managers, investigators, and analysts can harness the power of MSAB’s mobile forensic tools to reduce the evidentiary backlog and automate device extractions inside of our powerful XRY, XAMN, and XEC solutions.
Transcript
Kevin: Thank you for joining this MSAB presentation on the future of integrated forensics: ecosystem solutions for digital forensics investigations.

My name is Kevin Kyono. I’m a technical sales engineer with MSAB. I’ve been with the company for about a year and a half and joined them after a 27 year career with the San Jose police department. Well, let the SJPD, I was in the detective bureau for eight years. During those eight years, I performed digital forensics in the high-tech crimes unit for five years and was also the forensics team leader in the Silicon Valley ICAC task force for three years.
The last year and a half before I retired, I was also the ESD canine handler for the task force. The ESD canines are the dogs that can locate mobile devices, like cell phones, hard drives, thumb drives, and even the smallest SD cards. That’s my girl, Heidi, on the screen. And thankfully she was able to retire with me.
So just to provide a little background on the company, MSAB is a Swedish based company which specializes in mobile forensics. We produce a suite of products designed to extract and analyze the data from mobile devices. Our products are deployed in over a hundred countries across the globe, and we sell primarily to government and law enforcement agencies, and to a very small number of vetted private companies. We will never sell to companies supporting defense attorneys, or to unscrupulous countries. Whereas our largest competitor will sell to anyone who will pay them. You will never see our products in the hands of the bad guys.
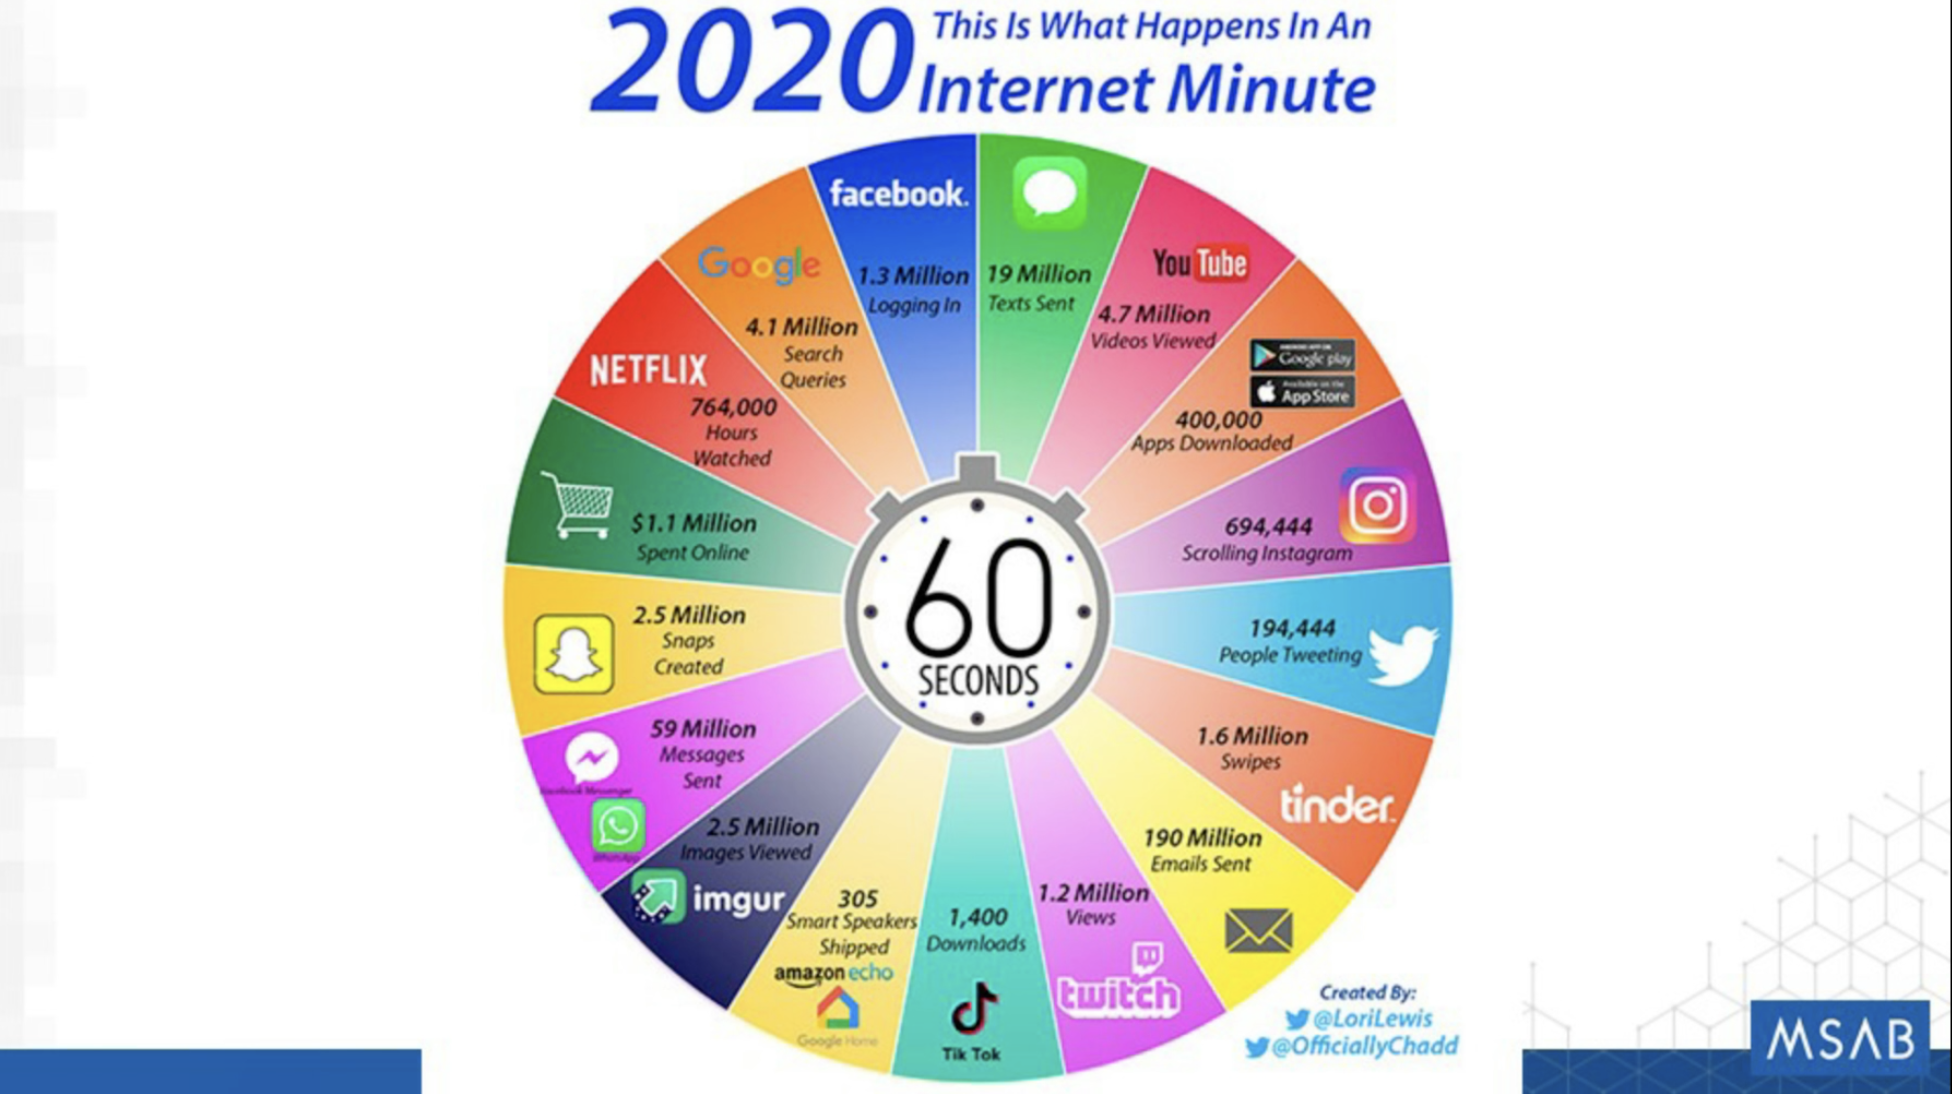
As you know, the use of mobile devices is increasing exponentially every year. It’s estimated that in the year 2020, over 51 exabytes of data were transmitted per month over wireless networks. That’s the equivalent of 51 billion gigabytes of data per month. Coinciding with society’s increased usage of mobile devices, crooks are also increasing their use of mobile devices to commit crimes or are in possession of their devices while committing crimes.

Our ecosystem of tools will help everyone from the frontline user to the administrator. We will help the frontline user quickly and easily find their actionable intelligence in a forensically sound manner that will hold up in any court of law. And we’ll also help the administrators manage that ecosystem, from gathering statistics to keeping the entire deployment up to date. There are other products out there that can also perform forensics on mobile devices, but I’m going to show you what sets us apart from the rest.
MSAB has multiple tools to assist you, but our primary ones are XRY, XAMN and XEC. XRY is used to extract the data from devices; XAMN is used to analyze that data; and XEC is there to help you manage your ecosystem. I’m going to give you a high level overview of our tools and how they can help your agency.
XRY is our mobile device extraction tool. So we can extract cell phones, tablets, drones, and even portable storage devices like SD cards. Now let’s show you a live demo of XRY’s features.
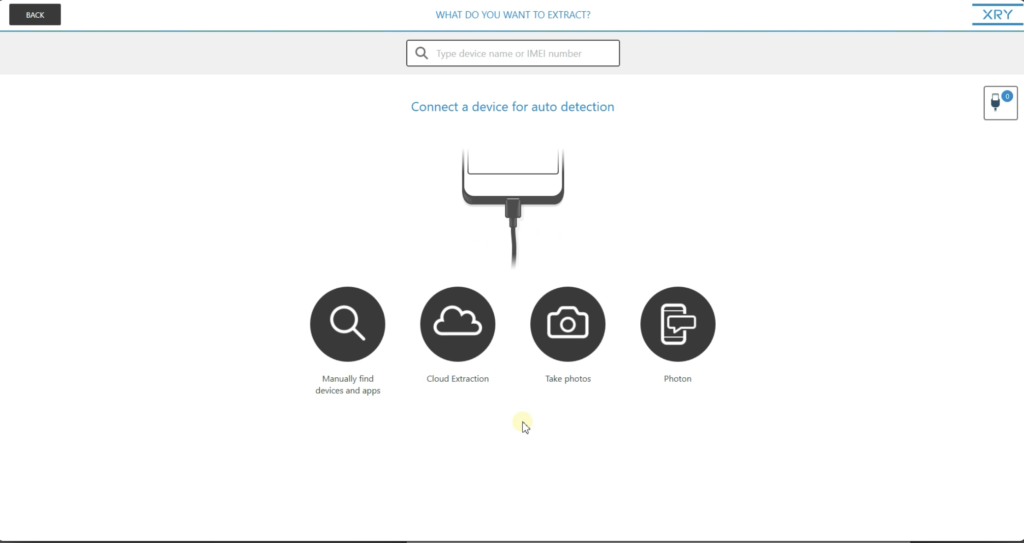
So what you see here is the splash screen for XRY. You can see how simple the user interface is. The main thing here is where you could connect to the device for other detection, you can manually search for a device or an app. You could do a cloud extraction, take photos or use Photon. And we’ll talk about Photon in more detail in a little bit here.
What I’m going to do here is search for a device manually, by clicking here in the text box. You see by this list, we support over 34,000 different devices. If I click on Apps, we have support for over 400 apps.
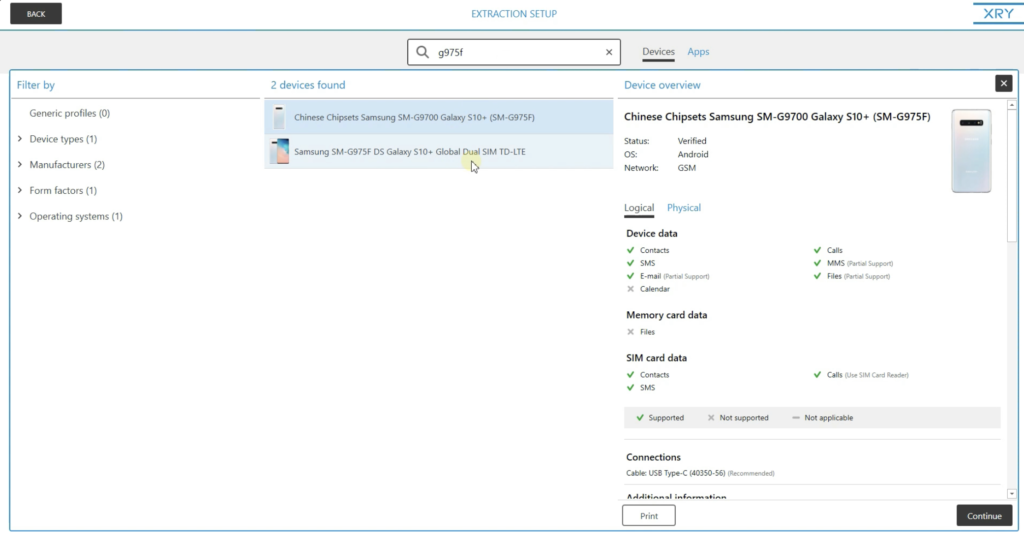
XRY also has support for thousands of locked devices. We have the ability to either brute force the passcode or completely bypass the passcode. So if I go back to the devices, if it start typing out a model number of a phone that I know we have full support for — if I start typing G975F — you’ll see it belongs to a Samsung Falaxy S10+, which is one of the newer Samsung phones. If I click on that device, and I click on physical, you’ll see the description it says ‘pattern lock can be bypass regardless if USB debugging is enabled or not.’ So what that’s telling me is that we can bypass this passcode and extract the data out of it.
XRY can also perform cloud extractions. So if I go back to our splash scree, you’ll see we have our cloud extraction button here. Click that. You’ll notice that all major providers of cloud data are supported here, from Apple and Google to Facebook and Snapchat. All the major players are here.
If you know the username and password, you can manually extract the data, or it’s also possible to automatically extract entire cloud accounts without even knowing the user account name and password by using credentials XRY locates during your device extractions. But the most common task you’re going to perform is a device extraction.
So let’s go back to our splash screen. I’m going to plug in an Android device and let XRY automatically detect it. See how quickly it identifies an Android device. Now it’s going to go to our extraction set up page. On the left column here, you’re going to see a tab that says pre scan data. If I click pre scan data, we’re going to be able to triage the device for identifying data and install that. And this is all pre extraction.
So you’ll see the manufacturer, the model name, serial number, what version of the operating system it’s running, as well as how much storage is being used. So it gives you a gauge on how much data is within that device. But very importantly, you’ll see a list of known apps. So these are all the apps that are installed on the device.
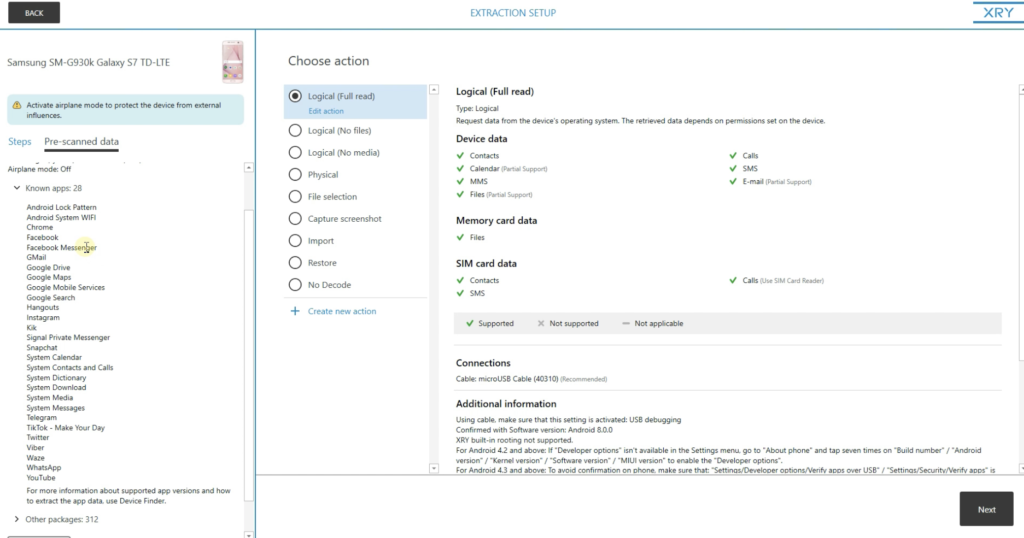
So this can be very important in triaging your case, especially if you have a stack of devices in front of you. Say for instance, the case you’re working is a Snapchat case or WhatsApp case. You can look through this list and if you don’t see Snapchat or WhatsApp on your list, you may want to put that device aside and move on to the next device so you’re not wasting a lot of time. This can quickly help you pinpoint what your primary device is going to be.
In the center column here, you’re going to see a list of tasks you can perform with this device. The most common are going to be a logical extraction and a physical extraction. So I like to use a law enforcement analogy when comparing logical to physical extractions. So your logical extraction is going to be like your knock and talk, or consensual encounter. You’re only going to get as much information out of that device as the operating system is going to allow you to take. In most cases it’s just about everything. Whereas your physical extraction is like a search warrant at a residence. You break down the door and everything in the house is available to you. Everything is fair game. A physical extraction is going to everything off of that device.
I’m going to select logical, click next. And then this next screen, you see the timespan customization page. You can specify the exact timespan for your extraction. You can select all, which will give you everything. You can select the last year, last 30 days, seven days, the last day, or you can do a complete custom timespan. You can completely customize the exact starting date and time to the end date and time of your extraction.
This is nice because it can help you stay within the legal boundaries of the warrant. The courts are getting very restrictive, especially here in California. And this feature can help you stay in a hundred percent compliance of that legal order. And this is a feature that’s exclusive to XRY. You will not see this feature in any other tool.
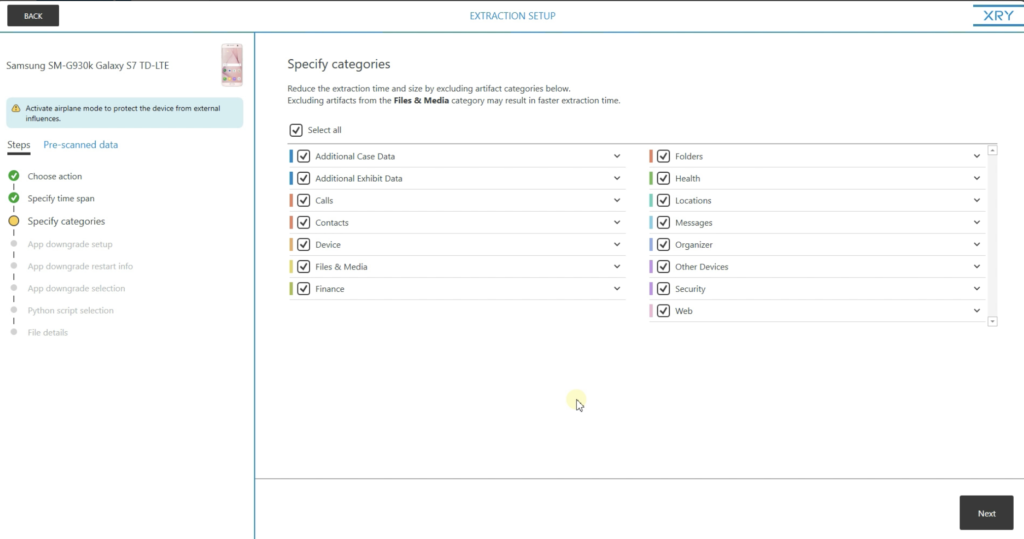
I’ll click next. And then we can come up to our file category customization. So from this screen, you can customize what file categories you want to include in your extraction. So if you’re only looking for pictures, you can just select pictures. Or if you’re looking for pictures and videos, you could just select pictures and videos. There’s a vast array of customizations you can do here. And not only will this save you time on the extraction, but it will save you time on your analysis too, because you’re only pulling out the data that you need for your case.
Okay, we’ll click next. And then at the next screen, we have our app downgrade page. So we have the ability to downgrade apps to previous versions. So as you’re well aware, apps are constantly getting updated, you know, sometimes every week, every two weeks, and it’s kind of a catch-up game for our developers. So we have the ability to downgrade apps. So if you do an extraction and you’re not getting the data that you know should be there, you can downgrade the app. So what we’ll do is we’ll downgrade the app to the latest version that we do support, extract the data, and then re-install the original version back onto the person’s phone. So we’re not changing any user created data. We’re just extracting that data that we do need. So everything will still be extracted in a forensically sound manner.
We’re going to select downgrade none, click next. This next page is more for advanced users. We have the ability to import Python scripts and run them during the extraction, but we’re not going to get into that at all. That’s more for the high end users. So we’ll click next.
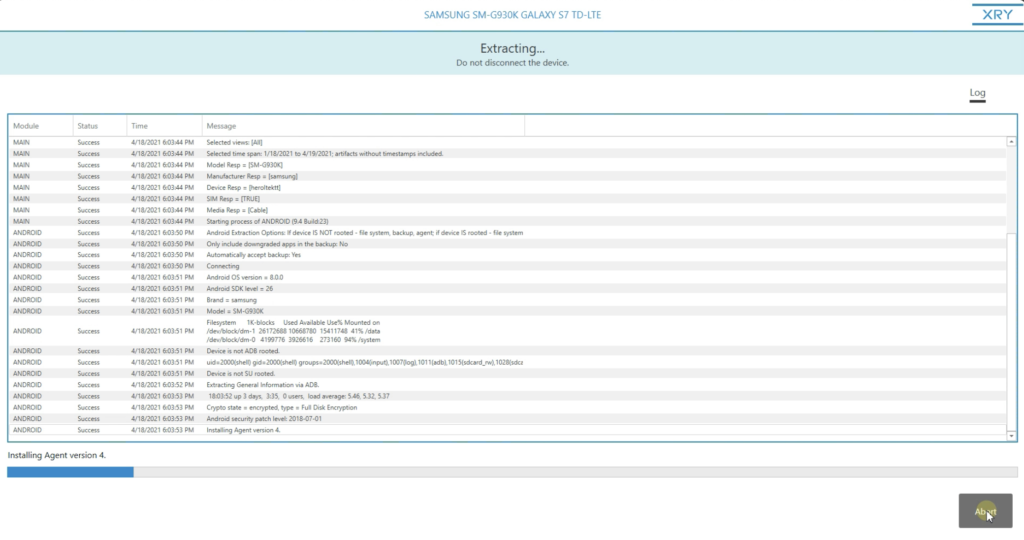
We enter our device details and our user info, and then click next. And now you’re going to see our extraction log. So we do a full audit log for transparency in what is taking place during the extraction. So everything is there. Every process that’s done on the device is going to be documented. So not only is this good for potential court purposes, you know, if you have a[n] overzealous defense attorney who wants to try and shake you a little bit on the stand, but it’s also good for customer service too, as far as if you run into any problems, you can give it to our customer support department. And they’ll be able to troubleshoot your log and find out why you may not have gotten a good extraction on your device.
So while this device is extracting, I can open up another XRY page and start another extraction. So it could be another device from the same case, or it could be another completely different case. It doesn’t matter. I can actually do three devices at one time. And what’s nice is that there’s no chance of the evidence being cross-contaminated, and there’s no degradation in computer performance. What’s nice about this, it’s a huge time-saver. Especially if you have multiple devices in front of you that you have to hurry up and get extracted. And once again, this is another XRY exclusive that you won’t see with any other tool.
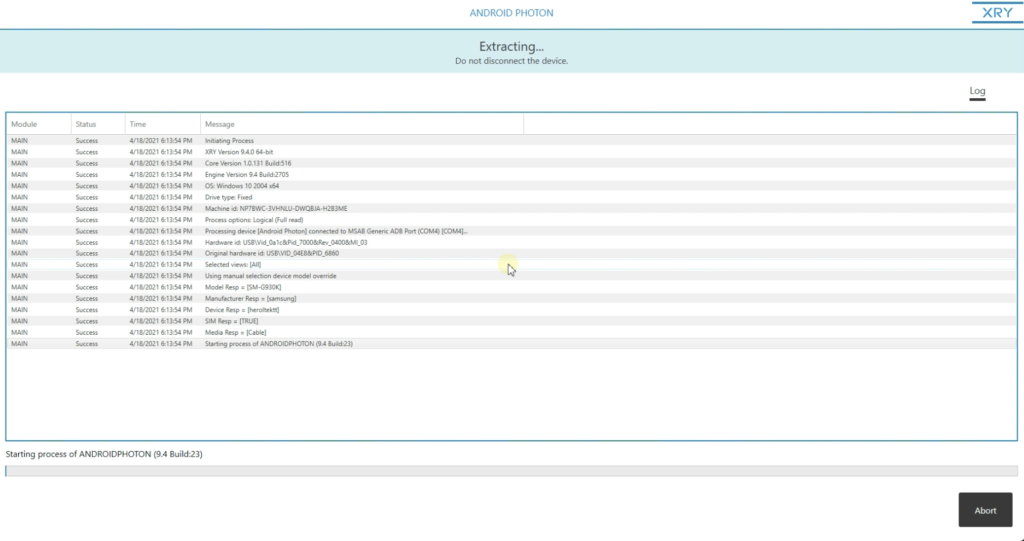
Another XRY exclusive feature that I want to show you is called Photon. So Photon is a screen capturing tool, especially useful for obtaining data from encrypted apps, but it can also be useful for just about any app. So I see now many communication apps now have end to end encryption, and your regular extraction of the device isn’t going to get that data. And the most popular encrypted apps nowadays are WhatsApp, Signal and Telegram.
So Photon will obtain this encrypted data. So I’m just going to run you through the Photon process really quickly here. So I’m going to click Photon, I’m going to click next, click next, I would enter my device information here, click next. The device is connected, and it already recognizes the device I’ve connected.
I’m going to select WhatsApp. I’m going to do a full contact extraction. I have the ability to customize the date range, but I’m going to select all. I’m going to select all the messages, all the calls. And in a second here, it’s going to come up with a list of all the contacts within my WhatsApp account. So you have the ability to customize a specific conversation, or you can select a couple of them, or you can select all of them. So select all.
Now, I’m going to share my device screen with you. This is the screen of my actual device, and I’m not manipulating it or touching it in any way. So XRY’s Photon has taken control of my phone and is now capturing screenshots of everything within my WhatsApp account. So it’s going to collect all my contacts, all my chats, dates and times are preserved. So everything’s going to be collected here and it’s going to make everything very readable and searchable within XAMN, when we get to XAMN.
One last feature I’d like to cover about XRY is file selection. File selection will allow you to quickly extract photos and videos and audio files from a device in a forensically sound manner without doing a complete device extraction. So this can be very useful when you have a reluctant victim, or a witness who doesn’t want to give up their phone, and you can finish in a matter of minutes and return the phone that same day.
So this was very useful when I was in ICAC and we were dealing with teenage victims. As you all know, a teenager’s entire life revolves around their phone, and they can’t bear to be separated from it. So this can be a nice solution for that. But it can also be used in major incidents where maybe multiple people have recorded the incident. Maybe it’s a workplace accident or some sort of major catastrophe where dozens, or maybe even hundreds of people recorded the incident. You can gather all of the devices, extract the video footage, and return the phones in a matter of minutes.
So I’m going to run you through a demonstration of that to show you how quickly it can be done. I’m going to plug in my device. I’m going to select file selection. Click next. I’m going to access the folder where the videos are stored, which is in the DCIM folder. I’m going to select a video.
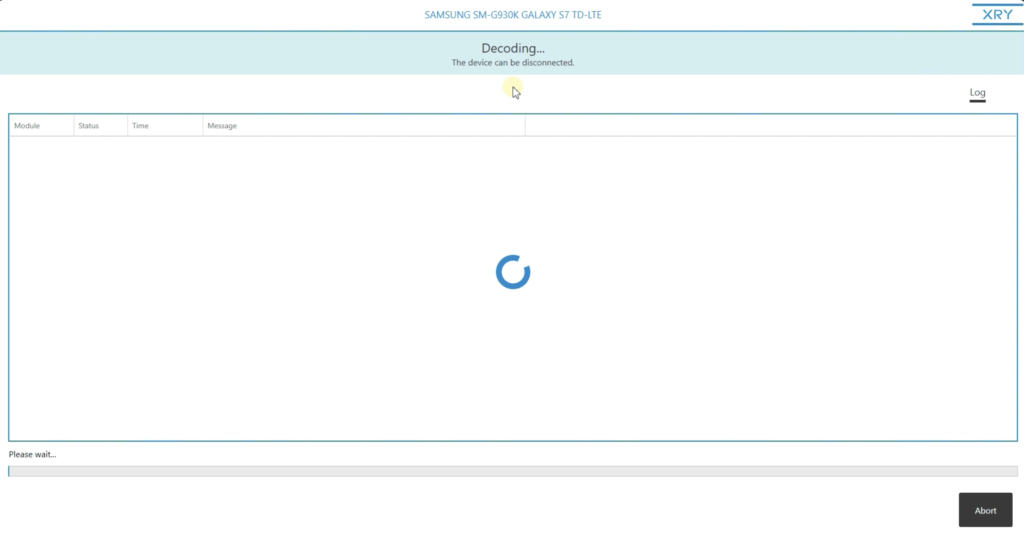
So say this is the video you’re looking for. I could select this file, go to my selected files. This is the file I selected, click next, enter my evidence information, click next, you see up at the top of the screen that says ‘decoding… device can be disconnected.’ So just as quickly as that, I will unplug my device, hand it back to the owner. They’re happy because they have their device back, and I’m happy because I have the evidence I need for my case.
Each time I create an extraction, whether it’s a device extraction or Photon or file selection, whatever it may be, it creates a single file with a .XRY file extension. What’s nice about this file is that it is a hundred percent forensically sound. You can go to court and say with a hundred percent certainty, that file has not been changed from the time you created the extraction to the time you did your analysis.
It’s because this file is fully hashed. It’s encrypted. And it’s also compressed, which is nice for storage savings. If you make a change to this file — say you use some sort of editing software and make a change to just one bit of data — it’s going to make that file where you can never open it again.
Our competitors, their files are not forensically sound, and potentially their evidence can be altered. Our evidence, there is zero chance of any alterations being made to our file structure.
Okay, let’s move over to XAMN. As I mentioned earlier, XAMN is our analysis tool used to view the data we extracted with XRY. It can be as simple or as complex as you want it to be. The interface is simple for less experienced users, but there are also advanced features for experienced forensic examiners.
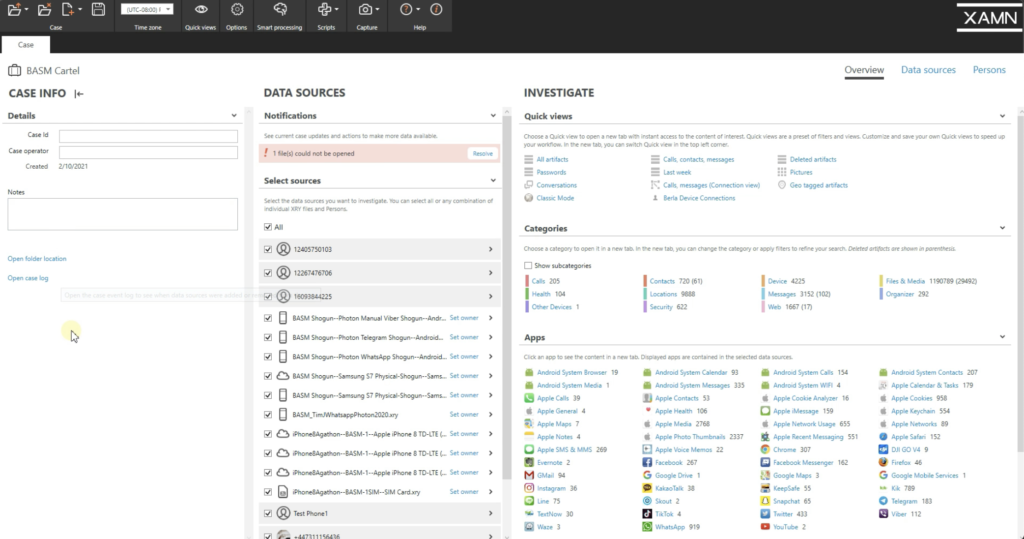
You’re now looking at the homepage of XAMN. So this is what a typical case may look like. You have your case info on the left. You can customize these fields any way you like. After you fill in the fields, you can minimize that. Now you have your data sources. So these are all separate extractions here, and it could be a device extraction, it could be call data records from a cell phone provider, it could be a drone extraction. It can be multiple types of evidence here, and those are all going to be listed here.
You also have notifications up at the top. So you notice I have a notification there. So if I click resolve, it says an unknown error occurred when opening this extraction. If I click on it, check integrity, you’ll see it has a bad CRC. So what this can mean is that this file has changed from the time I extracted the device. So as you can see, I’m unable to open that particular extraction, which is what I explained before: these files are forensically sound. And if there are any changes that have been made to the file, you can no longer open it.
Go back to my overview. Then you have your investigative column. So in this column, you could quickly jump to any of these categories of evidence. So you’ve jumped to pictures, conversations, calls, or messages. You have calls, locations, web history, just a vast array of categories. Or you could jump to any of the artifacts from apps that are installed on these devices.
In the categories, I can also show sub categories. If I click sub categories, you’ll see that opens up even more categories here, where I can really narrow down what evidence I want to look at.
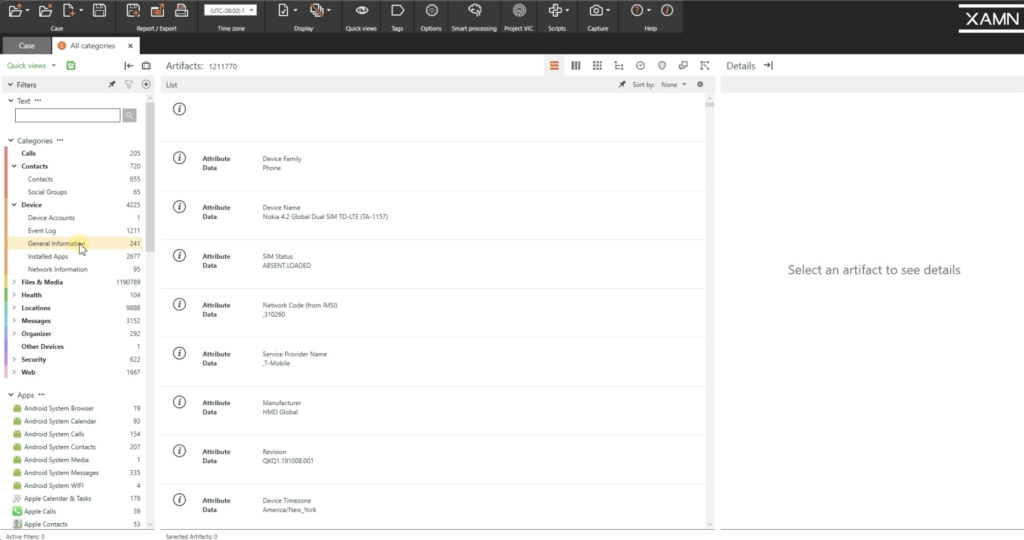
But normally I will click all artifacts, which will show all of my data all in one place. So now that we have all of our artifacts open, we can now really dig deep into what data is stored on all of these devices. On the left side here, you see we have all of our main filters. These are default filters. We have calls, contacts, and then I could open up contacts for even subcategories, devices — so you have all your device info — installed apps on these devices. Files and media are going to include your pictures, videos, audio files, documents. So you see here, we have over 500,000 pictures that were extracted. You have health data. So if these people are using any of these health apps, we can plot all that data. Locations may be big for your cases. If there’s location history, we can pull that up, look at it in map view, and you can see pinpoints on where artifacts are.
And if I just roll my cursor over it, you could see what the artifact is: messages. So it could be chat messages from maybe Facebook messenger, emails, text messages. If I open up the text messages here, open it in conversation view, so you can see all the nice little chat bubbles. I’ll open up one of the conversations, and you see here, we have our nice little to and from chats, people talking back and forth.
You see here, one of them is even in a foreign language. It looks like French. If I click on the message and look at the details pane, I can highlight that text, click translate only this, it’ll open up a translation window and then will translate that for me in a matter of seconds.
Going down a lot further, we have security. So this could be account information here. You see accounts here for Viber, WhatsApp, Facebook. So if I just click on Facebook, for example, you see all the account information for this person, a name, birth date, email address, phone number.

We have web history. We have your bookmarks, cookies, actual websites that these people have visited, and it could be a big one here, is Google searches. So you’ve look at these searches here, how to sell guns, automatic weapons, prostitution laws. These can be all critical for your case here.
And scrolling down a little further, a big one here is deleted artifacts. So I’m hoping you all know that deleted doesn’t necessarily mean deleted. So there could be a vast amount of valuable data here in your deleted artifacts. Like, we have pictures of a rifle, picture of a shotgun here, pistol, we have some location photos. These are all… technically they’re deleted, but these artifacts are still inside of these devices.
Now I’m going to show you the results of the Photon extraction I did with XRY. So if I select this little suitcase up here, it shows that I have multiple items of evidence open. Currently I could de-select them all. And I could just select my WhatsApp extraction.
So you see here, these are all the screenshots that were captured with Photon. These are all the chat messages within Photon — or within the WhatsApp account and captured by Photon — and Photon also pieces together the entire conversation. So if it’s a long conversation thread, Photon will piece it all together into one long string, which can be very nice for presentation purposes, especially if you’re going to court. The juries love to see these actual chat messages.
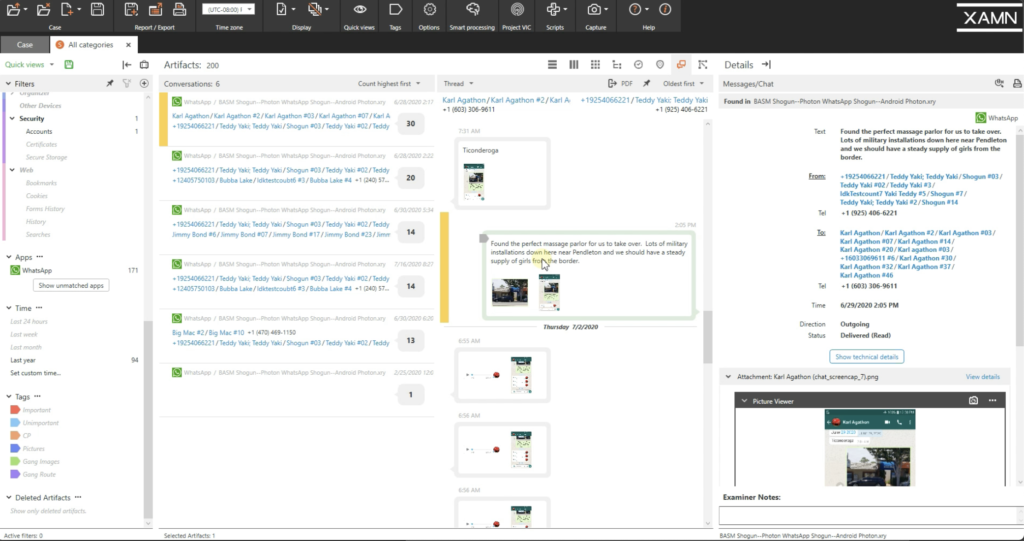
But you can also look at it in conversation view. So all of these conversations are now indexed as well. So all of the text from within these screenshots has been captured, and now you can see exactly what all that text was. And if there were images embedded with the message, it also captures that image.
And all this text is searchable too. So if you know some keywords you’re looking for, you could just type them up here in this little text search box and it will find that for you. So I see the word bandit. If I just start typing the word bandit, you see it populates automatically for me right here. If I click it, it’s going to pull up all the messages that have the word bandit in it.
So all of these messages that were pulled out of WhatsApp had been encrypted, but Photon worked around that and extracted everything out of the account.
XAMN can also help you clean up your case and make connections between the individuals. So if I close this out here, I’m going to click on persons, from our main case overview page, and say your main suspect, you know what his name is. Say his name is Teddy. If I type Teddy, you’ll see that XAMN has already identified multiple instances of this person. Maybe Teddy Yaki is your suspect’s name, it’s already found multiple instances of his identity within these devices.
So if I click this main one here, it’s showing Teddy Yaki is here with a name, a phone number and a Telegram ID. XAMN has automatically done that for me. But it’s also identified artifacts that thanks may belong to Teddy, but it isn’t quite sure. So I can go through and manually make these connections and have it included in my case.
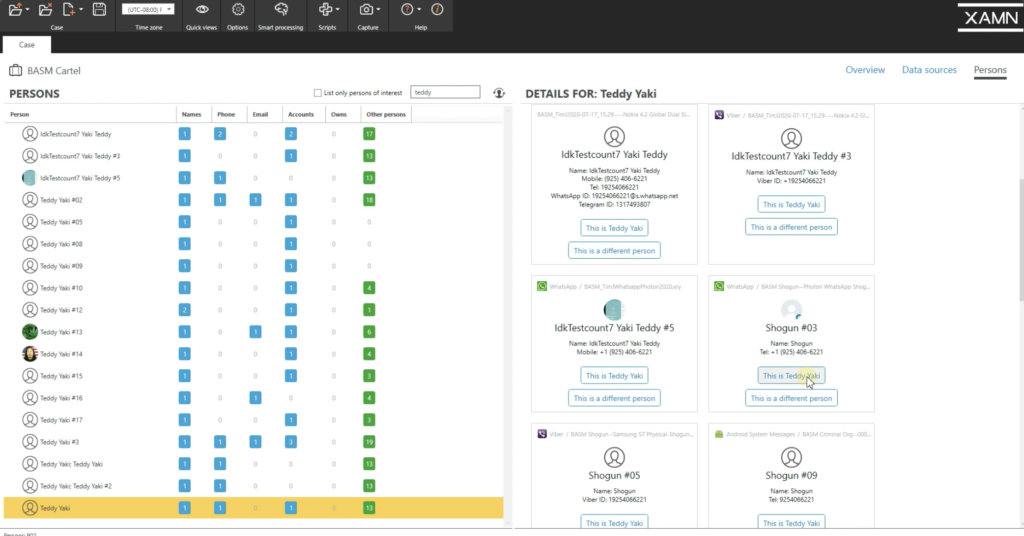
So if I say, yes, this is Teddy Yaki. I see here, this one, this says Shogun. So I now have a nickname for this person. Maybe I didn’t know this nickname before, but I have the same phone number identified with it. So I can say, yes, that’s Teddy Yaki. So now I have another name associated to him up here, Shogun.
So I could keep going down through this and find more connections. You see this one here is a big connection because it has multiple identifiers: phone numbers, email addresses, WhatsApp IDs, I can say, yes, that’s Teddy Yaki. And now look up the top here. I have all these connections here. I get it his nick ame, if I have to, and I can even add an image to it, say, this is my main suspect. I could now list him as a person of interest.
Say my other suspect’s name is Big Mac. That’s all I know him by. I don’t know his real name, but I typed Big Mac. So now I type Big Mac. I see multiple instances of Big Mac here. So if I just look at the main one, I have Big Mac and a WhatsApp ID. But as I go down, XAMN has already identified people that it thinks may be Big Mac. So now I possibly have his first name and last initial here, because this is the same identifiers here. I can say, yes, this is Big Mac.
Looking up here now, I have Big Mac and a possible name of Adam D. So after I added that Adam D, I now have another account here that it thinks might be associated. I now have a last name, Adam Dale. I can say, yes, that’s Big Mac. Now I have multiple identifiers here. I can now list him as another person of interest. So from this big list here, now, if I need to, I can just show persons of interest only.
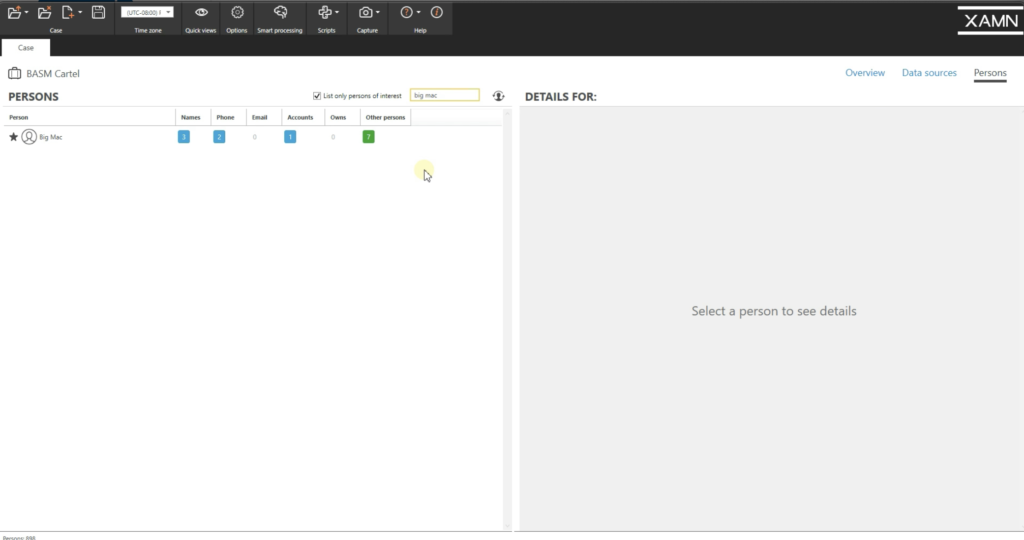
And if I erase this Big Mac here, now I see Teddy and Big Mac as my persons of interest. So if I go back to my overview, open all artifacts, I can open up a new filter with just my participants. And you’ll see here at the bottom now, I have Teddy Yaki and Big Mac, my two main suspects, and these numbers next to them show the number of artifacts associated with both of these people.
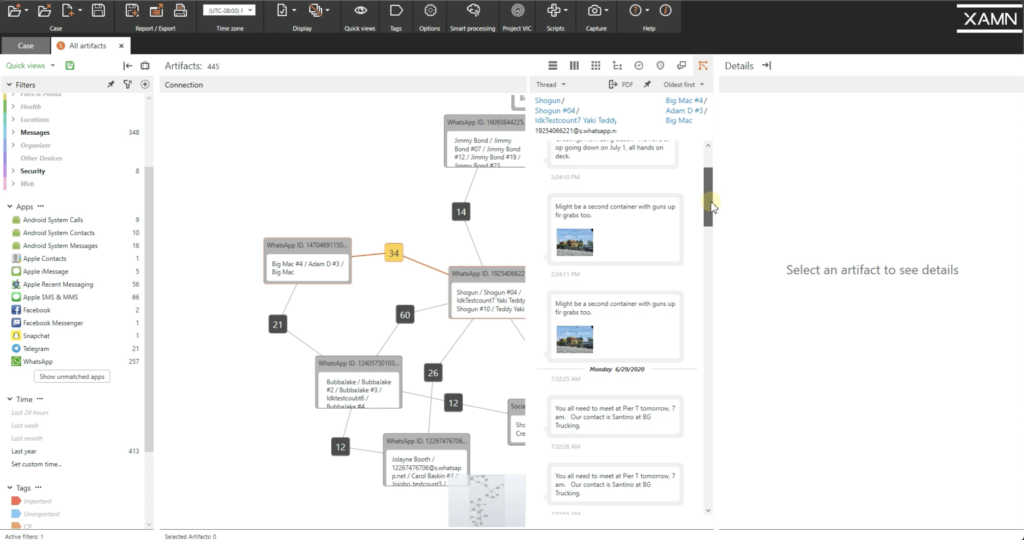
So if I click Teddy Yaki, you’ll see all of the artifacts associated with Teddy Yaki, all these conversations I just pulled out. Same thing with Big Mac. I can see that… all of his conversations as well. And not only are these conversations through WhatsApp — here, you can see WhatsApp — but it pulls out all conversations, whether it’s WhatsApp — this is an Android message — more WhatsApp… but it’ll pull it out from all of the different apps. If I highlight both of them, I could see both of their messages together. And if I look in connections view, I can see if there’s any connection between these people.
So in connections view, you can now see how people are interlinked. I zoomed in on our connections view, and you can see here, there’s a conversation, through WhatsApp, between Big Mac and Shogun, which is Teddy Yaki’s nickname. You see a number 34 between them. That means there’s 34 messages that took place between them, or it could be phone calls.
If I click on the 34, it’ll tell me exactly what those artifacts are. So it looks like it’s mostly chats. You can see the chat bubbles, the to and from, this is all between my two persons of interest. That’s just one nice feature to help clean up your case and make connections a lot easier in this jumbled mess of multiple extractions.
One last thing I want to point out in XAMN is our ability to import records from other sources. So if I go up here to the import tab, you can see we can import from other tools, like our main competitor, or we could impart call data records. So whether it’s from AT&T or Verizon, or any other service provider, we can import those records. Because as you know, these records can be difficult to read, and XAMN makes them easily read. If there’s location data within those records it will map it out for you, and you can also use the persons feature to assign names and even photos to the phone numbers you get in the CDRs. Because as you know, the CDRs don’t include any names to go with the phone numbers.
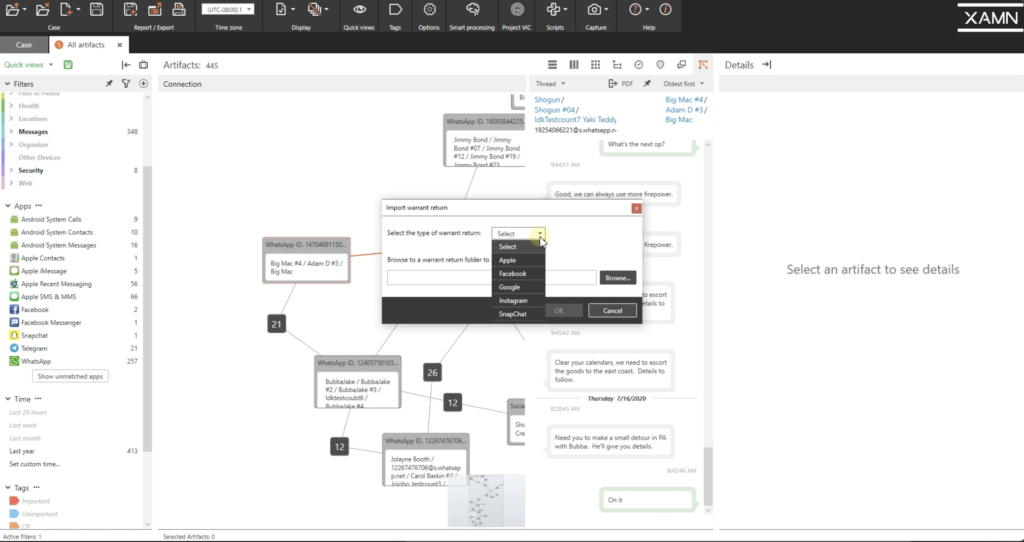
We can also import search warrant returns. So we currently support Apple, Facebook, Google, Instagram, and Snapchat. Many times, the service providers give you the data in formats that are extremely difficult to open and read, because these providers only care about being in compliance with their warrant. They don’t really care if you can read the data or not. So XAMN will automatically open the search warrant return for you, and make them easy to read and to sift through that data.
We just recently assisted a Bay Area agency with their Google search warrant returns on a child exploitation case, where the suspect was a person of trust with easy access to dozens and dozens of children. So that imported data helped the detective gather enough evidence to execute a search warrant at the suspect’s residence, and he eventually arrested that person. Without XAMN that detective would still be trying to open these Google search warrant returns, and there’d be numerous children that would be in danger.
That was XAMN. And finally, I’d like to cover XEC. XEC is our management tool, used to manage your entire MSAB deployment. You can keep tabs on all of your equipment, your users, your licenses. You can create reports, and these reports can be user accounts to see their activity, or it could be numbers and types of devices extracted. And you can even export these extractions to a central server with XEC. this can be especially useful if you’re using some sort of analytics software, like Nuix or Penn link, because we have full integration with those tools.
So on the screen now is XEC Director. Right now I’m on the users screen, and you can see all the users within your deployment. You can see their status, when their last activity was, what their experience level is. And you can edit that. You can generate reports from that. And you can add users here as well.
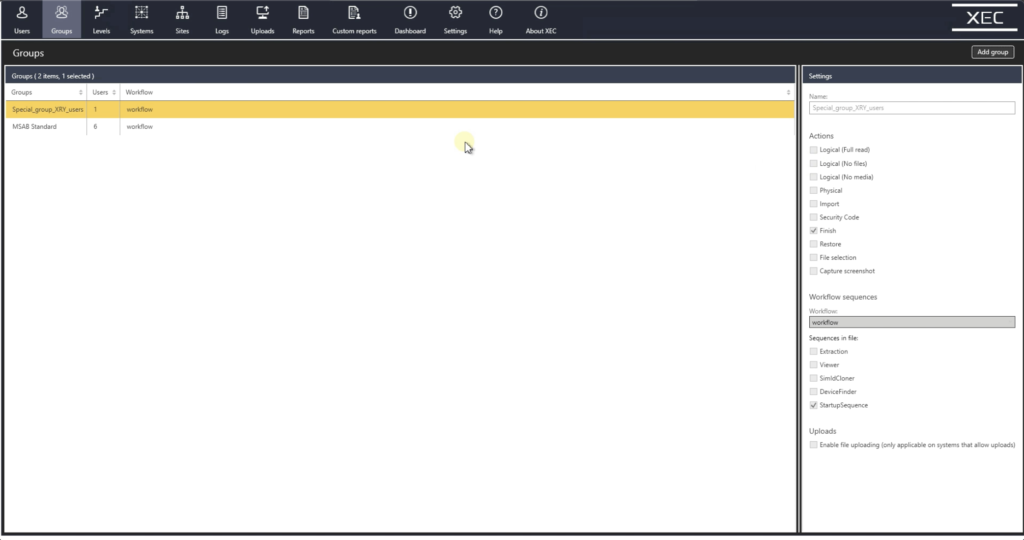
This is our groups page. So you can group your users into certain categories. Maybe you want to put all your detectives in one group and analysts in another group. Or you could group them by skill level. The choice is yours here as well.
Levels. So this is a description of all the different user levels. And this is not set in stone. You can customize these levels based on how you’d like to set up your deployment.
The systems page will show every system within your deployment. And this be especially useful if you have a very large department where your deployment is all over the place, or even a large task force, where you have systems in several different locations. And from the systems, it can see what type of system it is. We have kiosks, we have tablets, we have our regular office kits. You can see if it’s online, you can see what version number they’re running, how much drive space they have.
And very important here is the licenses. You can see if their licenses are current. If they’re about to expire, like this one here, or if it is expired, you could actually update the licenses here all in one place.
Sites, you can group your sites together, maybe have taskforce licenses in one place and maybe sexual assaults in another place, and high-tech crimes in another. You can create different groups for your sites. Your logs will show you all of the activity in your system, whether it is user activity or extraction activity, all of that will be here in your logs. And if I create a range, it will add activity.
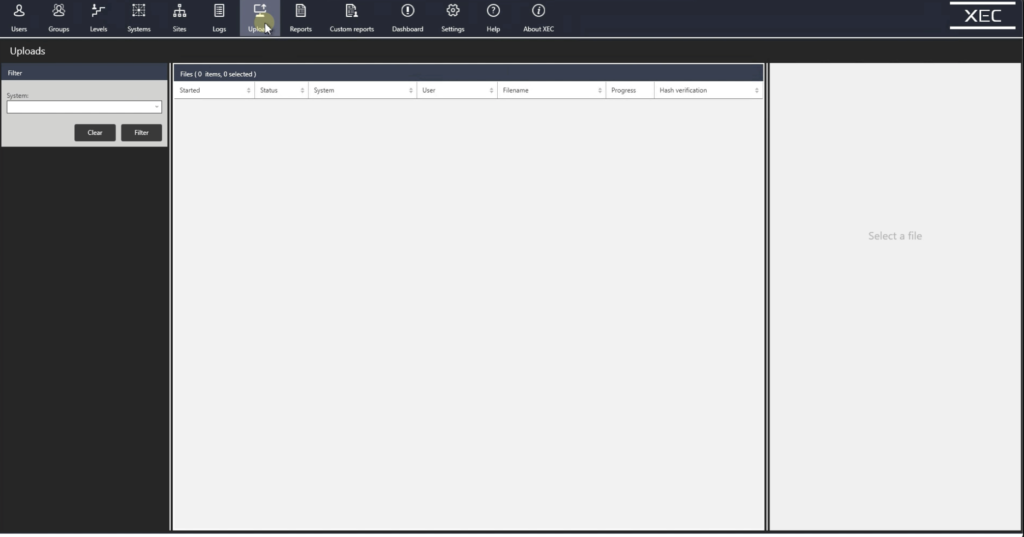
Uploads. If you have XEC Export, you can have all of your extractions saved in a central server. And this is especially useful if you’re using analytics software, such as Penn link or Nuix, that way all of your extractions are in one place and you can run analytics off of that. You can create reports, and I’ll show you what types of data you get from those reports, and the custom dashboard. I will show you that too. It’s not set up on this one, but I will show you what data will be within your dashboard.
What you see here are two sample reports from XEC director. The reports can show you a lot of useful information, whether it’s amounts of devices extracted, or types of devices extracted, maybe you could see trends in what your officers are running into, or it could be user generated report, where you want to see if a specific user is utilizing the product. Maybe they’re not having success with the product. Maybe they’ve only used it once in the last three months, where another location is very busy and could use another license. You can redeploy that license to another user or another location. So reports can help you quickly see the status of your deployment.

Now I’m showing you the dashboard of XEC Director. So with the dashboard, you could instantly see what’s going on with your deployment, whether it’s how many devices are being extracted, types of devices being extracted, user activity. You can see it all quickly and easily with just the press of a button.
Thank you for your time today. I know this was a lot of information covered in a short amount of time. My contact information is up on the screen, and you can get a hold of me anytime. And I’m also open to any questions right now in the short amount of time we have left.


