by Patrick Bell
This walk-through will show you how to Bruteforce LUK volumes using hashcat, how you can mount a LUK partition, and how we can image it once it’s decrypted.
Scenario: You’ve got a Macbook in. MacOS has been removed and Debian 9.0 has been installed. The suspect is using LUKS (Linux Unified Key Setup) full disk encryption to encrypt the disk. Password is unknown and we need a forensically sound method to access the data. This is how I’d do it:
Requirements:
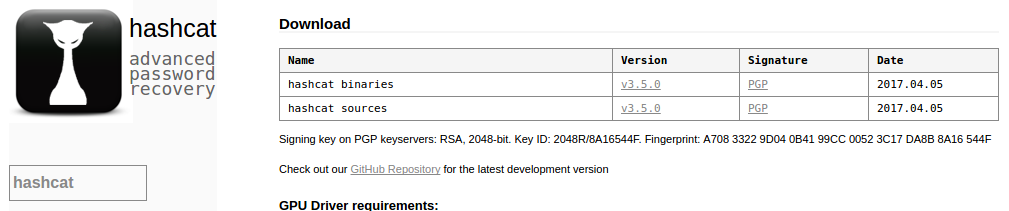
- Hashcat 3.5.0+
- FTK imager (optional)
- Encase (optional)
Skip to step 5 to just see the hashcat step.
Skip to step 6 just to see the mounting and imaging.
1. Image the Macbook and load into EnCase
Imaging the hard drive can be done forensically sound via thunderbolt, another Mac, and target disk mode. This is fairly easy and common so won’t be detailed here.
Once we have an evidence file loaded into EnCase we can see that the boot partition is visible but hda2 appears as Unallocated Clusters in an EXT2 partition.
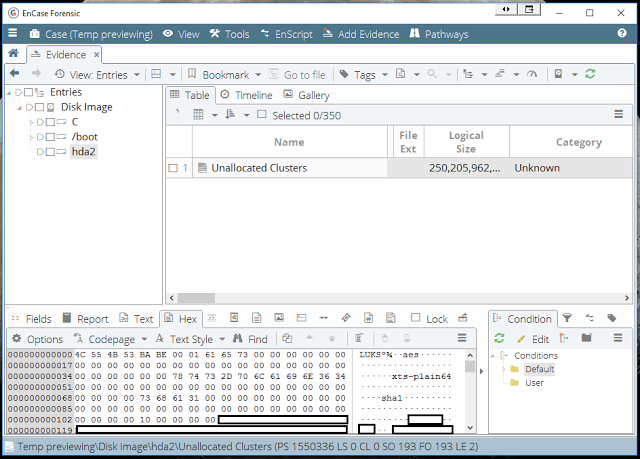
We can see however the LUKS header, which is telling us it is AES encrypted using XTS-plain64.
2. Export the encrypted partition
To decrypt and mount this we need to export out the encrypted partition as a raw image. I found the easiest way to do this was using FTK Imager, either by mounting the partition in as emulated disk with EnCase or more easily by just loading the image file into FTK Imager.
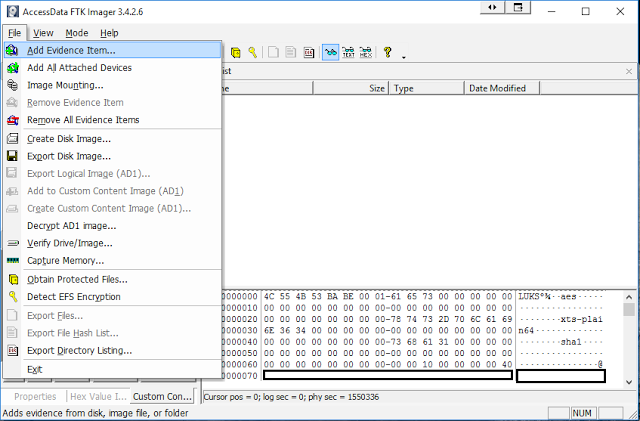
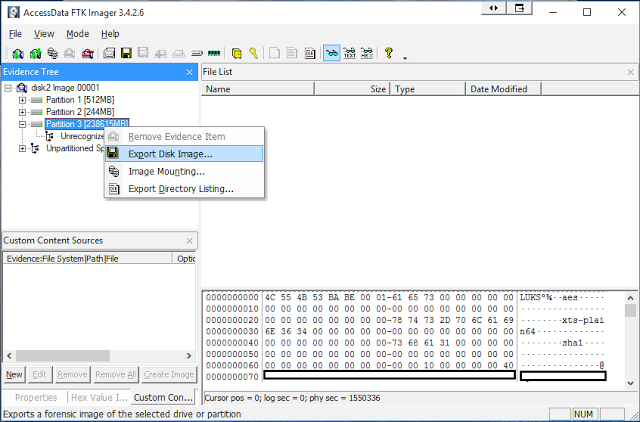
Once loaded, right click on the encrypted partition and choose “Export Disk Image”.

Set your fragmentation to 0.
3. Partition Header – Hashcat ‘hash’ file.
We will be using hashcat, a password cracking software available for both Windows and Linux.
Usually hashcat works by cracking a hashed copy of a password, so we would normally load in a single hash or a list of hashes in a text file.
LUKS is different in that it does not store this Master Key used to encrypt the data in one location. Rather is it stored in Anti-forensic (AF) Stripes. AF stripes cause the key to be stored across a larger disk area so that overwriting one stripe causes all the data to be lost. Darell Tan has an excellent write up and explanation of this.
This is to say that we therefore need to run hashcat over the partition, with hashcat being clever enough to locate all these stripes. Luckily hashcat only needs around the 1st 2MB to crack the password, which means we can make it much more portable by segmenting this away.
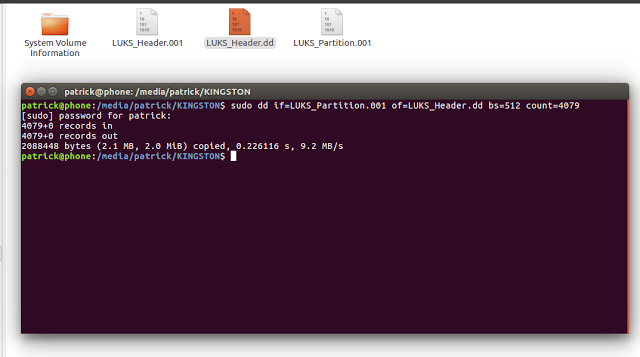
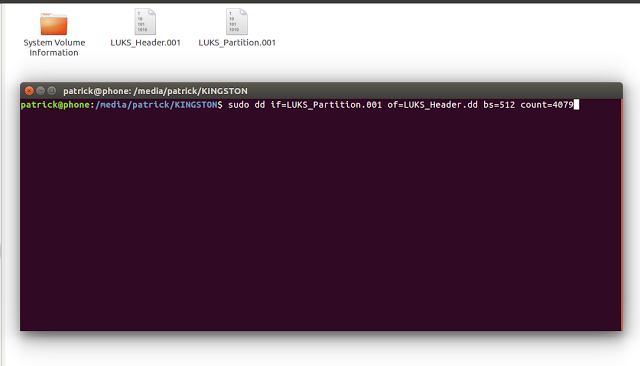
You can create a 2MB header using FTK imager by fragmenting the image to 2MB, cancelling the imaging as quickly as you can, deleting the 100 or so 2mb fragments created and leaving just the first one. Alternatively when you’ve moved the full partition to linux you can use this dd command:
sudo dd if=LUKS_Partition.001 of=LUKS_Header.dd bs=512 count=4079
The FTK way:
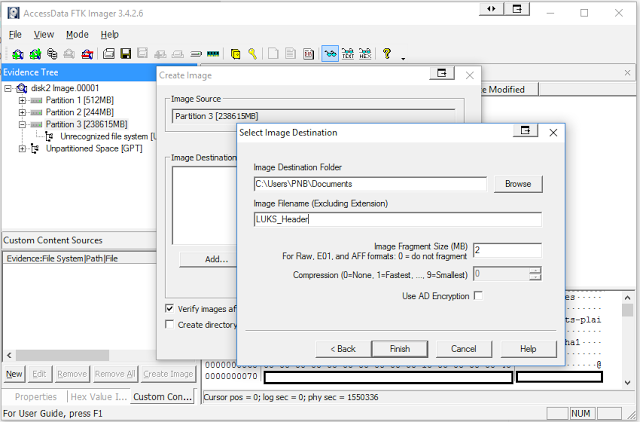
Fragmentation set to 2.

If you prefer the dd method:

4. Hashcat
Now we’re going to use hashcat. This step can be done in either Windows or Linux, but for the sake of convenience I’m using Linux as we’ll need that to decrypt the partition and mount it.
You’ll need a copy of hashcat 3.5+, either set as a variable on your system or just extracted into the folder you’re working from like I did.
Hashcat has many options to cracking a password, from straight bruteforcing to dictionary attacks, rule based attacks and mask attacks.
While bruteforcing is the most common when it comes to cracking, it is the most inefficient, most likely taking months or centuries (or a millennium) to crack. Rule-based attacks and mask attacks can massively increase the effectiveness of your attack and dramatically lower the cracking time. They are the best way to crack, I recommend learning them. For more info look in the hashcat forums.
For the sake of this tutorial I already know the password for the container, so I am using a dictionary attack with a custom dictionary file (a text file with the password in). There are many good dictionary files you can use based on known passwords, Rockyou is a good one and can be downloaded along with others here.
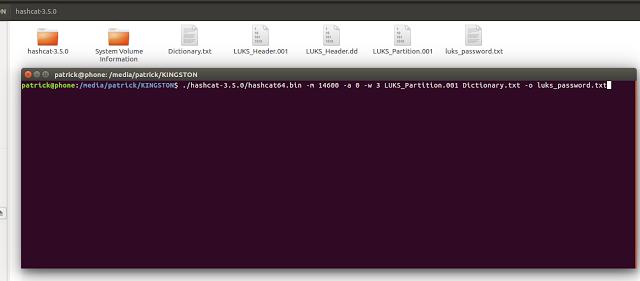
Once you have the partition image and the header image copied to linux and hashcat is ready, you want to run this command from the terminal, from the location your image files are.
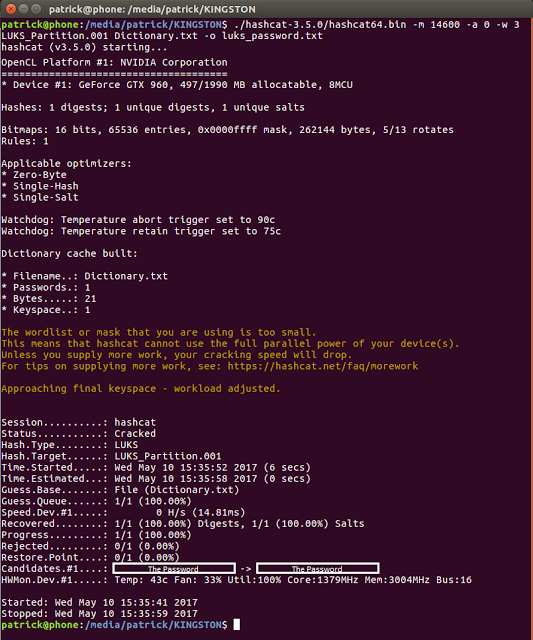
This runs hashcat using a dictionary attack, using a dictionary called “Dictionary.txt”
./hashcat-3.5.0/hashcat64.bin -m 14600 -a 0 -w 3 LUKS_Partition.001 Dictionary.txt -o luks_password.txt
The general hashcat syntax is:
hashcat <METHOD> <HASH> <DICTIONARY> <OUTPUT>
In this instance:
-m = hash method - 14600 for LUK encryption

-a = Crack method - 0 for standard dictionary (3 for bruteforce)

-w = resource allocation - 3 for high

LUKS_Partition.001 = Encrypted partition

Dictionary.txt = dictionary

-o = output luks_password.txt
You should see this result (I’ve obscured my password):
5. Decrypting the partition
Now we have the password we can decrypt the container! Using cryptsetup with the command:
sudo cryptsetup luksopen LUKS_Partition.001 Decrypted_partition

Enter your admin password, then enter the LUKS password provided by hashcat. This will create a ‘file’ of the decrypted partition at: /dev/mapper/Decrypted_partition. Using ls we can see it:
![]()
6. Mounting the partition
First create a location you want to mount it to:
sudo mkdir /mnt/Decrypted_partition
if you try to mount it with:
sudo mount /dev/mapper/Decrypted_partition /mnt/Decrypted_partition
You’ll likely get the error of “mount: Unknown Filesystem type”
![]()
If so, just run:
sudo apt-get install lvm2
then:
sudo lvscan
This shows you the logical volumes in the decrypted partition and we can now mount the root partition with:
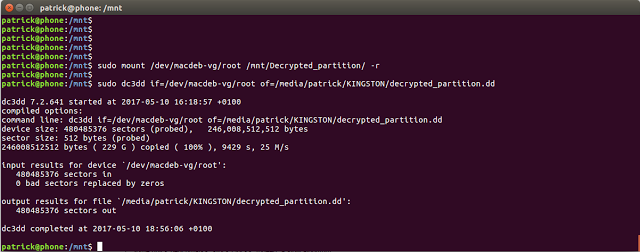
sudo mount /dev/macdeb-vg/root /mnt/Decrypted_partition –r
-r FOR READ ONLY!

We could also easily mount the swap partition using the same mkdir and mount command.
7. Browsing the data
We can now browse to the /mnt/Decrypted_partition and see our previously hidden data!
![]()
8. Imaging the de-crypted partition
Imaging the decrypted data is now easy using dd or even better dc3dd! But make sure you point it to /dev/mac-deb-vg. I used the command:
sudo dc3dd if=/dev/macdeb-vg/root of=/media/Patrick/KINGSTON/decrypted_partition.dd
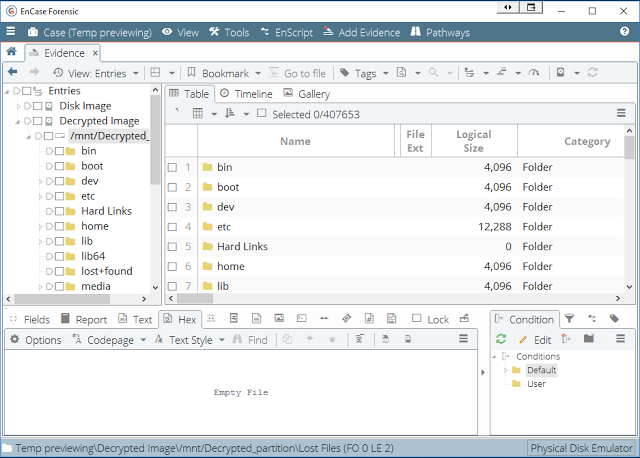
9. Viewing it in EnCase!
With the decrypted partition imaged, we can load it into EnCase or any other tool and see that the data is now readable.
Thanks again for reading. If you have any comments or suggestions, please comment them below!
About The Author
Patrick Bell is a Digital Investigator for West Yorkshire Police. Graduating in 2015 with a 1st Class Hons in Computer Forensics BSc, he is skilled in both mobile and computer examinations. You can contact him at: [email protected], find out more about his skills and experience on LinkedIn or follow his Practical Forensics blog.


Yes, but if someone uses a secure password, it would take centures to crack it. In your practice, how long would it take with a regular guy passwords?
Nice article!
Just one minor thing: your first dd-command seems to contain an error as ‘count=4079’ should probably read ‘count=4097’ as the size required by hashcat is 2MiB + 1 sector AFAIK.
A quite convenient method to export this data with a forensic tool running on windows without any hazzle might be WinHex or Xways as it directly allows to define a block-start, jump a defined number of sectors (4097), define a the blocks end there and select ‘Edit’ -> ‘Copy Block’ -> ‘Into New File’ (also accessible by the shortcut CTRL + SHIFT + N).
Is it possible to use the hashcat Rules in combination with LUKS cracking ?
You can also give a try to SKUL:
https://github.com/cryptcoffee/skul
http://crypt.coffee/research/luks.html
After grabbing the LUKS header from the LUKS partition, running Hashcat 6.2.4 and a few older versions of 4, I get “Invalid LUKS version. No hashes loaded” Any suggestions?