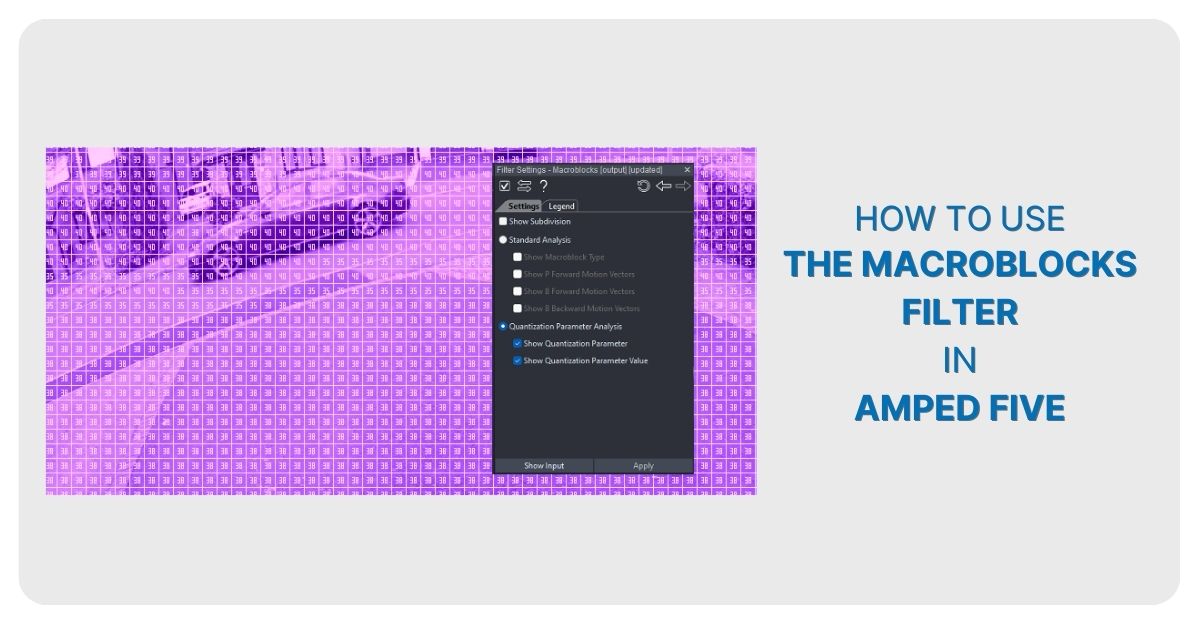
In this latest article, David Spreadborough, a Forensic Analyst at Amped Software, looks at why compression is a factor when analyzing video before giving us a run-through of the Macroblocks filter in Amped FIVE. Read on to learn more.
You may find yourself with some CCTV or Body Worn Video (BWV) evidence and have questions related to a small part of the visual material. It could be part of a person’s face, a logo, a mark, or a scar. It could be a small movement from a person or the position of a tyre on a road’s surface. When evaluating the reliability of the perceived object or movement, the creation of that video must be understood. This is because compression plays a significant role in how a video is created.
CCTV uses video compression to reduce the data to a manageable size. Part of this compression process places small parts of each frame into blocks, known as Macroblocks. Understanding these is a vital part of video evidence evaluation when small objects or motions form part of the investigation.
Video compression is very, very clever. Its purpose is to shrink massive amounts of data so it can be transmitted and stored easily. How this reduction is done however brings several challenges from an evidential perspective.
The first is that only some of the visual data is retained. A lot gets discarded, especially high-frequency detail and color information. The second is that some of the data you see when the video gets played back is created dynamically upon playback. Lastly, to aid in the storage of data, parts are grouped and then managed together. They must, therefore, be considered together.
If some of this is new information, you may now be questioning how you have never noticed it before. Well, this comes from the fact that our visual system deals with color and motion in a very specific way, and the compression methods use this to their advantage. The person who configures that encoder will discard as much as possible before it becomes noticeable.
It is a Forensic Video Analyst’s job to verify that the decoded data can be relied upon for the questions being asked. If the question is whether a vehicle traveled along a street, then analysis at the block level may not be required. However, if it relates to the shape, position, or color of an object on that vehicle, then compression will affect the reliability of that data.

Many of you would have heard of the pixel. This picture element (that’s what pixel stands for), with a color and brightness value, forms the smallest part of a video or image. With no compression, the data required to form the image would have to retain every pixel (px) location, along with the values for the color and brightness. For a single image, this would be large. For a video, made up of thousands of frames, the size would be huge.
This is where compression has to be used. For your average MPEG-based CCTV system, the general process is:
- Only retain one piece of color information for every 4 pieces of luminance (brightness).
- Limit the amount of luminance and color values available.
- Separate the entire frame into 8px X 8px groups.
- Place the pixel groups into 16px X 16px Macroblocks.
- Identify the changes in each Macroblock and code them according to the changes.
- Code the entire frame with new blocks for every set number of frames as a reference frame.
After loading a video into Amped FIVE, it is important to analyze how it has been encoded.
The File Info Tool gives us a quick overview:
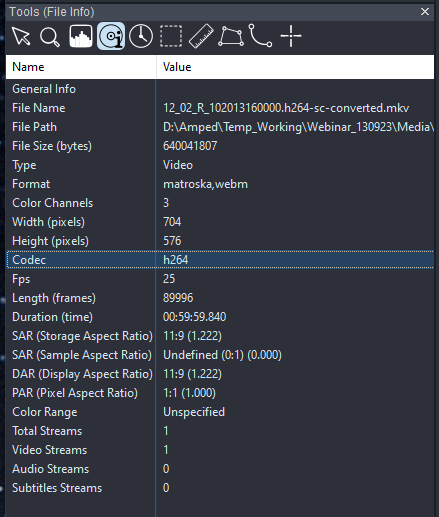
After establishing we have a video with MPEG encoding, in this case, H264, we can utilize the Macroblocks filter to view the coding at the block level. The filter is in the Verify category.

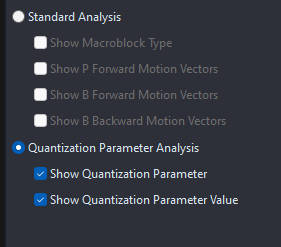
The filter has several options, all available under the Settings tab.

The first option is to show Subdivision. This places a 16px X 16px grid over the image. Following this are two Analysis types, with the first being Standard Analysis.
Here we have the first frame (frame 0) of our H264 video. We have selected to show the Subdivision and Macroblock type.
You can see the block types are presented using different colors. The colors are referenced in the Legend tab.

The first frame has been coded with all intra-blocks. Most have been sub-divided into smaller blocks because of high-frequency detail, but a few have been coded as a single Macroblock. You will notice that they are on areas with low detail. This frame is then marked as an Intra (I) Frame.
The next frame reveals something different.
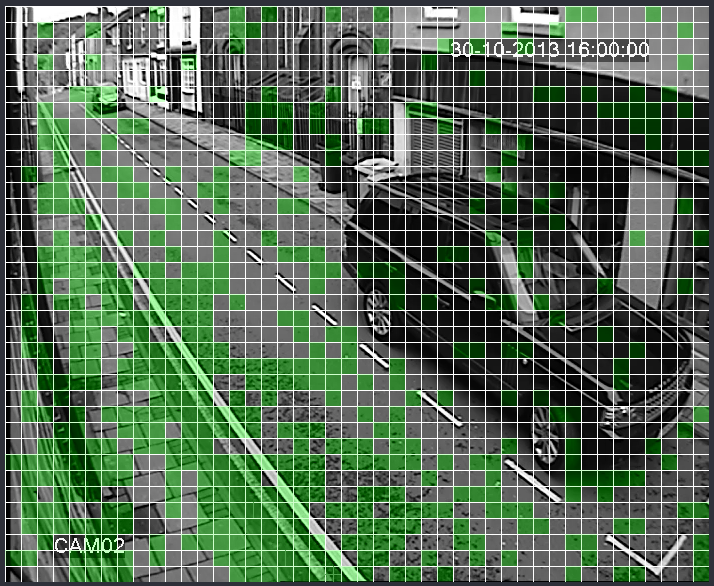
Many of the Macroblocks have no color reference. These have no coding. They are simply copied from the previous frame. The other Macroblocks have a green overlay. These are referenced from the previous frame and show that changes have occurred but they have not been enough to re-code the block with completely new data. Those changes are instead predicted from a previous reference frame. This type of frame is then marked as a predicted (P) frame.
A certain number of frames, which is set during the encoding stage, will start with an I-Frame and then have several frames afterward. This is called a Group Of Pictures (GOP).
You can visualize the GOP in the Advanced File Info.
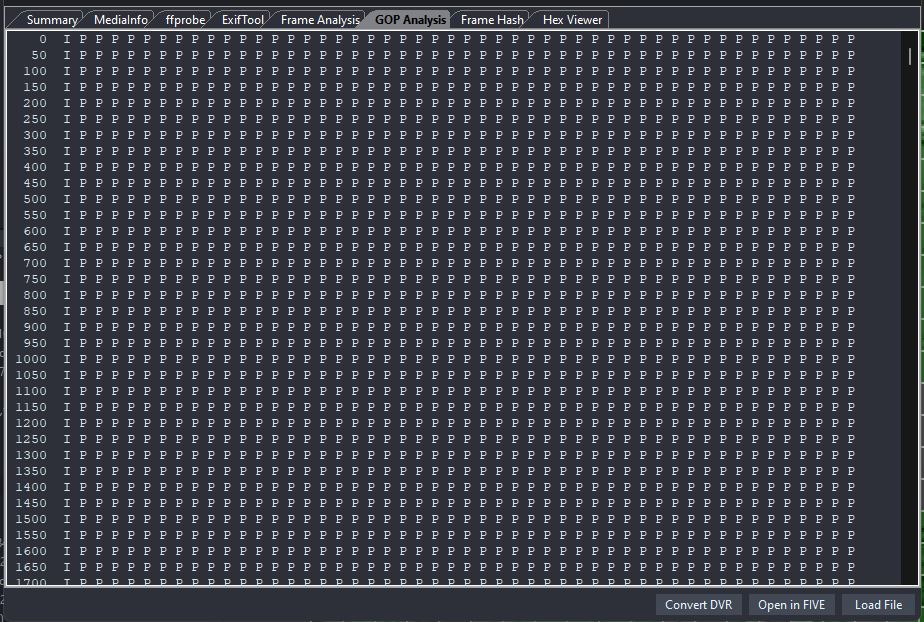
Here we have a 50-frame GOP, consisting of I and P-Frames.
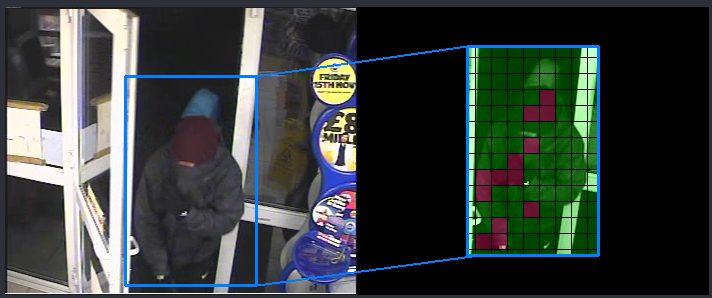
Let us have a look at a frame when a vehicle travels down the road.
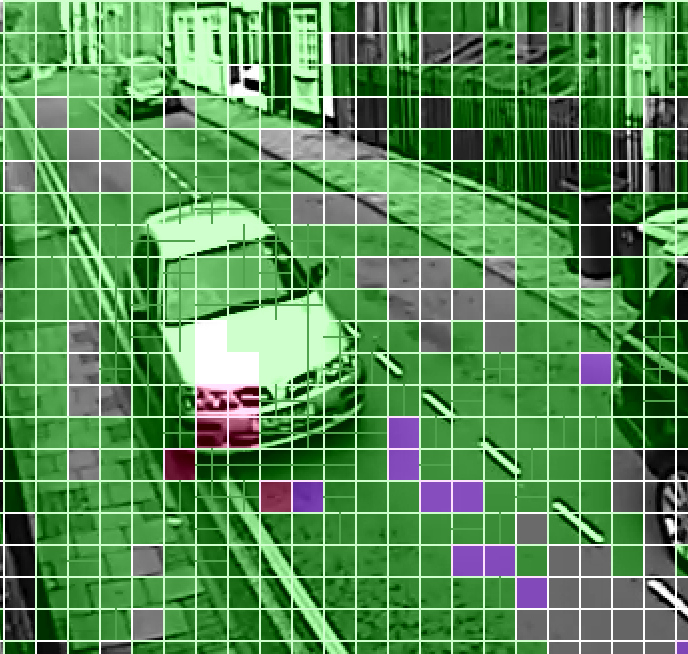
Although this is a predicted frame, we can see that some of the Macroblocks are newly coded. They are given a red and purple overlay.
Newly encoded data may result in less prediction error, and as such provide more reliable data at the block and pixel level. However, there is another important factor surrounding the coding of the block, and that’s the amount of data it can use to recreate it. The less data, the lower the quality. This topic will be discussed in more detail later on in this article. For now, it is worth looking further at how Macroblocks can be moved.
Let us use a different piece of footage for this and then visualize the motion vectors by selecting the Show Motion Vectors option from within the Macroblocks filter settings.
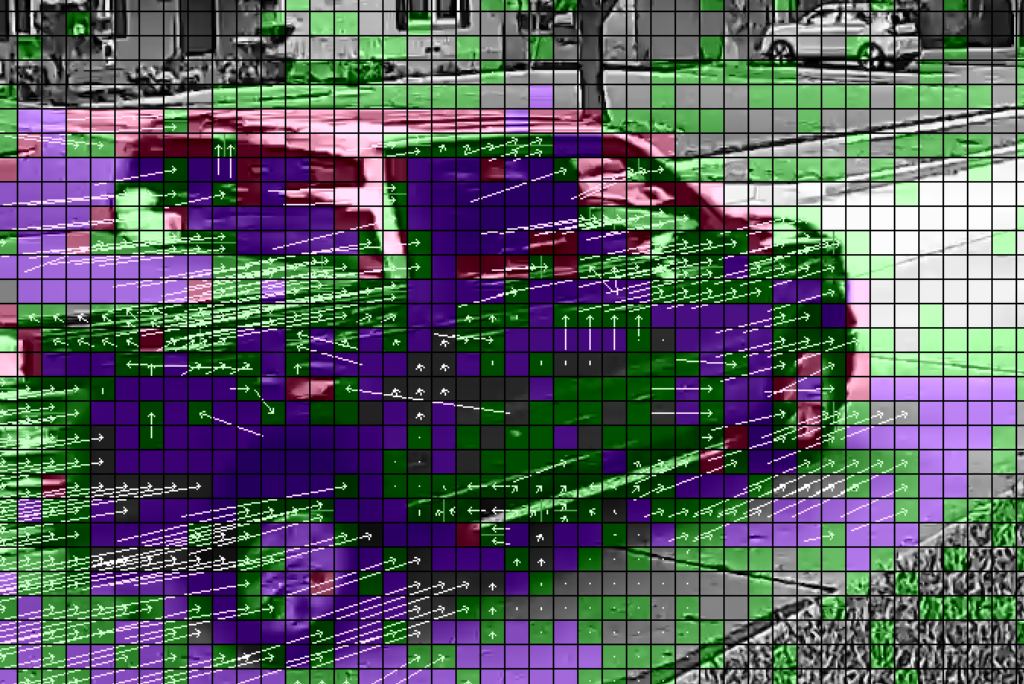
The ability to move a block makes the encoding much more efficient. In general, blocks will be moved with the direction of travel, but they can be taken from anywhere the encoder believes is a good match, from within a set area. You may notice one in the middle that is pointing left. The resulting predicted block may, therefore, have a lower reliability than a block that was created from the same object in a previous frame.
There is another frame type, and that is one formed from both backward and forward frames. These are classed as B-Frames, with the B standing for Bi-Directional. The filter settings also allow for the visualization of those block types and their Motion Vectors.
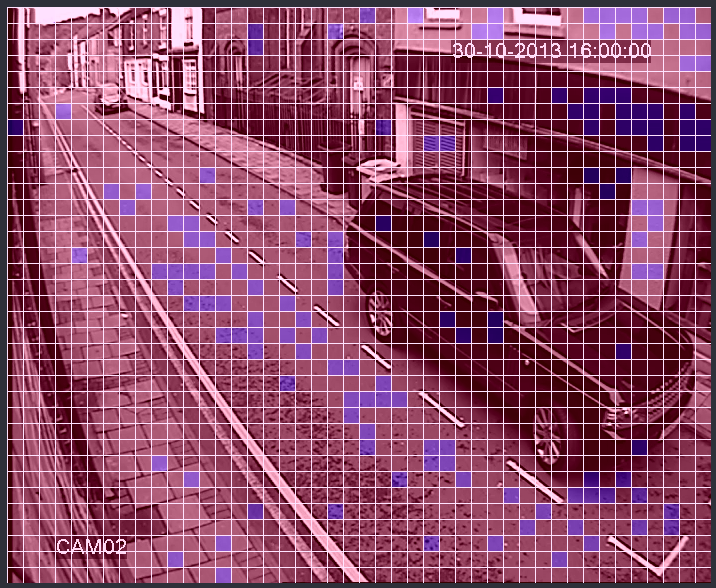
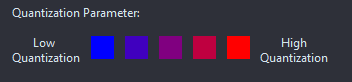
Remember we mentioned earlier about another factor that has to be considered when interpreting the reliability of the data? Well, that is the Quantization.
Every MPEG encoding method has different capabilities and different numerical ranges. To assist in visualizing the quantization, we not only provide the numerical value but also color grade the overlay with a heat map.
In the following image, showing just a small part of the entire video frame, we can see that the area magnified is made up of blocks that are quantized differently.
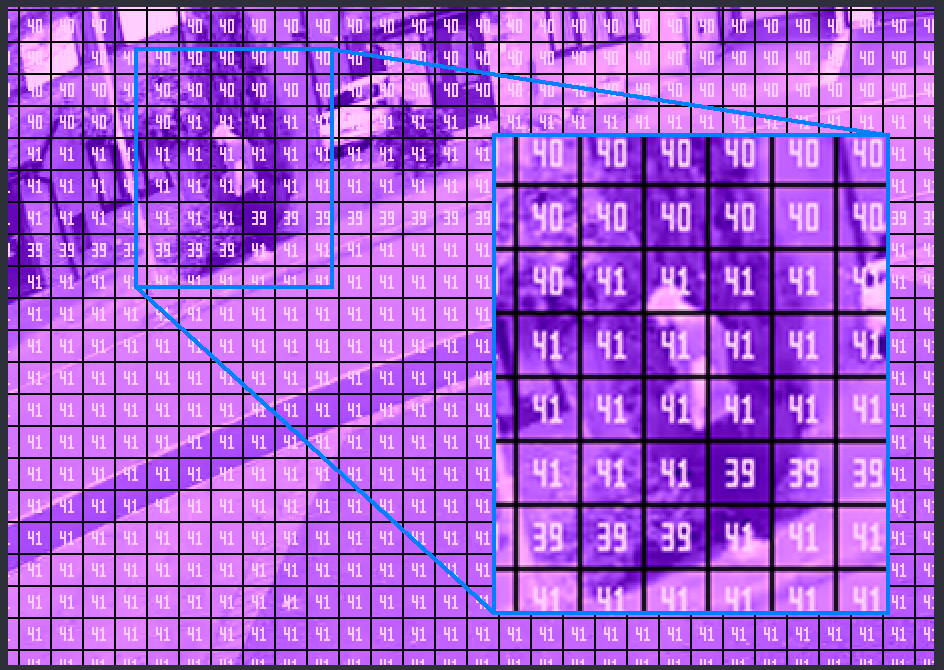
Quantization sets the amount of color and luminance values that are possible to be used. Lower quantization would have more detail as gradients would be able to be replicated better. However, high quantization means that the encoder decided it was not needed to give all the color and luminance possibilities to that area. As such, a grey area may appear black and white.
You may have watched CCTV where the roadway and trees all look nice and clear, but when a vehicle drives through, the quality of the image drops, specifically in the areas involving movement. That’s the Quantization at work. The system can allow a good image when nothing happens, but when something does happen, it has to reduce the quality.
As you have probably realized, video compression involves many other aspects than what has been discussed so far. It is a fascinating subject that Amped Software remains committed to supporting with future updates to Amped FIVE.
It is worth emphasizing that analysis of compression is only beneficial when conducted with the original native evidence. If the video has been incorrectly acquired, or it has been transcoded within a Digital Evidence Management System, you will be observing the information of that encoding process, not the original one.
It is the Forensic Video analyst’s role to ensure that a court can rely on the imagery presented. When video compression has been used, the effects of compression must be taken into consideration and referenced in any decision-making process. It is impossible to correctly state facts if the data used has not been identified and understood.
For more about the correct acquisition of CCTV, check out the CCTV Acquisition series summary.
For a deeper dive into the Macroblocks filter, along with some of the connected components in video decoding, check out the recording of a recent webinar.