by Jade James
AccessData Enterprise enables investigators to forensically image and analyse devices. It also provides a means of workflow analysis and documentation, as well as a level of staff management. The inclusion of FTK means that examiners can conduct forensic investigations without interrupting business operations.
AD Enterprise enables the user to preview live data on any end user point that has the agent installed. With remote collaboration, investigators across different departments can work together more efficiently. Discretion is often crucial to a successful investigation; knowing this, AccessData have ensured that with Enterprise, investigators can conduct investigations without arousing suspicion amongst end users.Key features of AD Enterprise include the ability to preview live data; filtering and targeting options for those who only want to retrieve data that is pertinent; the ability to conduct live memory analysis to find traces of malware; and identification and removal of unapproved process by wiping or killing remotely.
Several pre-existing items have been improved in the latest version, including support for Amazon Linux distros v1 and v2; decryption of APFS volumes; exporting to L01 format; and registry keys from newer versions of Windows 10 in Registry Viewer reports.
Technical Specification And Installation
In order to install AD Enterprise 7.2, you must be running Windows Server 2016, Windows Server 2012 R2, Windows 10 or Windows 7. To make the most out of using AD Enterprise, the system should have a large hard disk which is used solely for the database, and the database should have at least 1GB for every 200,000 items processed. The system should have at least 2GB of RAM per processing core. The Evidence Processing Engine will need at least 100GB of free space to use a temporary storage during processing. It is also not recommended to be running any other software or tools, as this can impact the processing capabilities.
I was able to download an .iso file which had all the files and executables I required to install AD Enterprise. Simply follow the prompts, agreeing to a PostgreSQL Licence agreement, and then all the modules are installed. A licence is required to run AD Enterprise; these can either be physical or virtual.
Full technical specification and installation details can be found here.
Practical Use Of AccessData Enterprise
Once the tool has been installed successfully, on the first run, there are quite a few things the user needs to configure. You will need to add a database and an admin user, which is a straightforward process. I also generated an FTK Password Reset token, just in case I forgot my password and needed to reset it, as there would be no other way for me to access my account without a valid password.
In order to effectively acquire data remotely, you will need to ensure AD Enterprise is set up to do this. Enterprise Agents will need to either be manually installed on all end users in the specified network, or Agents can be pushed using AD Enterprise.
AD Enterprise is a corporate version of FTK, which consists of a central database and a central user repository. Users will need to be created and roles will need to be assigned to each user. Roles include case/project administrator; case reviewer; and evidence processing user. Assigning roles allows you to restrict access to only what the user needs to be able to view. For example, it would not be possible for a Case Reviewer user to push an Agent or collect evidence from an Agent. It is also possible to assign roles to Agents, so they can have different functionality from an admin account.
Previous versions of AD Enterprise would have automatically generated keys during the installation process, but now these are generated by the user, using ‘certman’. Detailed instructions on how to generate these certificates can be found here. Agents can also be installed or pushed out in ‘incognito’ mode so that they will not show up as processes in Task Manager, and it is possible to rename the agent before you push it out.

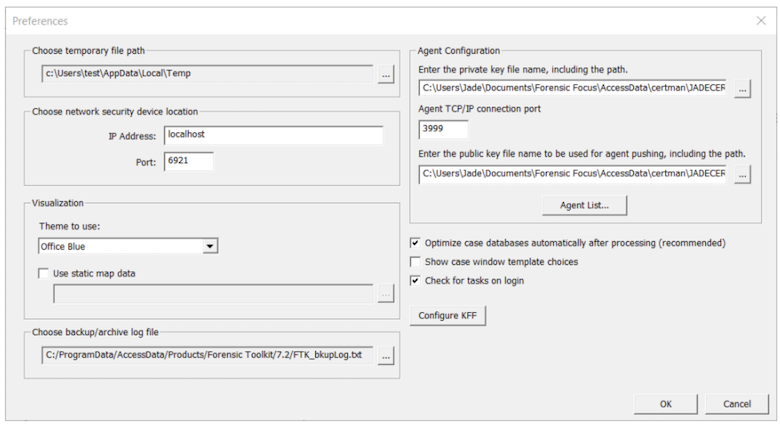
Once you have generated the certs, the private key (.p12 file) and the public key (.crt file) need to be included in Preferences > Agent Configuration, and the Agent TCP/IP port must be set to 3999.
Working With Live Evidence
These configurations can be completed even before you create a new case. Once you have set up a new case, you can then add remote data. This option allows you to select the Agents and the different types of data you wish to collect; for instance, you may only wish to collect volatile data initially.
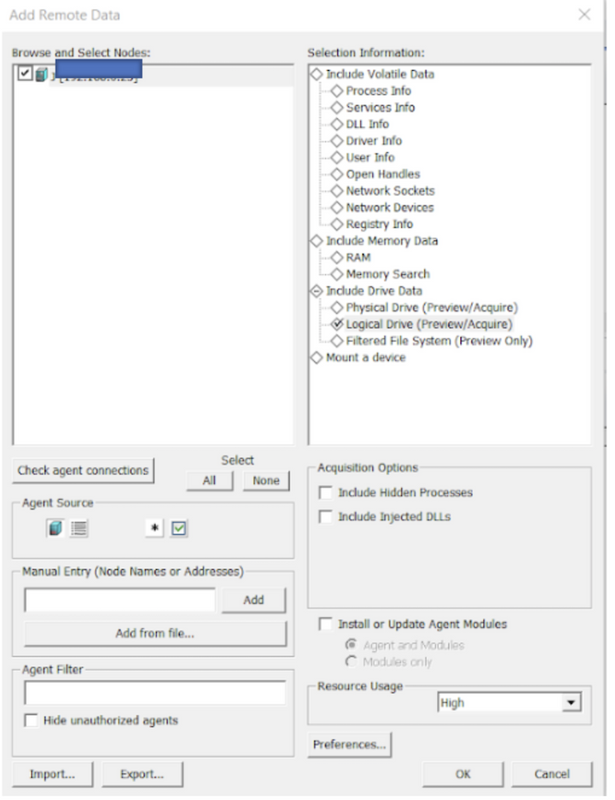
When the prompt opens for the first time, you will not have any Agents listed, so you will need to toggle between ‘Load Available Agents from Agent List’ and ‘Load Available Agent from Text Box’. If there are no Agents set up already, you can manually input the Node name or IP address of the node and click ‘Add’.
Before you can add remote data, you will need to ensure that the agent is connected. If you choose to acquire volatile data, it will be stored as xml, and you will be able to access this data in the Volatile tab. Acquiring volatile data pulls information from the Agent about processes, DLL lists, sockets and other artifacts. Essentially, it provides a slightly more detailed view than if you were to access the Agent’s Task Manager directly.
The same process is used to acquire memory data. Memory data can be extracted into a file which can be used with a third-party tool, or it can be added to the current case. AccessData recommend that RAM acquisitions are carried out separately from volatile data acquisitions, as the volatile acquisition may override the RAM acquisition settings.
During the acquisition process, you are given the option to either perform a ‘Memory Analysis,’ which will add the RAM data directly to the case; or to perform a ‘Memory Dump,’ which will save the data to a dump file. It is also possible to import a memory dump that has previously been extracted from an Agent: the data will appear in the Volatile tab under the Agent name, with each memory dump listed separately with its own date and time stamp. The user can also conduct a keyword search within the memory itself.
Another way to add remote data is to acquire drives from the Agent. When acquiring the drive data, you can choose to acquire the physical, logical or filtered file system. There is also the option to preview the data, or to acquire the complete disc image. Previewing the data will provide a list of files in the drives, but not the files themselves. Creating a complete disc image acquires an actual image of the drives, but this can be time-consuming and can impact significantly on the Agent’s CPU usage.
Finally, it also possible to mount an Agent’s device or drive and then to navigate through it in Windows Explorer as if it were attached to the host system.
Adding Or Removing Evidence
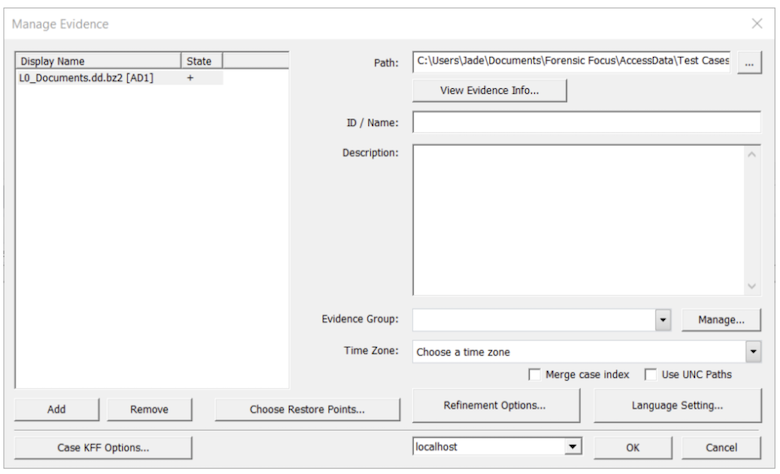
Adding and removing data is a straightforward process. It is also possible to line up jobs so that you can add/remove items simultaneously. Evidence will be processed using the options that were selected during pre-processing. You can now drag and drop files from Windows Explorer directly into the ‘Manage Evidence’ dialog box, which is a useful feature.
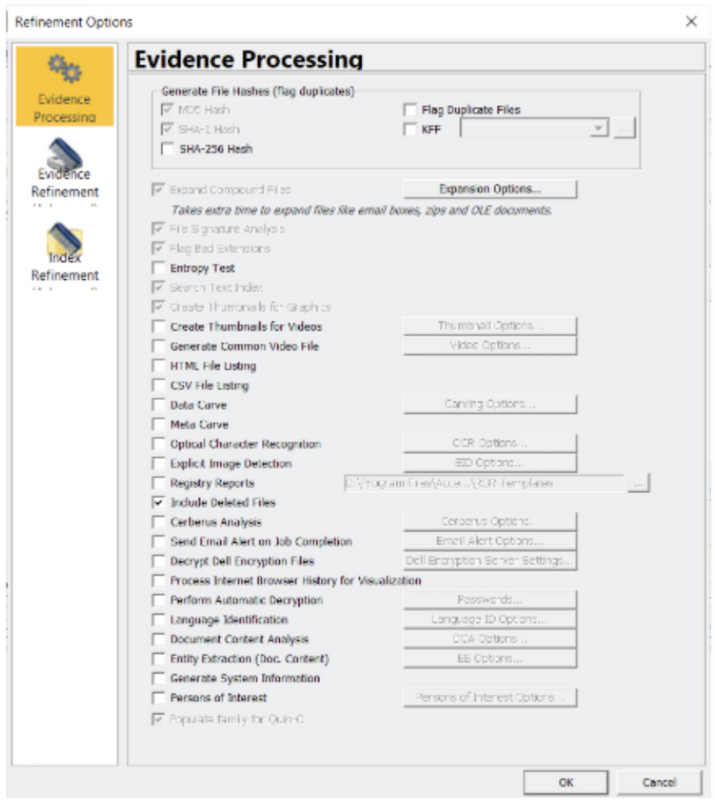
‘Refinement options’ can be used to override any previous settings selected in pre-processing. The Refinement options allow the user to specify how the evidence is processed (e.g. conducting a Cerberus analysis); how the evidence is refined (e.g. including file slack or free space); and how the indexing is conducted – the user can choose to exclude categories such as databases or system files.
When adding or removing evidence, if you are dealing with live data, you may be prompted to create an image first in AD1 format, but it is also possible to just add live data. AD Enterprise will prompt you to create an image file if you try to add anything that is not already an image file, such as the contents of a directory, or individual files.
Cerberus Malware Analysis
Cerberus is built in to AD Enterprise. It allows the user to perform a malware analysis on executable files. There are two stages to the analysis: Stage One – Threat; and Stage Two – Static.
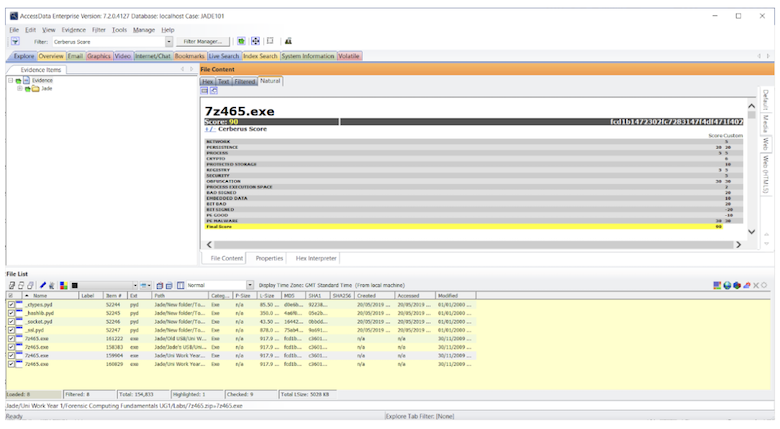
Stage One is a quick general file and metadata analysis which will look for common attributes the executable file may have. Files are given weighting ranging from -100 to 100. The higher the score (such as +30, +65), the more likely the executable is malicious. Safer executables will have a lower score (+5, -10). The following image shows the different attributes which are given a threat score. Cerberus tries to work out if the files have specific attributes that could point to them being malware files.

If an executable receives a threat score which is equal to or higher then the predefined score, then a Stage Two analysis is performed. Stage Two consists of a static analysis of the executable, meaning the code of the executable will be disassembled without running the executable. Information from Stage Two – Static Function Call may not necessarily mean anything to a novice user, but this information could be valuable to reverse engineers or malware analysts.
Performing a Cerberus Analysis can either be set as an additional analysis process, or the user can highlight all the files of interest, right click, and select ‘Perform Cerberus Analysis’. Using Filters, it is then possible to view the files which have been analysed by Cerberus.
Volatile Tab
The Volatile tab is a good resource to use when gathering and analysing data from the memory of an Agent. The user is able to view memory dumps, including all the processes, DLLs, sockets, drivers, open handles, processors, and other attributes.
Hidden processes are automatically detected and it is possible to perform file remediation from the Volatile tab (kill process; wipe file; add hashes to KFF library; add hashes to fuzzy library; and create a memory dump).
The Volatile tab could be particularly useful if you need to examine snapshots. To colour code your snapshots, simply left click on one and right click on the other, and then all the processes will then be highlighted in different colours. This is handy if you are viewing two snapshots from a server and you need to work out if there have been any changes to the processes in between snapshots, and potentially look for the addition of malware to the server.
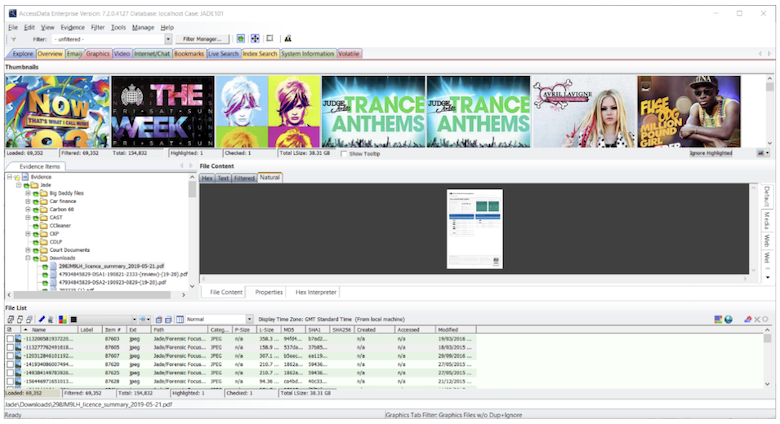
The other tabs are self-explanatory: Explore (a directory structure similar to Windows File Explorer); Overview (a general view of artifacts in the case); Email (mailboxes and their associated messages and attachments); Graphics; Video; Internet/Chat; Bookmarks; Live Search (a bit-for-bit comparison of all the evidence in the case containing a specific search term); Index Search; and System Information (detailed information about disk images).
Filtering
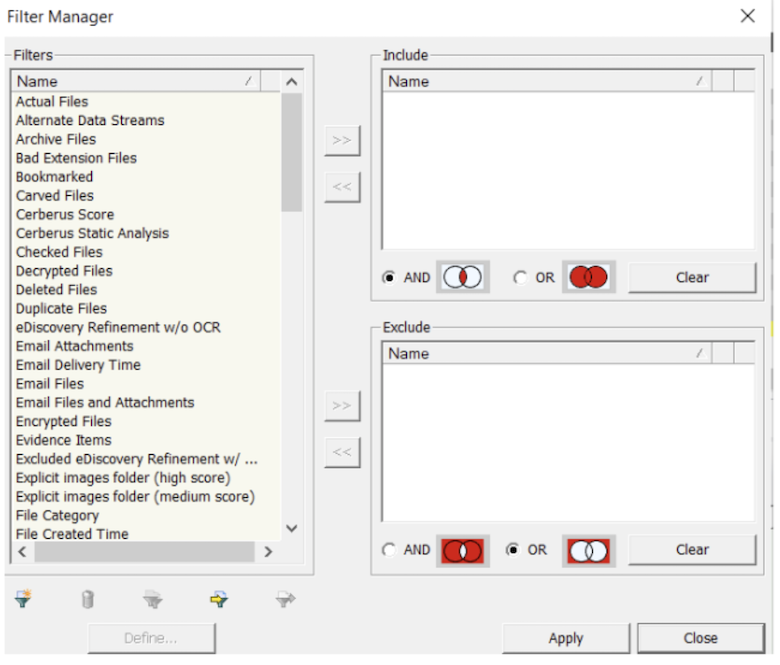
Filtering allows the user to quickly sift through files so that the focus can be narrowed down, and you are left reviewing only relevant data. There are many different filters built into AD Enterprise, consisting of predefined (created by AccessData); global (applied to all files in the case); tab (filters which are specific to one tab); custom (created by the user); nested (multiple filters within a filter); compound (multiple filters selected and applied at the same time – AND/OR logic); and search (added to a live or index search).
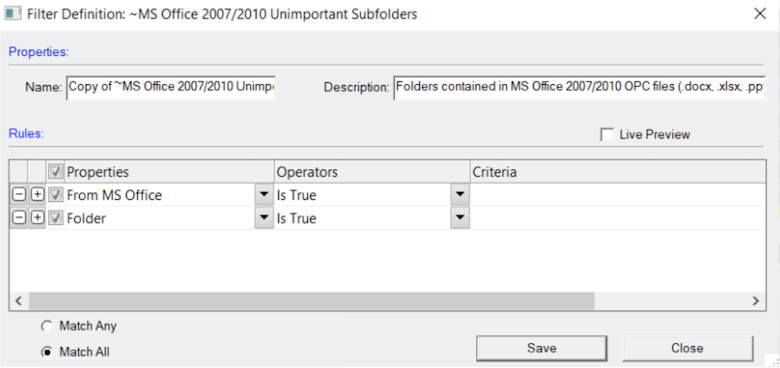
Within Filter Manager, there is a list of attributes in which you can find out more information about each individual attribute and the operators that have been selected. Filters can then be added to the ‘Include’ or ‘Exclude’ lists.
Known File Filter
Known File Filter is a function built in to AD Enterprise which allows the user to compare hash values of known files against the evidence. The known files could be files that you wish to exclude (such as system files) or files that you wish to be alerted to, like known malware. The database for the KFF is maintained by several US Federal Government agencies; you can also configure your own. In order to use KFF, you will need to install and configure the KFF Server.
Batch Remediation
In the ‘Tools’ option at the top of AD Enterprise, you can select ‘Batch Remediation’. This will open a prompt in which you can perform tasks such as wiping files, killing processes, pushing files on to the Agent or executing commands. These are all done as a batch, and are performed on the Agent.
Summary
The initial setup of AD Enterprise can feel quite laborious for a first-time user. It takes a lot of installing different modules, setting up databases, generating certificates, pushing agents or manually installing on each end user point, before you can use AD Enterprise to the full. However, once the tool has been set up, you can quickly and easily carry out your investigation, using its powerful processing engine.
AD Enterprise is a very effective tool for the acquisition of remote data, which I would definitely say is its best feature. There are so many options and filters to use, which can be overwhelming; the supporting documentation itself is 664 pages long! However, this does add a level of customisation and case analysis that is lacking from many other tools on the market.
The new features have definitely improved the tool since I last reviewed AD Enterprise 6.5.1. Users of FTK will have no problem using AD Enterprise, and the tool would be of the greatest advantage when deployed in a corporate organisation.
Jade James BSc (Hons) is currently a Cyber Security and Forensics Postgraduate Student. She has previous professional digital forensic experience from working at the UK’s Serious Fraud Office, IntaForensics, the Home Office Centre for Applied Science and Technology and the City of London Police. Jade has experience of conducting computer and mobile device examinations as well as drone forensics, and has been involved with ISO 17025 & Quality Standards both as a digital forensic practitioner and quality manager.