As a digital forensic examiner, I am always looking to try out the next great digital forensic examination and analysis platform. Little did I know that when trying out the latest release of the Detego® Unified Digital Forensics Platform, that I would be diving into a full-blown digital forensic suite. This suite includes the ability to acquire, analyze, and examine Windows, Linux, MacOS, iOS, Android, external storage, drones, and even cloud-based evidence.
While there are multiple modules to explore in Detego’s investigations platform, the focus for this review will be devoted to an image of a 17.6GB thumb drive (in E01 format) that has been extracted through Detego’s Media Acquisition module. An impressive and easy-to-use user interface makes this particular forensic software suite stand out in a positive light compared to some that I have worked with in the past. How about that dark theme though? Thank you Detego Global for taking the time to make a product that is effective and thoughtful for your examiners.
Minimum and recommended requirements
Note that while Detego will function on minimum specifications, its performance and capabilities will be highly compromised. For optimal performance, consider a system using high & medium specifications. Windows 10 Pro 64-bit, builds 1607 and above are recommended across all tiers.
| Minimum | Medium | High | |
| Processor | Intel i5 2.6GHz Quad Core or AMD equivalent | Intel i7 2.8/2.9GHz Quad/Hexa-Core or AMD equivalent | Intel i9 3.5GHz Octa Core or AMD equivalent |
| RAM (Memory) | 8GB2 | 16GB | 32GB or more |
| Storage | 256GB SSD | 1TB SSD | 2TB SSD or more |
| Ports | 3 x USB 2.0 Port | 1 x Thunderbolt 3 2 x USB-C / USB 3.1 Port 1 x USB 3.0 Port | 1 x Thunderbolt 3 3 x USB-C / USB 3.1 Port 1 x USB 3.0 Port |
| Graphics Card | None3 | Dedicated 4GB NVIDIA CUDA Compatible | Dedicated NVIDIA CUDA Compatible 8GB+ |
Detego Global additionally recommends:
- Secure Storage: Servers, NAS or SSD
- Cables and Accessories to enhance connectivity between the Detego Analyse machine and case exhibits
- Write Blocker and Forensic SATA / IDE Bridge
- Adapters to facilitate greater acquisition options along with the ability to perform multiple ‘big data’ acquisitions simultaneously.
- A complete and up-to-date set of phone and smartphone cables for your region.
- For Detego Field and Ballistic devices, any USB 3.0+ or SSD device with 4GB or more available storage as a collector or field device
Detego Global maintains lists of specific devices for each of these categories.
Loading an image
Detego makes it possible to load images that have been previously created by other solutions, as well as images created using Detego’s all-in-one platform. This includes Ballistic Imager, a field tool that acquires data using multiple collection devices for use in time critical scenarios.
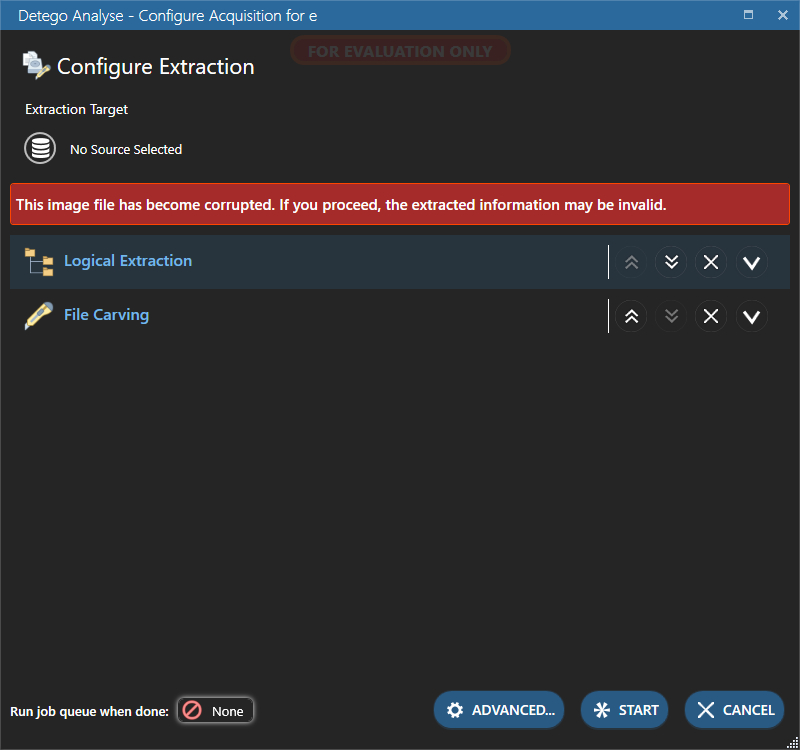
The loading process is extremely simple and aims to provide an error-free experience while loading an image. As an example, we first attempted to load a partial E01 file to see how the product would react. Immediately, we received a message saying that the E01 file was corrupt and we would only be receiving partial or invalid results.
We then added the second half of the E01(E02) to the same folder that the initial file was in to continue the processing, and it then recognized the remaining portion of the image and the warning message went away.
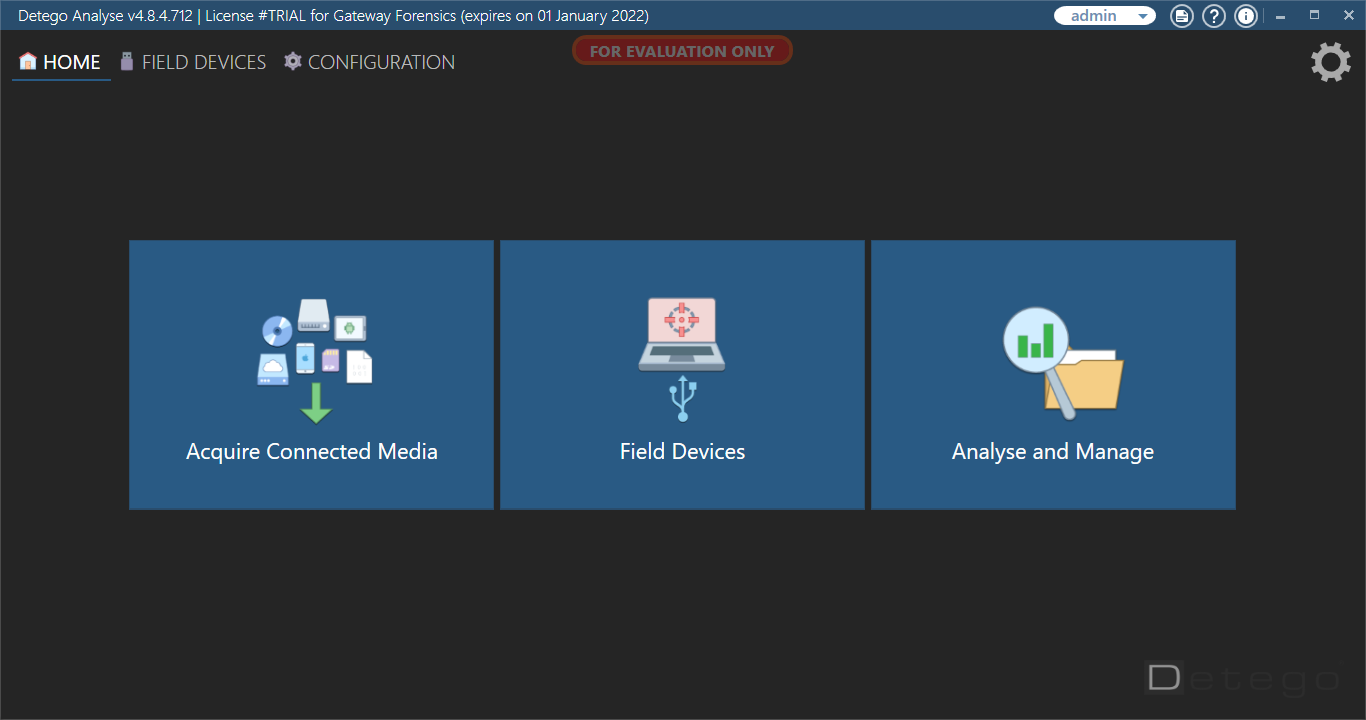
The 17.6 GB image file was loaded into the product within minutes and we were able to immediately begin looking at the contents of the image utilizing Detego’s INSPECT element.
The INSPECT option allows an examiner to perform a triage of the image and choose what contents to extract for analysis. Detego is no doubt an outstanding product for examiners who need to be able to pull artifacts from a device and export only the necessary contents when time is not on their side.
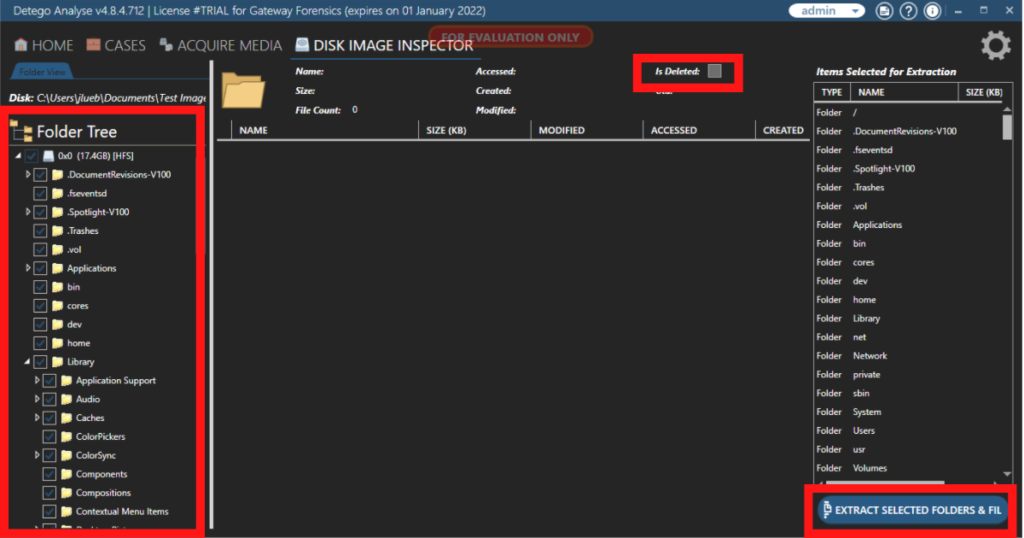
The product loads the image into a file structure viewer and allows the examiner to select the most important artifacts, such as recovered deleted items. Next, we simply select ‘Extract selected folders and files,’ located in the bottom right-hand corner of the product.
Extracting an image
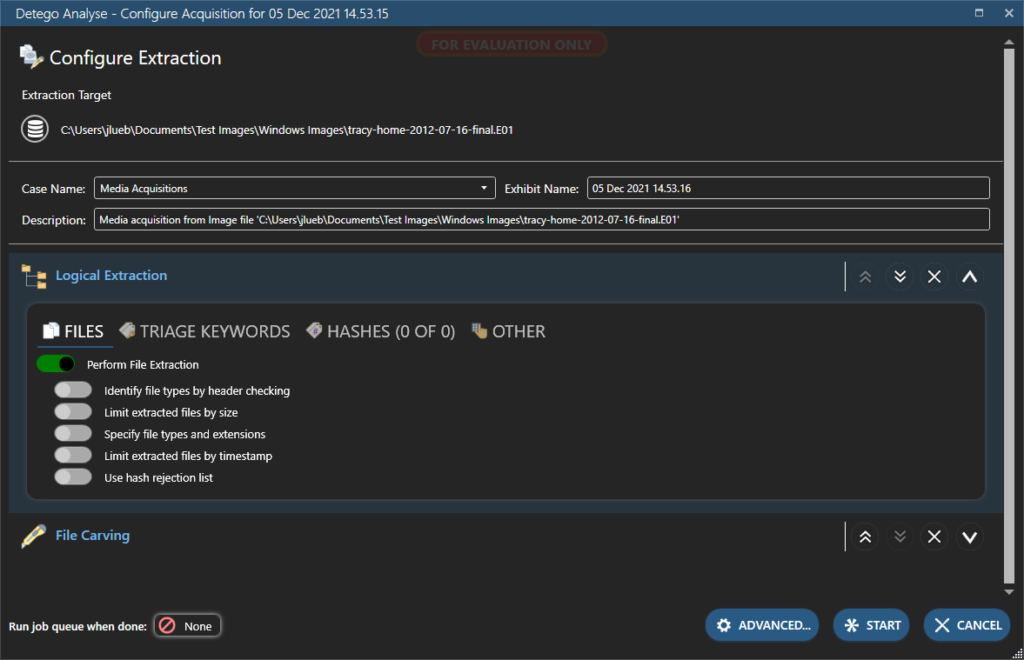
We began our extraction by selecting the EXTRACT button at the bottom of the screen. Upon selecting EXTRACT, we were prompted to select what type of extraction we would like to perform. As an example, we are asked whether or not we would like to do file extraction.
If we choose yes, we are prompted with many options such as: identify file by header, limited extracted files by size, specify file types, use hash rejection list, etc. Detego Global has gone to great lengths to ensure that the end user holds the keys to the fine tuning of each case extraction.
This particular portion of the examination is where an examiner can make or break their case, so we paid special close attention to the capabilities within this section of the product. When the examiner has the ability to fine tune extraction procedures like file extraction types, keyword searches, filter out known and bad hashes, and additional information selections, they are defining the outcome of their examination.
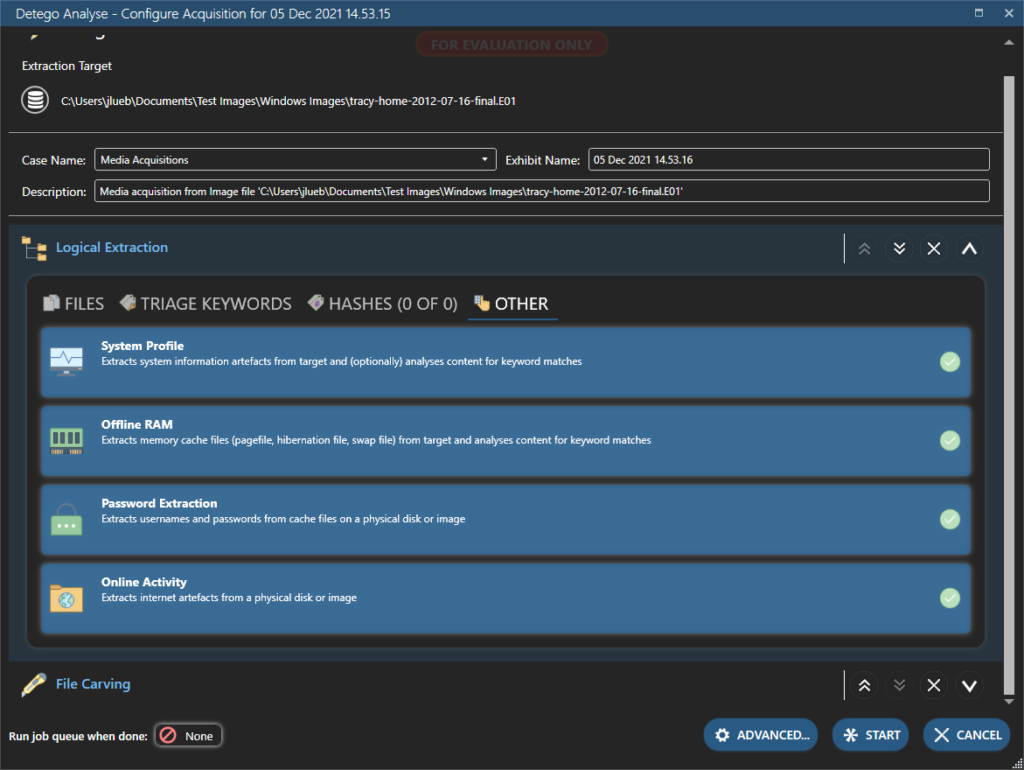
One portion of the EXTRACT tab that we would like to highlight is the OTHER section located underneath the logical extraction. This portion of EXTRACT is crucial during the extraction process. In this particular section of the product, we have the ability to extract system profile information, offline RAM — such as a page file or hibernation file — or a swap file. We also can extract passwords, browser activity, and much more from this location.
Upon completing our selection within this screen, we simply select START to begin.
Viewing evidence
So now that we have extracted all of the artifacts from the image based on our selections, it is time to dig into our evidence using EVIDENCE BROWSER.
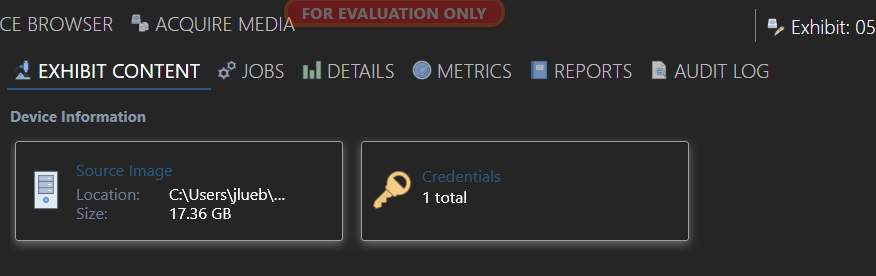
EVIDENCE BROWSER breaks out your artifacts into categories and allows you as the examiner to dig in deep on each individual evidence item. You can expect to see Device Information, File Type, Application, and other types of artifact categories in this particular section of Detego v4.8.
As a digital forensic examiner, one of the first steps during our analysis is likely to identify the device information, compare it to what we already know, and create a preliminary report from the provided information. Detego does a really great job of breaking the most relevant information for a device in an easy to understand manner.
Now that we have the device information and our preliminary report, the next item that we will dive into within the EVIDENCE BROWSER will be the analysis of individual artifacts. This is one of our favorite aspects of the Detego Unified Forensics Platform v4.8 product.
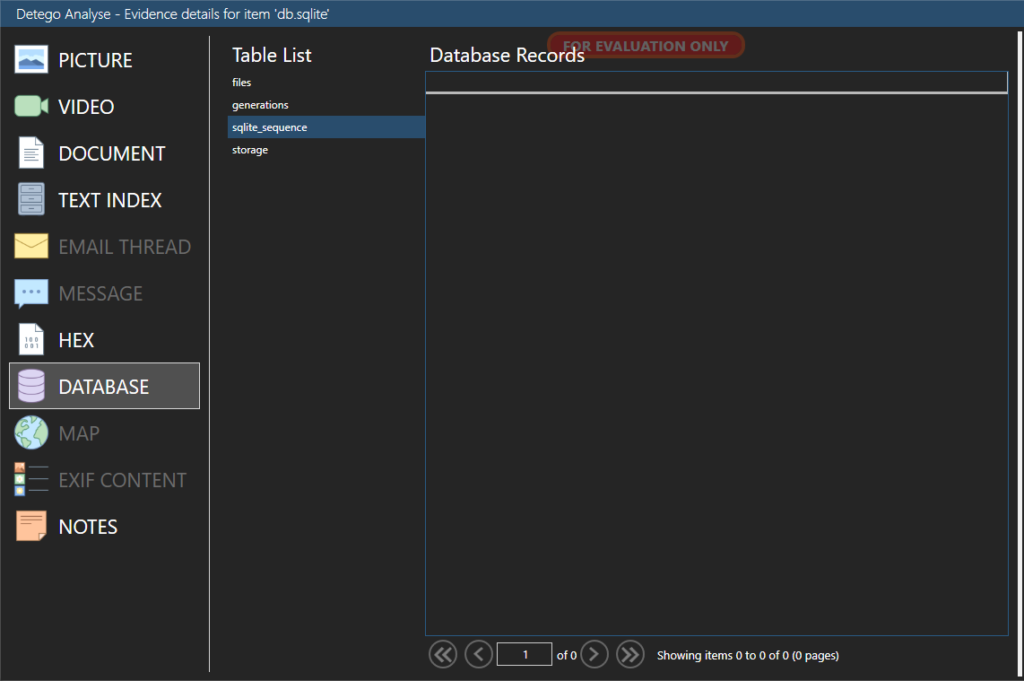
The first artifact category that we analyzed was the Database file type. Simply selecting the category will bring you deeper into the artifact and give you more granular analysis options, depending on the type of artifact.
For this specific category, when selecting the database file type, we were presented with all of the discovered databases laid out nicely in a clean and crisp list. Double-clicking one of the databases brings up a multitude of options for that granular analysis that we had previously mentioned.
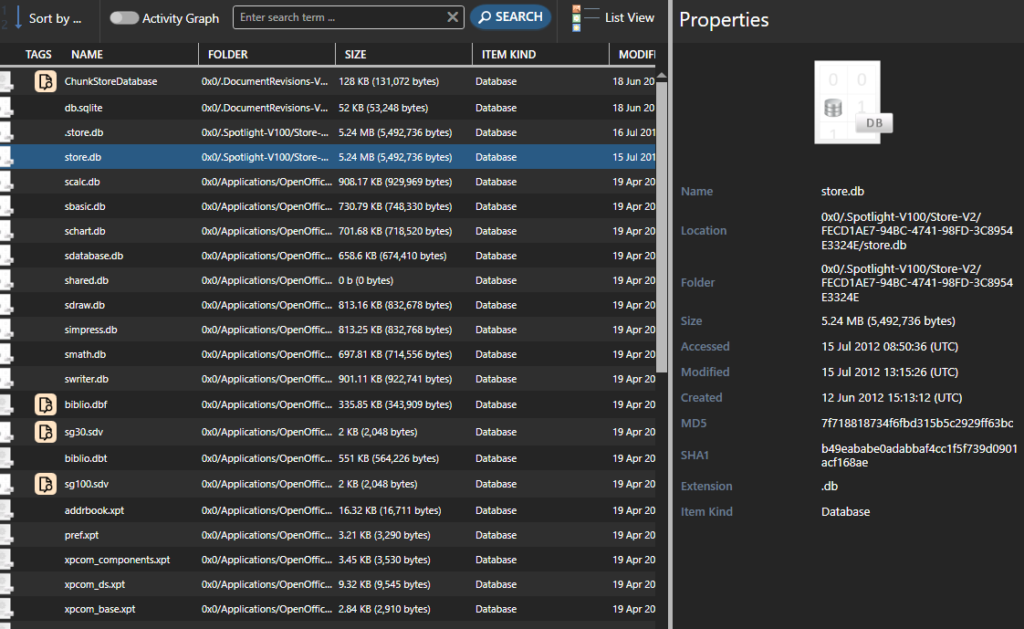
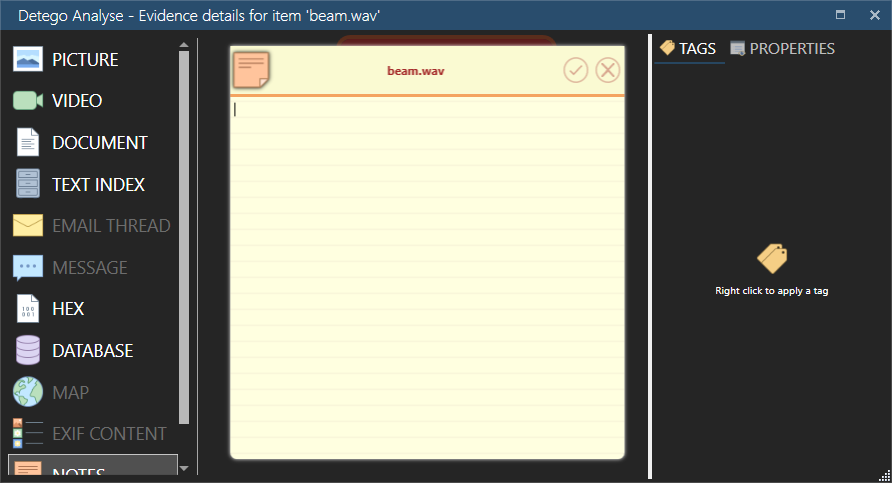
Remember how we had mentioned this is one of our favorite parts? Let’s take a look at the bottom left-hand side of the picture above. We are given a NOTES section! If we find something interesting about an aspect of the artifact, Detego allows us to input notes for each individual artifact.
This is very useful. As digital forensic examiners, we are taking notes about specific artifacts and findings throughout the entire process of an examination or investigation, so why not keep all of these notes within the case file that you are using to analyze your evidence files? These notes can also be input into a final report along with the artifact they refer to.
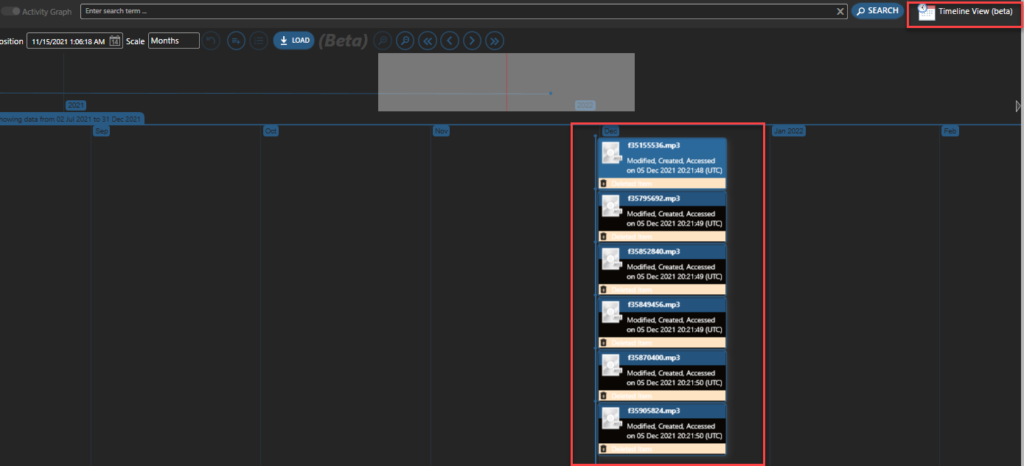
We then dived into the different views that are available for artifacts in different categories within the EVIDENCE BROWSER. Upon selecting the desired artifact category, all artifacts will be displayed in three different views, if you so choose. The three views available for your artifacts are: Gallery View, List View, and Timeline View.
If you are anything like us, clean, crisp, and compact views of our evidence is the way to go and we enjoy utilizing the list view for analysis. But the fact that a timeline view is available for any artifact with a timestamp, from the main evidence browser screen, really shows the level of thought that went into designing the product. With Detego v4.8, you do not have to leave your evidence screen to view the timeline, you can simply change the view and see where the artifacts took place on a scalable calendar.
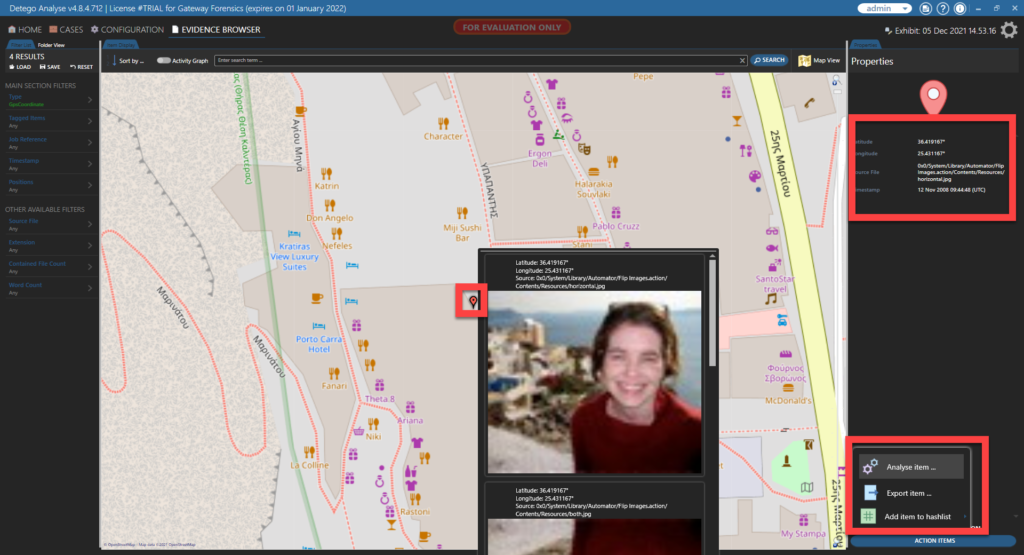
Let’s map this out
The final aspect of this review, before getting to the reporting feature, will be testing the map functionality and ease of use in the product. To begin with, we identified artifacts from our test case that had geolocation coordinates within them, and then tested their placement on the Map feature inside of the product, based on what we know from other mapping features within other products.
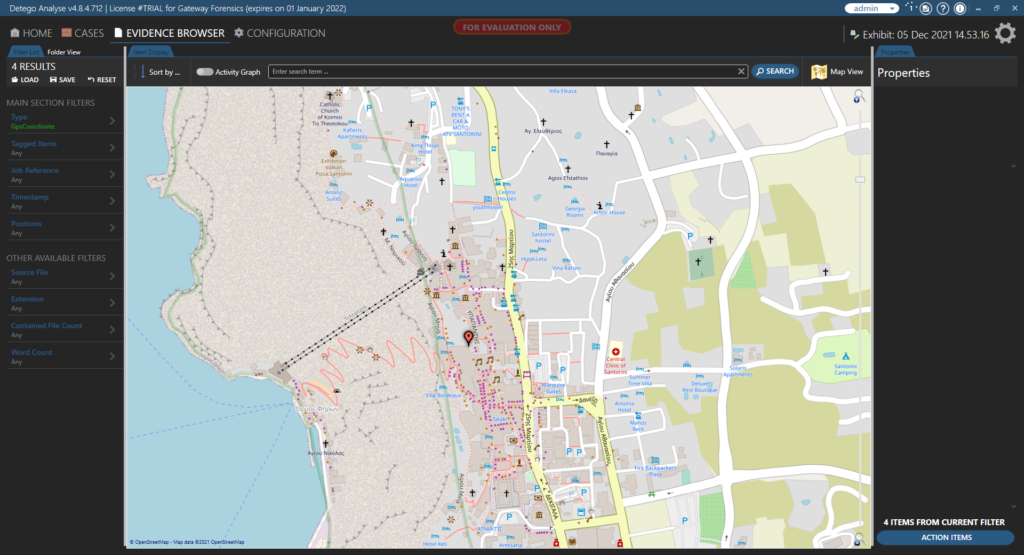
Next, we compared the usability of the map feature within Detego to other forensic products that we use regularly. The results? The product does a really good job of displaying the artifacts and allowing for user scalability. The examiner has the option to zoom in extremely close, nearly street level, and out far enough to see the entire map.
A simple click on an artifact will display important information about it and even give you a picture preview, if that is the type of artifact you are examining on the map feature.
Another really great feature from not only the map viewer of the product, but any viewer of the EVIDENCE BROWSER tab, is the ability to perform additional analysis, export an item, or add specific items to a hash list.
Reporting
So now that we have rolled through just a few of the many really great features within this highly robust and expandable product, we come to the point of needing to produce a report that is highly technical in nature, yet understandable by even the least technically inclined judge or jury.
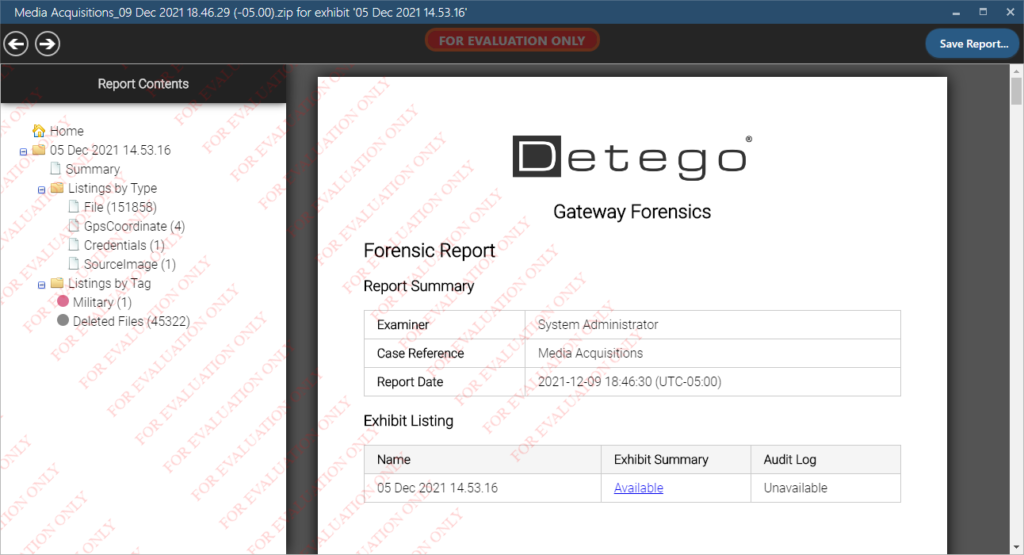
When it comes down to creating these highly customizable and extremely detailed reports, Detego gives us the option to create either a “Detego Report” which generates a report containing all analyzed data in an exhibit in either PDF or HTML format, or an “Actionable Intelligence Report”. This type of report generates actionable intelligence in either PDF or HTML format. So, what is the difference? Below you will find the options available to you while creating a “Detego Report”.
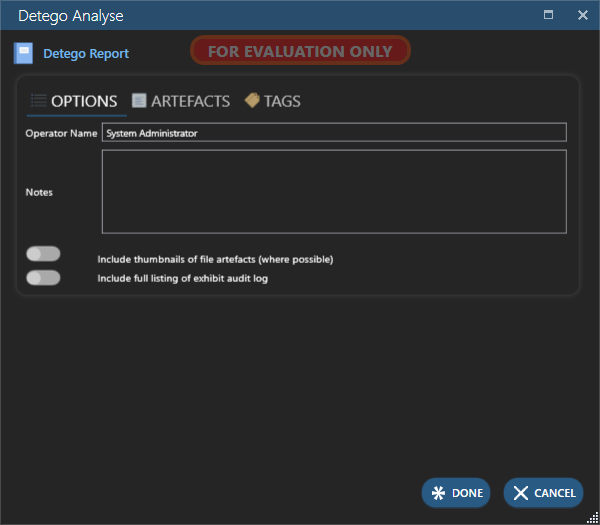
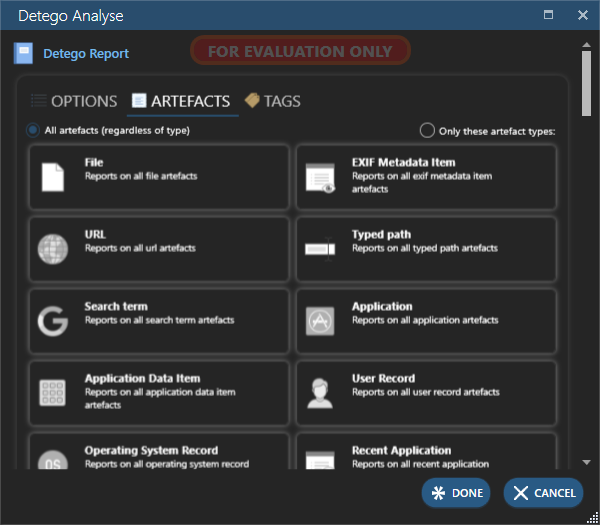
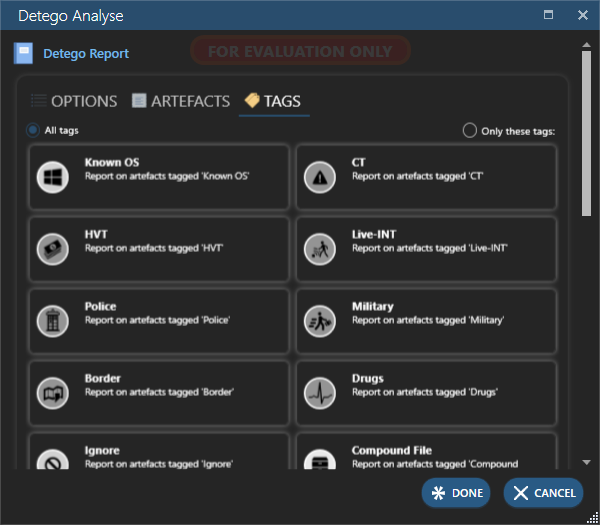
The final result of your selection, depending on the granularity, will appear something like the below picture:
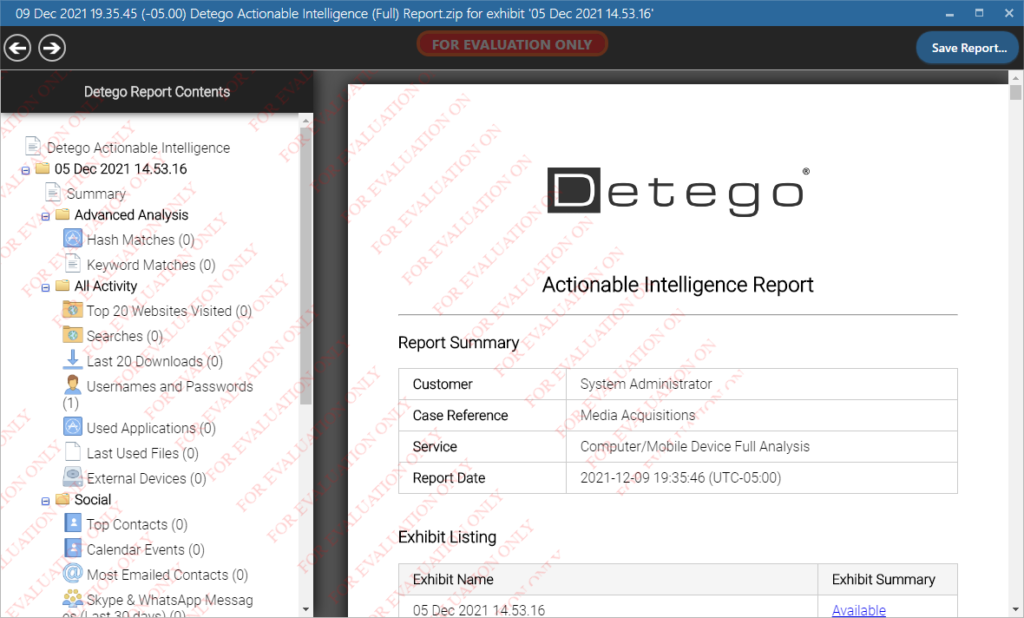
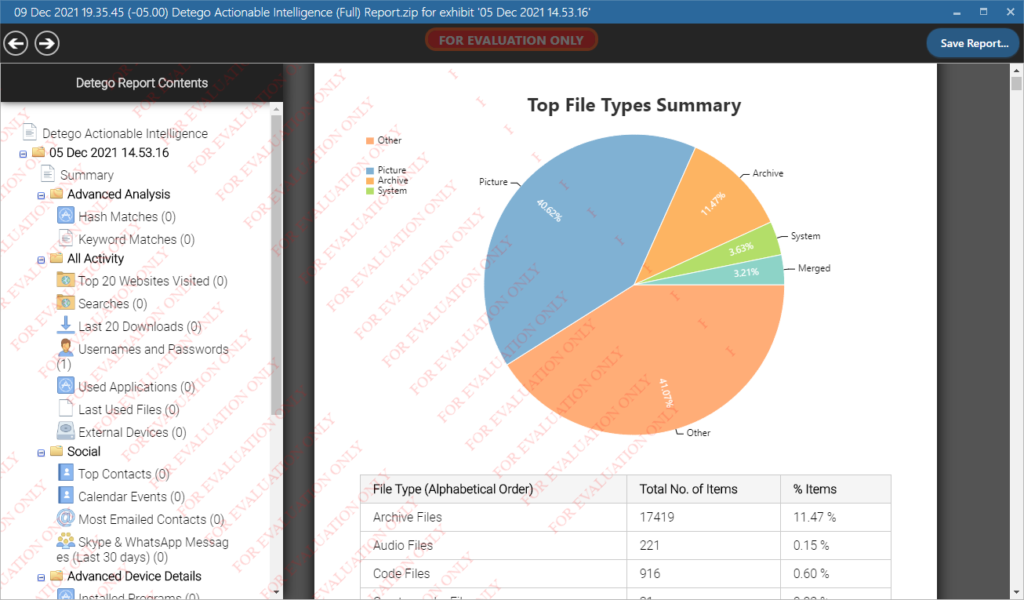
When you choose to perform an Actionable Intelligence report, you do not select specific options, as this is a full report and produces much more detail about the evidence file that you are reporting on. It displays charts and graphs, percentages of artifacts compared to the image, and shows each individual artifact in great detail. Best of all, the report for the 17Gb evidence image that contained roughly 152,000 artifacts only took about two minutes to create.
Conclusion
After digging through the ins and outs of the Detego Unified Forensic Platform v4.8, it is safe to say that this is definitely a product that we would feel comfortable adding to our toolkit. As we mentioned earlier, there are many products available from Detego Global, and we did not have the chance to analyze each one, but we hope to in the future.
Detego is expandable and you can add many different features to tackle whatever forensic hurdle is standing in your way.
Detego Global has done an outstanding job creating a forensic product that allows examiners the opportunity to pick and choose which portions of the product they want to take advantage of, and also allows for additions at any time to meet the needs of any investigation.
Their products are used globally by military, law enforcement, intelligence agencies and enterprise organizations, and we can see why.
Jared Luebbert is a Digital Forensics Expert and Litigation Support Professional with years of experience performing digital forensic analysis worldwide and is the Founder and Lead Examiner for Gateway Forensics, LLC. Mr. Luebbert’s expertise is in mobile device forensics and computer forensic analyses as they relate to litigated matters such as the misappropriation of assets, lost profits, employment issues, as well as other commercial matters in dispute. Mr. Luebbert has assisted clients in a variety of industries, including Energy, Manufacturing and High Technology, and Real Estate. Additionally, he has assisted legal counsel with Electronic Discovery, Computer Forensics, Mobile Device Forensics, and Intellectual Property issues. Mr. Luebbert is a native of Loose Creek, Missouri, but currently resides with his wife and three children near Washington, D.C.