Hello, everyone. Jordan here with the Oxygen Forensic training team. Today, I’m gonna show you how to search images for text values using optical character recognition. Let’s get started.
In today’s video, I’ll be discussing what OCR is and providing some background information on OCR. I’ll also be providing a hands-on demonstration of how to properly configure OCR. I’ll show you what the OCR workflow looks like. And I’ll also show you how to conduct searches with OCR. At the end, I will provide additional resources that you can check out on your own at any time.
Before we get into any hands-on demonstrations, it’s important that we know what OCR actually is. Some viewers watching this video may have never encountered OCR. So one thing to keep in mind is that OCR is basically a[n] analytic tool found inside Oxygen Forensic Detective, that extracts text from graphics.
That being said, it’s extremely beneficial for investigations such as a domestic violence investigation, wherein, say, the victim took screenshots of a chat or message wherein they were being threatened. What the investigator could do at that point is run OCR against all the images on a victim’s device.
And it will pull out and identify the text that were on the screenshots taken by the victim. OCR uses the Tesseract engine, which is driven by language packs that are available for download in the customer portal. And I’ll show you how to get to those language packs in just a moment.
Let’s take a look at where we can find the OCR language packs. I’m in the home screen of Oxygen Forensic Detective right now. I’m gonna click this little down arrow, select “options”, “updates”, and “view customer area” to download software updates.
My sales ID has already been put in. I’m just gonna select “login” and right here where it says “OCR language pack”, all I would need to do from this point on is select “download”. And there’s no specific order when installing alongside Oxygen Forensic Detective.
Now let’s take a look at some of the configuration settings for OCR. I’m on the homepage of Oxygen Forensic Detective. I’m gonna hit this down arrow, select “options”, “advanced analytics”, and right here where it says “OCR”, you can see that we have the option to run OCR import.
The only problem with this is that it’s gonna be very time and resource intensive. So my recommendation would be to leave OCR off until you definitely are sure that you want to use it. And you can turn it on at any point.
You have the option to select a variety of languages right here. You also have the option to scale by size. As you can see here, I don’t want to miss out on anything, so I keep my minimum image size 16 by 16 pixels. Image processing for improving OCR accuracy, adaptive threshold processing, and upscale images that are smaller than 25 pixels: what I’m gonna actually do is move it back down to 16 pixels.
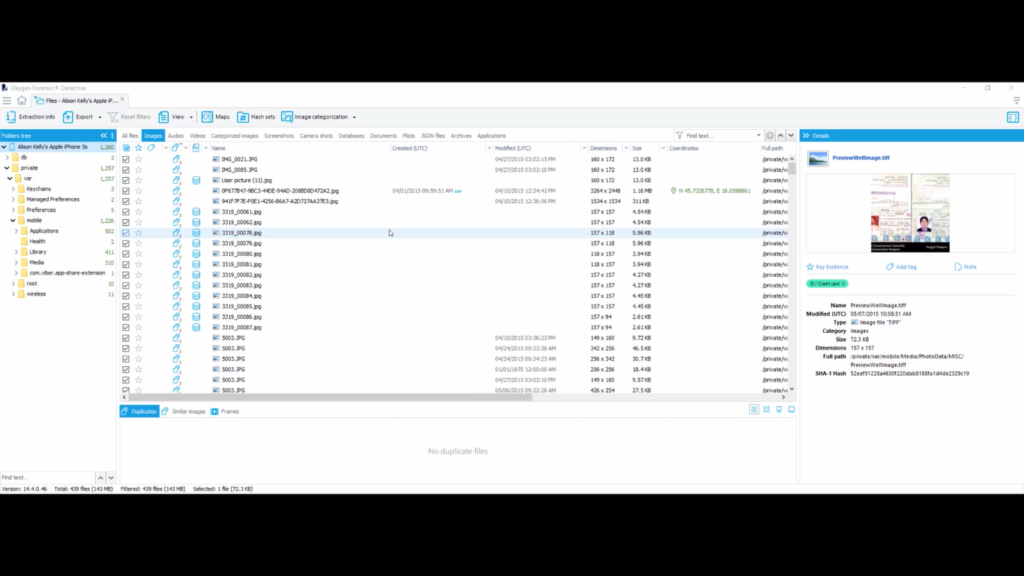
Now let’s take a look at some of what your options are as far as the OCR workflow is concerned. I am currently on my homepage in Oxygen Forensic Detective. I uploaded an Apple iPhone 5s, so what I want to do is select “files”. And I’m gonna run image categorization first, just to kind of narrow down my search results.
So I’ll run image cat. It should just take a few minutes. Our image categorization has been completed. As you can see here, it created a bunch of nice tags for us. So what I’m going to do now is I’m gonna go back to extraction info and I’m gonna select “OCR” underneath analytics.
In the view option, you have the option to view tags, thumbnails and OCR results. So I’m going to select “tags”. And I wanna choose something that I would think would have some words to it, some text to it. Maybe not necessarily “alcohol” or “weapons”, but something along the lines of “currency”, “ID card”, “credit card” and “documents”.
So I’m gonna uncheck all. I’m gonna select “currency”, “documents”, “ID card”, “credit card”, and we’ll just stick with that for right now. And I’m gonna select “apply”.
Now, what I’m gonna do is then I’m gonna come to the top and I’m gonna select “recognize text on checked images”. These are all checked. I’ll select that. And now you can see my OCR is analyzing. So that should be done in just a few minutes.
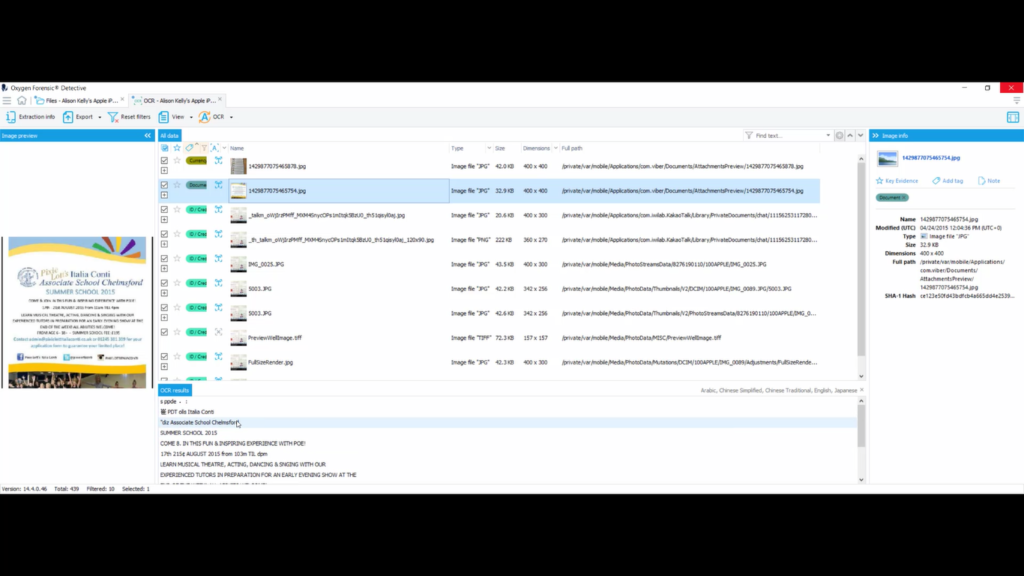
My OCR is done analyzing. So now what I want to do is go up to view and select “OCR results”. And now down here in the OCR results window, I can see the text from the different images.
So on this document, this is a Italian, it looks like summer school invitation. As you can see down here, “summer school, 2015. Come. It is fun and inspiring experience with Poe” and some various information, “6-18 year olds. Summer school fee is 195 euros.”
So you can see that it pulls some information from different passports or identification documents. One down here even says “forged passport”. So sometimes it doesn’t get every single thing on the document. It’s not an exact science, but this can definitely help you out and narrow down your search results when you don’t exactly know what you’re looking for.
At this point, you may be asking yourself, “what is the ‘so what’ factor? I understand that you can search for text on documents, you can search for texts on passports, other identification items, but how can I use this in one of my investigations?”
Well, I have a phone where we conducted a scenario where two friends were going to kidnap their buddy as a prank, and that actually ended in their buddy’s demise. They accidentally killed him. So what they did to cover their tracks was delete all of the messages between the two friends who put this plan together.
What they failed to do, though, is they took screenshots and they failed to delete their screenshots. So now I can search for whatever they were saying in their messages, just by taking a look at their screenshots. So let’s take a look at what that looks like.
So I’m gonna choose the device from the scenario, and I’m gonna go down to OCR, and I’m going to “recognize text on checked images”. Our OCR is done running. So now what I’m going to do is I’m gonna go up to “view”, I’m gonna deselect “tags” and I’m gonna select “OCR results”.
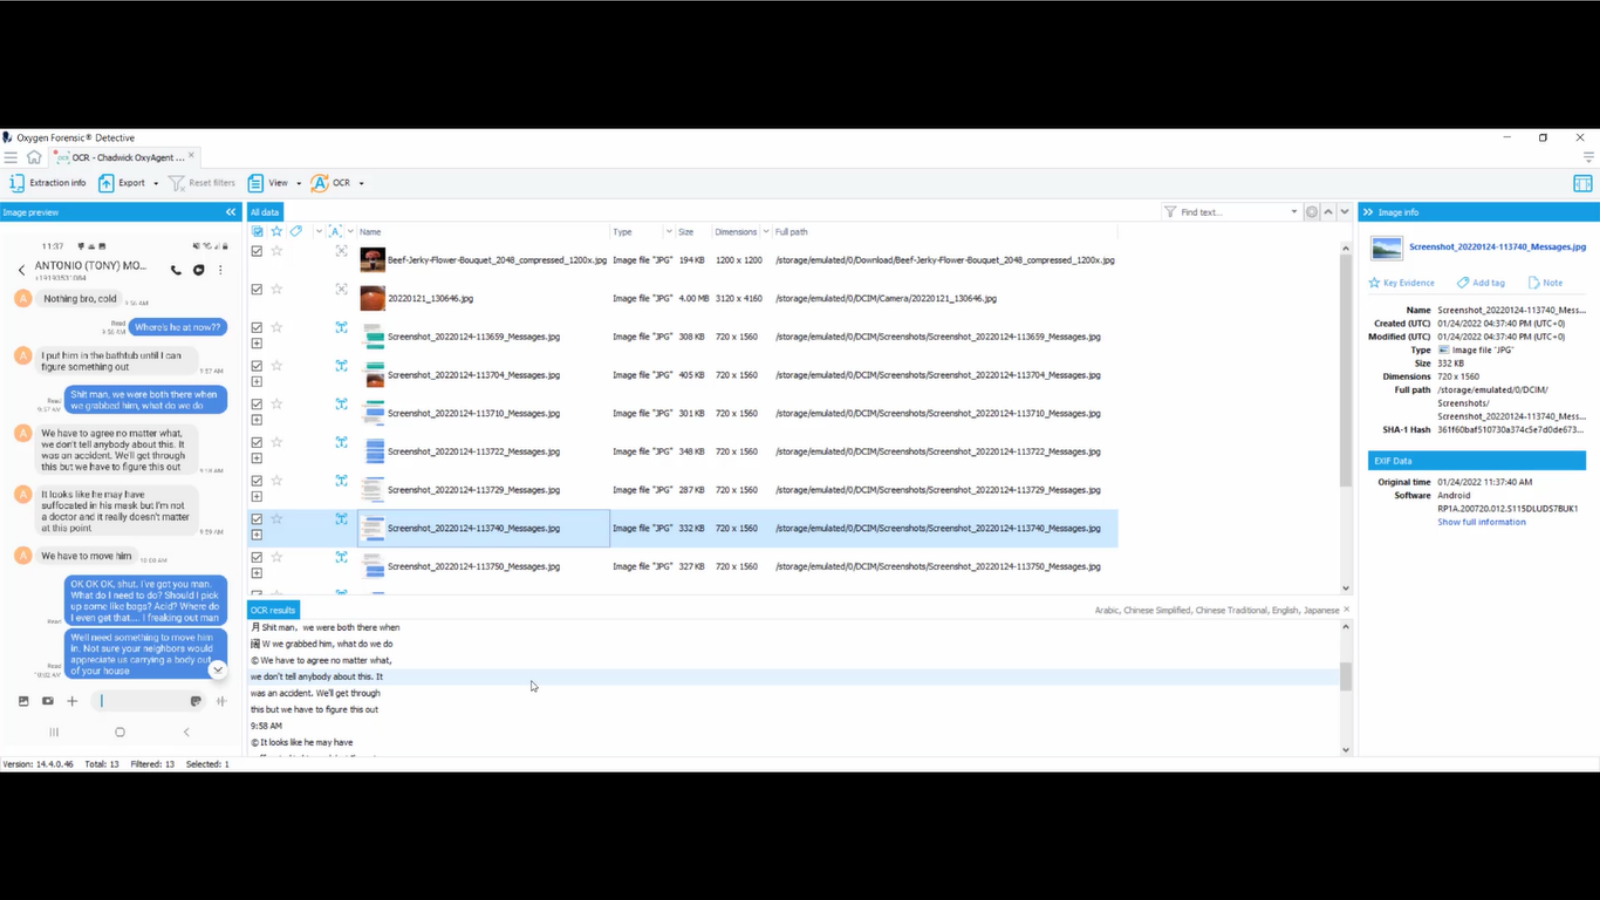
And now we can take a look at the screenshots between Antonio Montana and Chadwick Pearson. They’re two fictitious characters who accidentally murdered their friend when they were trying to pull a prank and kidnap him.
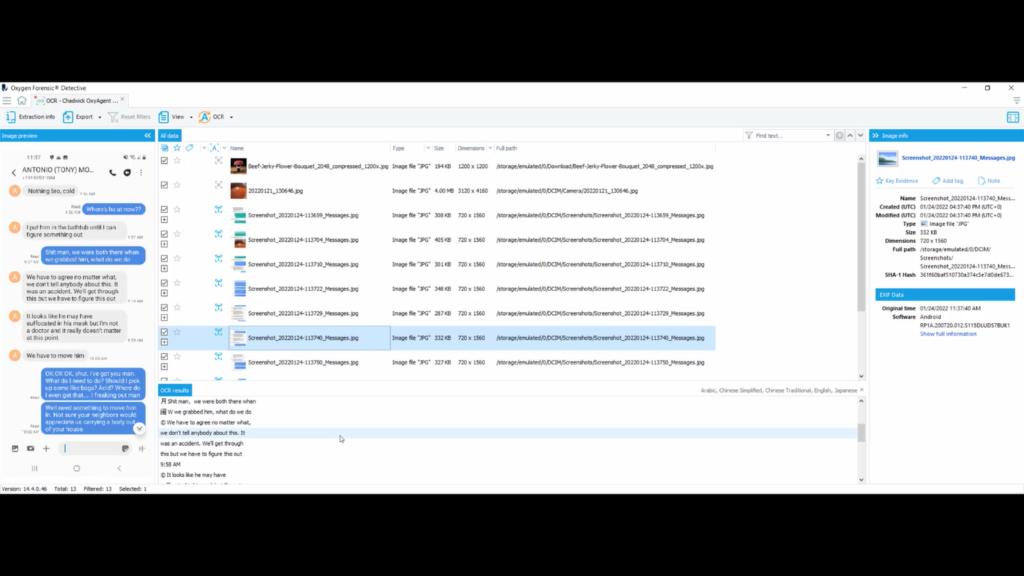
Down here, it shows how they know each other: they were both in the 82nd Airborne. A little bit later on, we can see where something went wrong. And he accidentally suffocated to death, so they had to put him in the bathtub till they could figure something out. They agreed not to tell anybody about it and that it was an accident. And they even go through where they want to dump the body and what tools they’re gonna use. They should wear gloves too.
So that’s super beneficial, especially when they deleted all their chat history. If they forgot to delete their screenshots, this is super beneficial in figuring out exactly what happened and why the individual was dead.
Now let’s take a look at one of the most important features for OCR: the ability to search texts that was pulled out of images.
So what I want to do is make sure the device for my subject, Chadwick, is selected, and I’m gonna select “search”. I’m gonna make sure I’m searching for “text”, and I’m going to leave “case sensitive” unchecked as well as “whole words only”, because you never know what kind of abbreviations someone will use when using a messaging app. So I’m gonna search in “parse data”, “file names” and “file content”.
So I’m gonna search for key terms for a death investigation, such as, say, “shovel”. So I’ll select “shovel” and “search”. “Okay, I’ll grab us the shovels. We gotta get them. Pay in cash for shovels, just in case. Be sure to grab some shovels just in case.” So we can tell that they’re going to be using shovels to bury the body.
And I’ll type in the word “pulse”. As you can see here: “does he have a pulse? Nothing, bro.” So that’s leading us to believe that Tosh is now dead. Type in “body”. “We can’t let anybody see him. Don’t tell anybody about this. When we dump the body, we need to erase…” So basically this is just showing you, you have the ability to search for the specific texts that we pulled out of the images.
In this video, I showed you what OCR is, how to properly configure OCR, the OCR workflow using image categorization, and how to conduct searches using OCR. Thank you for tuning in with me. If you have any questions or concerns, please reach out using one of the URLs on this slide. Thank you.


