On the 28th of June 2021, Forensic Focus attended Exterro’s one-day training course for FTK Imager. The aim of the course is to give investigators an overview of FTK Imager and help them to understand what is going on under the hood when they use the tool, as well as to provide them with the capacity to use the tool to its full potential. Completing the one-day course also qualifies practitioners as Exterro Certified Technicians.
The class can be taken either online or in person. Forensic Focus took part in the live online training. You can find details of upcoming training days here.
Exterro’s live online training option allows students to log in remotely to computers that are housed in a classroom with an instructor. This means that the instructor can easily keep an eye on how people are doing and fix any issues that might occur. There were a couple of technical hitches at the beginning of the class as people logged in and found their places, but once these had been fixed everything ran smoothly throughout the day.
I appreciated the group size and the opportunity for the participants to introduce themselves to one another. I have attended some courses where the group sizes are so huge that it feels like there is no interaction at all, and it was good to have a smaller group so that the instructor could give his full attention to every student. The instructor was very patient with students throughout the day — at one point my computer was playing up and rather than getting frustrated or moving on without me, the instructor helped me to fix it so that I would not miss out on the class.
Before the class, students were provided with login details for the Exterro training portal. On there was a copy of the handbook which would be used in the class, and there is also a section where you can view and sign up for available courses, as well as checking which courses and qualifications you have already completed.
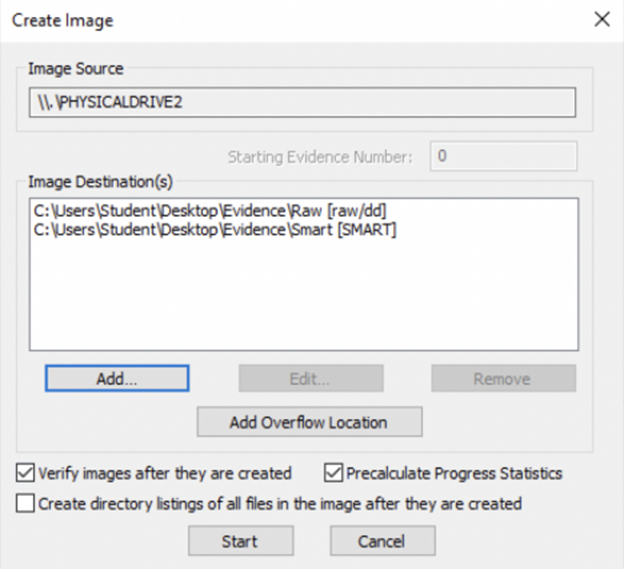
We began with a discussion of how to create a forensic image, and how to convert an image from one type to another. FTK Imager can also create multiple images from a single source at the same time, which can save a lot of time in an investigation.
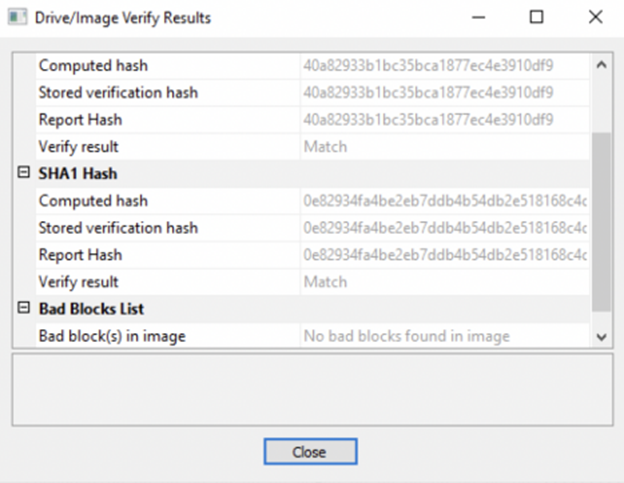
Images are verified using MD5 and SHA-1 hashes. The instructor explained the purpose of hashing for anyone who might have been unaware, and took us through how hash verification works.
I liked that throughout the training, the instructor was running through some of the questions that would be on the test so that we were all adequately prepared. I felt that he wanted us all to pass and to have a positive experience of the course. He was also very clear about what would be covered in each module, and he read a lot from the handbook which meant it was easy to track where we were up to and follow along. Being able to download the handbook from the training portal meant it was also easy to refresh my memory later when there were things I might have forgotten.
The instructor spoke about how FTK Imager is released in two forms: GUI and command line. He then gave an overview of what a forensic image is and how data is stored. It felt like the class was very accessible and would have been appropriate even for people who have no prior grounding in digital forensics.
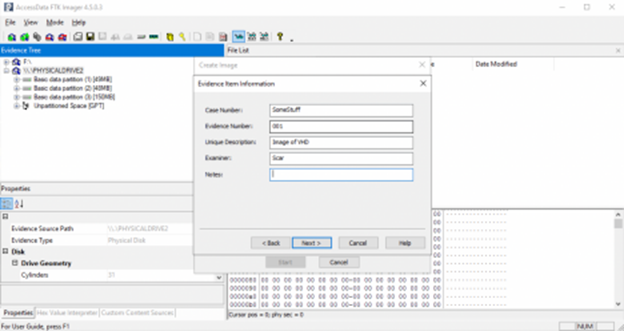
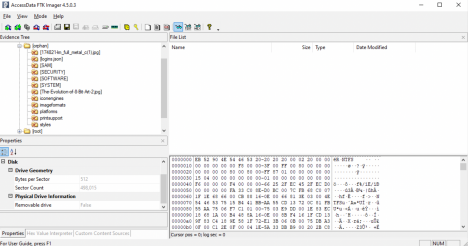
The instructor then talked us through what to add to an image, how to set things up and where to save cases. The ‘Notes’ option allows investigators to include details about the case to jog their memory further down the line: you might need to come back to a certain case years after you originally set it up, so making some brief notes in this section can save time and frustration later on.
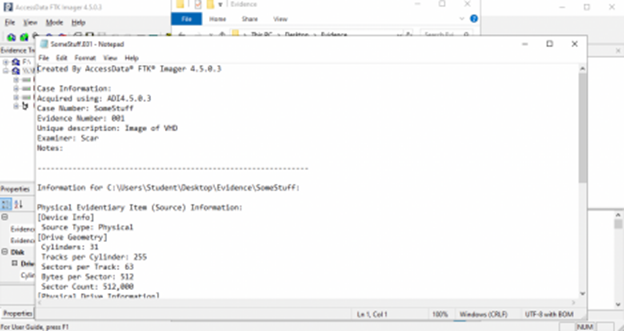
The image was created very quickly — throughout the day, I was impressed by the speed of FTK Imager — and then a notepad file was generated which included basic information about the case as well as source information.
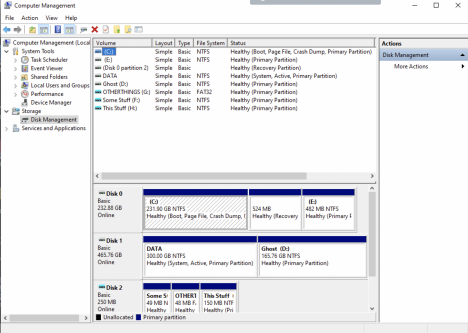
We then moved on to a description of sectors, and how if you know the size of the sector then you know how many sectors and clusters are available, and can therefore figure out the size of the drive. The instructor demonstrated how to work this out. I liked the amount of demonstration throughout the day — it felt like the instructor really wanted to make sure we understood what was going on when we were using FTK Imager, rather than just telling us what was happening.
During the practical parts of the training, step by step instructions were given, and at every step of the way the instructor explained what he meant by various terms. For example, when he mentioned the words ‘logical image’ for the first time, he described what this was for people who might not have known. All of this information is also included within the handbook.
The instructor emphasised some common mistakes, such as not making sure you are imaging the correct disk. I felt this was useful, particularly for people who have never used a tool like FTK Imager before. Imager’s layout will also be familiar to anyone who is used to a Windows file system, which makes it accessible for lay users and investigators alike.
We spent quite a lot of time laying down the basics of what some of the terminology meant and how to create a forensic image, but then we were into the more nitty-gritty elements of viewing and interpreting evidence with FTK Imager.
Once again, throughout this section terms were carefully defined by the instructor and he made sure to keep a close eye on all participants and regularly checked that nobody was falling behind.
We spoke briefly about how to view filesystems and then moved on to talking about the files themselves, including file properties and the hex view option.
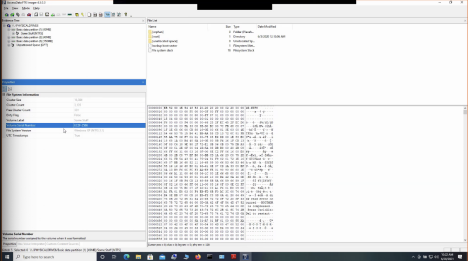
We were shown how in the file system information we can view various things including cluster size, cluster count, volume label, volume number and so on. It is also possible to see all of the partitions — FAT, NTFS, and so on — and within the Properties pane, you can see how much
space is being used and how many clusters are free. You can also see unallocated or unpartitioned space, and then look at a file in hex view to see if there is anything of further interest there.
Having talked through some of the options available in hex view, including match case and regex searches, the instructor then moved on to speak about converting decimal to binary and hex, and vice versa. He gave an overview of counting systems and the difference between, for example, a base 10 and base 2 counting system, and then shared some handy tables to help demonstrate the conversions.
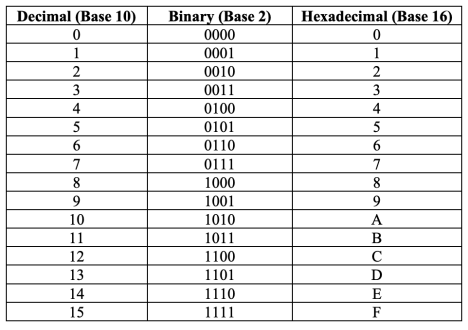
Within FTK Imager, the Hex Value Interpreter converts hex automatically, so most of the time you will not need to know how to convert hex yourself. However, it is useful to know what is happening behind the scenes, and to be able to double check if you are unsure about something.
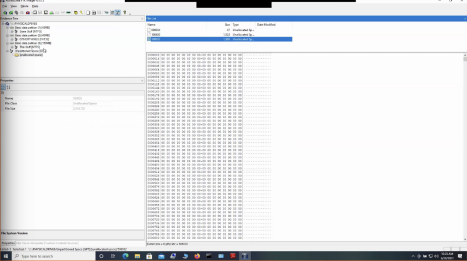
In many cases, investigators are restricted as to what data they are allowed to access, and sometimes there will be different levels of access allowed for different people within a team. FTK Imager’s Custom Content creation options are a great help with this, and we spent some time looking at how to create images that include or exclude specific file types.
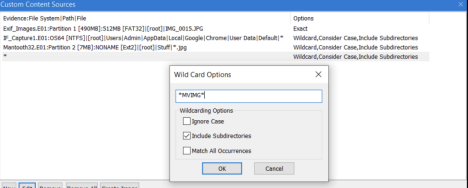
Once a Custom Content Image has been created, it can be saved and accessed just like any other image in FTK Imager.
The final part of the day before the test involved a demonstration of how to use FTK Imager in the field. Sometimes an investigator will need to image a live machine at a scene and then mount it later for analysis back in the lab.
FTK Imager can be installed on a USB for this purpose, and can then be run on the target machine in the field to capture memory, Windows registry files, and anything else the investigation may require. Bear in mind that your USB will have to have sufficiently large capacity to store the contents of the target drive, as well as FTK Imager itself. The instructor underlined the necessity of ensuring that the destination drive to which you are saving your image is not on the target machine but on the USB drive you have connected — apparently this is a common error and one that is not easily undone!
When back in the lab, you can then mount the image on your own machine. The instructor walked us through how to do this. At the time of writing, only logical images can be mounted.
Conclusion
I enjoyed the FTK Imager one-day training course — it was easy to access, the instructor was patient and made sure everyone was keeping up, and everything was clearly explained at all times. Having access to the handbook during the course was helpful as well, since it meant I could easily keep track of where we were and could go back to check something if I was unsure.
I would recommend this training course for anyone at a beginner or intermediate level of forensic investigation. It would be particularly useful for junior team members who might be tasked with triaging or imaging in the field, who might then need to be able to mount an image and do some basic analysis before handing over to a more senior investigator.
I tend to prefer live online training as I find it very convenient to be able to participate in an environment I am familiar with and in which I feel comfortable, rather than having to travel to a training site. However I do like that there is in-person training available for those who might prefer a face-to-face option. Different timezone slots are also available, which is helpful as digital forensics is very much an international business!
Overall, I would definitely recommend the FTK Imager one-day course and would be interested in pursuing further training with Exterro.