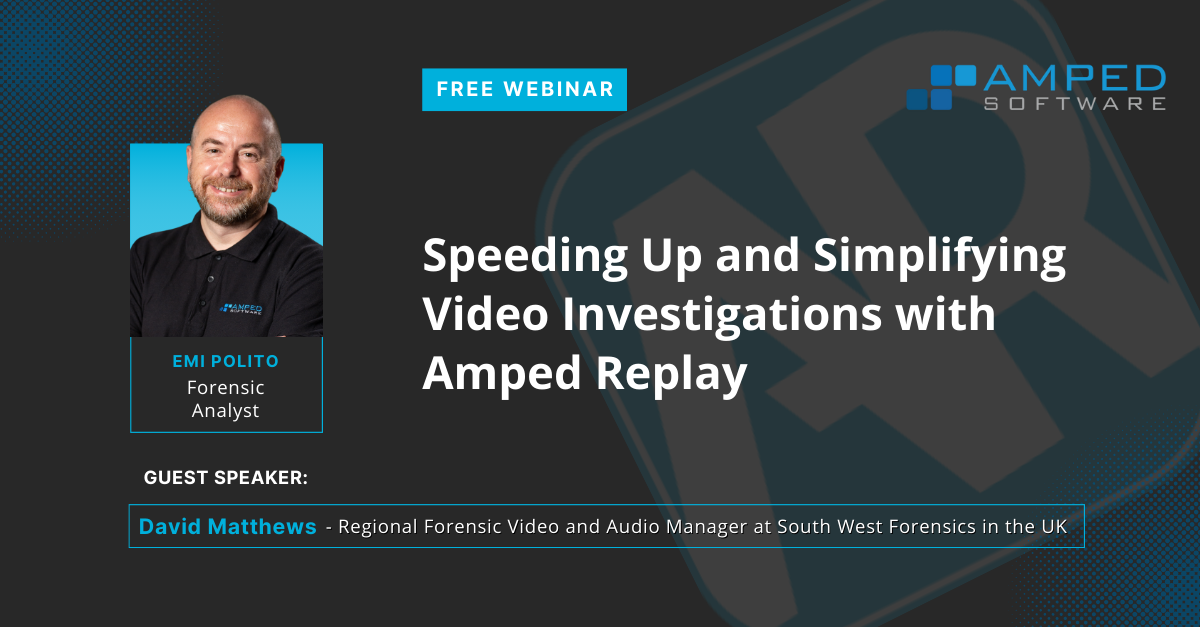
Emi Polito: Hello, everyone. Good morning. Good afternoon. Good evening. I’m pleased to see that we have got people from around the globe that, the joys of being on the Internet and that fantastic. So, welcome everyone. Myself and David from Avon and Somerset Police we are going to give you a little bit of an introduction to Amped Replay.
We refer to it as the forensic video player for law enforcement and applications regarding criminal justice and investigations. So, we’re going to talk to you a little bit about that. We’re going to show you some of the stuff that you can do and how it can help you.
I’ll show you a little bit of the software and then David will talk about how Amped Replay has actually already helped and is helping them with their processing and also, in view to accreditation and level tier access to certain abilities and things like that.
Anytime you have a question feel free to put them in the chat. I think there’s also a Q&A box. I might not see them straight away, but rest assured that I will have a look at them and catch up with all the questions that we have.
So, I’m Emi. I’ve been with Amped for a couple of years now. Initially doing support, now mainly doing training, technical marketing, conferences and things like that. I do like to move around. Every now and then go and travel the world and then see people. Wherever the training and the conferences take me, I always like to catch up with the colleagues and friends all over the world.
I was in the US a couple of weeks ago. There might be some of you guys from there that attended the LEVA symposium. I was in Singapore last week and here I am now online.
I am based in the UK and I used to work for a number of police forces, Bedfordshire, Essex. I also work for a private forensic firm doing video forensics mainly. I’ve got a Bachelor of Technology Multimedia Systems Engineering and I’m also a LEVA certified analyst. I used to work in television back in the days until I got laid off and stumbled into this industry almost by accident and then actually fell in love with it and never looked back.
A quick introduction about our company. We are a fairly small independent company. We have between 40 and 50 people now. An Italian company founded in 2008. We’ve got a subsidiary in the US, its actually separate entity, but still part of the Italian Amped company.
Our mission right from the start, Martino, our CEO started it as a thesis project that’s how Amped started, was to become a one stop shop for any needs relating to image video analysis and enhancement. So, anything to do with forensics, whether that’s analysis, processing, clarification, measurement, presentation, everything like that, we’re into that business alone.
We do that and we’re trying to do as best as we can. Our vision is justice through science. Everything we do is transparent using forensic safe methods that you can report on and you can explain. We have a lot of tools in our product to help our users understand how they process and analyse their imagery and be able to explain it in a court scenario etc.
We operate in more than 100 countries and we have four products which we refer to as being part of an ecosystem. They are all linked together.
They offer a specific need in regard to video forensics. Starting from the Dvrconv, which is effectively a batch forensic video converter. Then going into Amped Replay, which is the product we are going to concentrate a little bit more on today, which is batch is a forensic video converter. It also allows you to do some basic clarification as well as annotations and reductions.
It has the tools to present your evidence quickly, even if you’re not an expert. You’re not a skilled video technician, perhaps you’re a police officer or an investigator. You’ve been tasked with looking at CCTV and maybe producing some stills, some video for the prosecution, for the media, etc. That’s what Amped Replay does.
Amped Five is our mainstream product. Amped Five is mainly for the analyst, for the technician. It takes care of anything to do with conversion, analysis, clarification, advanced clarification techniques, measurement and presentation.
Then we go on to Authenticate, which is it doesn’t process images and video, it’s got analytical filters for the purpose of establishing the origin and the history of images and video and whether they are actually showing what they purport to do. So, authenticity.
That’s our ecosystem there. Why are we talking about video so much? More and more we talk about it when connected to criminal justice is because the opportunities keep increasing all the time. Video evidence is the best visual representation of what has occurred. But it needs to be reliable. Therefore, we need some niche tools that we can use to analyse them.
The issues that we get associated with video are the format is not supported. How many times will we come across this? I’m sure there will be a lot of people in this online room that have got a theory coming from a specific place and it just won’t play. We need proprietary software, we need Codex, we need elements that if we don’t have them, we simply won’t be able to view that video.
There are so many of them. Each manufacturer does it in a different way. We have limited control on correcting the image. We also now have a specific need to redact sensitive information quickly outside the video. Why? Because there are legislations out there, data protection, freedom of information act, which require us to, take out or hide certain elements of the video or the audio as well before they can go to court.
For example, personal details of witnesses, unrelated content and things like that. You will see with Amped Replay, you don’t need to be a video editor to do these kinds of things. You can do them easily, efficiently and safely, most importantly.
So, now other challenges like incorrect techniques, insufficient software to correctly capture individual frames or clips. This is quite a big issue. It’s always been a big issue, but more recently there’s an understanding from the legal community that the acquisition of video is very important.
It needs to be done correctly. Not just for visual quality, but sometimes to retain data associated with the video, for example, timings information, timestamps and things like that. So, we will see how we can do that with Replay, fairly easily and very safely.
It seems easy, but it’s really easy to get it wrong. The problem is that if something wrong happens it might go unnoticed for a very long time. That’s the issue. Proprietary video formats complicate investigations, because you need players and, you can’t even access certain players anymore on the internet because there are IT restrictions in downloading installing software etc.
The image quality is always an issue. We have come to accept that especially with surveillance video, if the video was of pristine quality, then we wouldn’t be able to store so much of it. So, it’s something that we have come to accept.
There’s now also the issue of trust. We can’t always trust it. In fact, I remember when I started, every video was taken at face value. If that’s what the video shows, then that’s what happened.
Now I see the opposite. Now you bring a video to the courtroom and the first question they ask is it authentic? We first need to prove that it is authentic before we can make it into the courtroom.
Then we need to interpret the video in the right way and that can sometimes be a challenge because of technical limitations of the footage. We need to do so without bias as well, which is quite a current issue, very relevant at the moment.
Then of course there is the black box topic. The explanation of technical topics to a lay person, to judges and juries. They need to be able to understand what the image shows or doesn’t show and we, as experts, need to allow them to understand this before they can make their decisions about guilt or an acquittal.
The impact of artificial intelligence, and the balance between privacy and security. All of this needs to be kept in the back of our mind. In the past we always had different tools, there might be people in this room that started with using products that were more designed for broadcast and media and adapted them into our industry.
Then before we know it, we all got all these different tools we need to export from one tool, then import into another and it becomes a very complex workflow.
None of these tools were created with forensic usage in mind, we just adapted them. Integration from one product to another and potentially you could be deteriorating the quality of your evidence as you do so and that could be an issue as well.
Reporting. The reporting is of course very important. We will see how all of our products come with the reporting tools that can assist you with that.
Before we move on, to show you a little bit of what Replay can do, I just wanted to talk to you a little bit on the very first stage of a video forensic workflow, which is the acquisition. So how do we actually get the video in so that we can look at it, analyse it, process it, etc. Especially when it’s in proprietary.
We need to decode and convert proprietary CCTV formats. In all of our products, and Replay is one of them, the only one that doesn’t is Amped Authenticate, we have a video engine, which we now refer to as the Amped Engine. This will analyse a video, both in terms of container and video stream, and perform a process of analysis to see in this video what is actually genuine video elements and what are proprietary elements.
There will be a process of stream extraction and segregation of the usable video elements from the stream, which will allow for correct decoding. What I mean by decoding is reconstructing compressed video, putting it back onto your screen, reconstructing the pixels and all the frames correctly. So that you can view exactly what that video is intending is to show.
Once we’ve done that process, then we will repack it into a compatible video container because sometimes a video could be encoded with a standard compression method such as H264 or H265, but then it’s packed into a proprietary container. In that instance all we need to do is take that video and put it into a standard video container.
This process is actually quite important because doing this process of stream extraction we can also extract the timestamp where present. A timestamp is not just what on the screen is also actually a data set, which you can extract from the file and then you can use it not just to show the time and date, but also because you’re doing a timing or a speed assessment. Therefore, you need to have a correct and genuine timing information about the frames in your video.
This is how the process works. We have a proprietary file with a proprietary container. Inside we have usually a video stream and in this video stream, there are usable and recognizable video elements. So, for example, H.264 or H265 Iframes and Pframes, channel numbers, timestamps and things that are necessary for video playback.
Then we have them, scrambled with proprietary data, which we don’t know what they are. Usually only the proprietary manufacturers know what they are. So, using the Amped engine, we do a process of stream extraction where we segregate this usable video data and we put it all back together in the correct order.
If the video is multiplexed, then we will have a separate video stream extracted by each channel and then we extract the timestamp. Then using FFmpeg once we have extracted the stream, we will put it into a standard container like an AVI or an MP4 or something like that.
That’s the little bit of a background behind video acquisition. You see actually how easy it is to do in Replay. So, what is a Replay? It’s a video player designed specifically for forensic use. It’s the video player for police officers, investigators, members of the criminal justice system and law enforcement community.
It’s got an Embedded Amped Engine, which we just discussed very briefly. It can perform basic correction and enhancement safely and quickly. Now it has got the ability to provide tools and features on a level access basis. Especially in the UK when there’s now a need like for identifying if a person is a skilled and trained enough to be able to do certain things then Replay can be customized based on access to providing or to hiding these features.
We can easily annotate video and redact sound as it doesn’t require a technical background. It is designed to be for police officer investigators who are tasked to work with CCTV even if they are not video experts.
So, without further ado now, I’m just going to launch Replay and show you really what it can do for you.
The first thing I would say, in regards to formats, a lot of us will have to deal with something like this. So, a folder or something like that, a device which contains possibly video, but it’s in proprietary format.
If we double click on this well Window simply doesn’t know what a dv4 extension is. So, it’s asking you what to do. If you try to open it with something like VLC, VLC will tell you it doesn’t recognize this file.
So, sometimes what we need to do is, if you’ve got a player, we can attempt to play that video with the player but, then we are limited in terms of what we can do after we’ve opened it with the player. Can we export this video in proprietary format to a video in a standard format that we can use to send to the prosecution or something like that.
But maybe the player doesn’t allow you to do that. It’s only got a snapshot tool. You can only take still images from that player. Or if they do, they won’t export at the same quality as the original. So, the purpose of the Amped Engine and all the products that use the Amped Engine in Replay is to bypass the player in trying to deal with the video exactly as it is. Exactly as it was recorded.
In Replay is just as easy as dragging a file from whatever location on your computer into the platform and then you’ll see there will be that process of stream extraction that I have been talking about.
So, in this instance here, I’m navigating into a folder to show you that process of clean extraction has actually happening in here. We have also got a timestamp extracted from the video and there has been stream extracted and it’s been converted into, in this case, an AVI.
We have got an audit log with the process that is taking place. This is an FFmpeg log. It show’s you that the stream has been copied over into an AVI container and everything is ordered in there. Now we’ve got our video in here. We’ve got our timestamp that we’ve been able to extract from the video and we can deal with all the things that we need to.
Now, I’ll show you some of the practical stuff that you can do in Replay. For that I’m going to go back and import something where we can start drawing some annotations, do some basic clarifications and things like that.
So, Replay works like this. You drag your video in and it’s right in the middle of your screen. You see at the top, here, you have six tabs. The first two tabs deal with locating video and importing into the platform. You have options to Navigate into folders, look at thumbnails and things like that.
Of course, you have access to most recent projects. One of the good things about Replay is that anything that you do in it, whether you’re taking some stills, doing some bookmarks, doing some clarifications etc, when you close the program, you haven’t lost anything. Everything will still be there.
So, for example, I’m closing my program and reopening. I haven’t actually saved anything. I didn’t save anything and, I just closed it down. But when I go and reopen it, all the stuff that I was working on is still there.
This is designed specifically for if you are doing some work and you are in a rush, you have to go out on a job or whatever. You don’t have to worry about having to save your project or losing your progress. Replay will remember it for you.
You’ve got a play tab here. On this play tab is where you do your triaging of the video. You’ve got a timeline in there and you can scroll through it. You got an audio waveform as well, in fact, you got two. This shows you the audio plots. If there is sound, it will be shown here in waveform.
You got two bars here. One bar is the one at the bottom and will show the audio on your entire video. The top one, you can zoom in and out. Later you’ll see that when we do some audio reductions, i.e, we take some audio away from the video, we can go and zoom into specific segments, even on a frame by frame basis. We can do some real tailored and very meticulous kind of like audio editing because you’re zoomed in very close.
At the bottom there, you would see exactly what section you are zoomed in on at the top. Here you’ve got it highlighted in blue. So, at the moment, we are just looking at this portion of the sound in this clip, in the top bar.
You will see that a little bit later on, but it’s very easy. You just hold the control button on your keyboard, and then with a scroll wheel on your mouse. You just go up and down to zoom in and out.
What else can we do? We can triage our footage. One of the things our users use Replay for is creating a storyboard of events. For example, in this video we have a car robbery. We see bad guy here is coming over. Straight away I can go and bookmark an event. I just click on this button here, add, edit bookmark, we’ve got bookmark in there. You can see it like represented in here as a yellow line in your timeline.
You can navigate through your bookmarks with buttons on your interface there. Then when you when you are on a bookmark and click on the bookmark button again you can add a description, for example, suspect arriving or visible on CCTV. Then click ok and then you can go and have a look at other frames.
For example, here, we got a frame where a weapon is may be seen. So, we can add the bookmark in there and then just add a description UK suspect carrying weapon. Then click ok. Go forward, here there’s contact between the suspect and the victim. possible assault? Who knows? We can bookmark that and then have a look later.
Then once we’ve done this, we can go into our export button here. Go at the top there, the export button in here. In the export tab, you can export your video as an MP4 or something that you can pass on to your prosecution. You can export the bookmarks, so all these images that I’ve bookmarked, I can export them as individual images.
When you export bookmarks in Replay, what happens is that they are exported with the frame number. A video obviously is made of many frames and each one has an individual frame number. So, when we export them, we can simply refer to them as their frame number in here.
All of our bookmarked images have got frame number at the top, a timestamp of when it was created and also got a reference to the original file there. You can always refer back to your original video, even when you export images.
Then you can generate a report. The report is very streamlined. It’s pdf documents, it’s got details of your software, when you created the report, details of your input file name with file hash, size, Codex, resolution and frame rate etc. It’s got the first and last frame and then it’s got your storyboard in there. With your images there is the frame number description, if you’ve put one.
In Replay, it’s very easy to create a storyboard without having to mess around with word document or stuff like that.
Something that we have recently implemented into Replay, which is really useful for triaging, is motion detection. So, motion detection basically is the process of identifying motion in a video. It’s easy and straightforward in Replay in the sense that you can define motion simply as pixels that are recognized as areas or pixel regions moving from and to previous and future frames.
So, whenever that happens, that is detected in Replay as motion. To do motion detection from the play tab, you see every tab has got your video here and on the right side, you’ve got some panels in there.
On the play tab, you’ve got a basic file information panel, some case info that you can fill out. This is for your reports, if you’re producing reports, you can fill out the case information, location, etc. Here, we’ve got a motion detection panel, so it’s fairly quick.
This video is half an hour long, you can see the duration of the video here. Once the process is done, what you will have is your motion detected pixel regions being highlighted with this kind of like transparent red overlay. So that is all the motion that is being detected.
Once we’ve done this, then we can look for specific areas of motion. For example, if we have intelligence that someone has exited this building and has crossed the road, then we can just click on this button here, set region of interest, and then pick out this area in here. That will basically look for the motion in that specific area.
Then we can show and hide the motion plot. So, now what you see in here is no longer the audio waveform. This is actually the amount of motion that you see in the timeline, starting from the beginning of the video and ending at the end of the video.
The bigger the motion activity in a specific frame the higher the peaks you will get. So, what can we do? Well, all these highlighted areas that you see are all being detected as motion. If we were to go through each and every one of them, we will spend all day. It wouldn’t be any easier than to look for any activity in this area than doing this.
So, what we can do is we can set the threshold. As I move this slider in here, you can see this yellow line going up. Okay. That will basically filter out events that have got a motion that is lower in amount to the set threshold.
In this case I would start from a very sensitive threshold and see if I can find some activities. At this level, there’s only maybe 1,2,3,4,5,6 motion events. Now that I’ve done this, I can navigate through them and see. For example, here we have this big vehicle passing through the road, that has got a lot of motion, so it’s being detected. There is another vehicle going through and if I think I am missing something, then I can lower my threshold and see if I’m missing something else.
So, vehicle in there. Let’s go a little bit lower. Okay, there’s no suspect detected in that area, so maybe we can go and have a look at another region. Maybe here and see if we can find something. Here we found some activity.
This system really allows you to be time efficient, but at the same time you can adjust the threshold slider to ensure that you’re not missing anything, that’s the principle. This process doesn’t use any artificial intelligence is just based on standard pixel recognition and detecting pixels that are being moved from one frame to another.
So, that’s how the system works. Once you’ve done that, you can also add bookmarks for your motion events. Once you set that threshold, you can bookmark them and you can export them exactly as I showed you before. Nice and easy. What else we can do?
Replay also has the ability to do multiplexed video as well. For example, we have an executable file. If you double click on it, it will command a player. If you drop it into Replay the process of stream extraction will be attempted. That’s because Replay can see past the container and identify the video frames in whatever the container is.
In this instance, what’s happened is that multiple streams have been detected. Whenever that happens, you have a number of additional buttons in your play panel, which will show your individual streams. Bear in mind, that the camera numbers may not necessarily be the actual camera numbers of the DVR, but they are the stream numbers detected in this process of extraction. That’s why you get camera zero because that is video streaming zero in there.
When we’ve done this, we’ve also been able to get the time stamp that you can see here. The time stamp, even though it’s not on the screen as I was saying to you before, it can be part of the data. In this instance, we will be able to identify that in this process of stream extraction and add it in as data.
Here there’s a robbery going on. What I want to show you on this one is quickly how you do annotations in Replay. I’ll show you the announce button in a second, but I’ll skip that.
You can go chronological in this workflow. You load your video first, then you play it, then you might do some basic announcement, then you might do some annotation and reduction, and then you may export. That’s like the standard workflow, but you can deviate, do annotations first and then do announcements.
I’m going to click on the annotate button here. In here you have got a bunch of options there for annotations. You can use arrows; you can do free text but you need to have good handwriting for that. You can add text, you can add images onto an image or onto a video. You can do some reduction, such as hiding someone’s identity on the video. You can do some magnification, which is actually one of my favourite annotations in Replay and Five because Five also has it. You can also do some spot lighting.
One of the cool things that we’ve added recently into Replay is if you have a timestamp and have extract this data, you just click, quickly drag it and put it onto your video right from the player. Just drag it onto your video and then it becomes an annotation that you can have on your video.
Once you got your annotation there, you get new options available. You can customize the colour; you can make a red for example. You can customize the background, make it bold and do whatever you like. It’s timestamp data that has been added to your video as an annotation.
In this video here we’ve got a view, maybe possibly a weapon there. It looks like a like a pistol, we can’t be sure a hundred percent, but that’s what it looks like from the imagery.
We can do some magnification. Click on the button magnify, and then here, we have settings related to that particular annotation type. You draw it on your screen and that will magnify this region off the video. Then, these blue dot in the middle of this rectangle we can use to move to the area that we want to magnify, for example to show a weapon.
Now we can do some customization. For example, we can increase the magnification size. We can make it bigger and then we can add border. A very good one that I use a lot, in Replay and Five, is the border type “point zoomed area”, which shows you where the magnification comes from in your original video.
If you’re asking why this looks so ugly in the magnification that’s because it’s using nearest neighbour interpolation which is a method of adding new data to your existing data. When we enlarge an image, when we magnify an image adding new pixels to the original pixels. The nearest neighbour adds pixel values that are duplicate values in terms of colour and luminance of neighbouring pixels.
It does so in two dimensions, horizontally and vertically. Your original pixels, which in reality are small dots that you cannot see individually, are represented as squares and that’s what nearest neighbour allows you to do. Using this interpolation method, you can see the original pixels of the video.
So, each one of these little squares are now the original pixels of the video. But when we do this, we are losing what those squares were actually meant to depict, when they’re all combined together. This is why the interpolation method that we would use is this one called bicubic. This no longer duplicate neighbouring pixel values, but averaging values out in between neighbouring pixel values. This will allow us to register the information better in our brain.
For a forensic player, you need to be able to decide what interpolation method that you want to use. You can change the contrast and the brightness etc. You can drag any annotation outside the image area. Then, when you export this the image that will be exported will be all this canvas in here that can make it a little bit easier. We can add arrows. Very easily change the colour, make it blue. Add text as well.
One of the things I really like, it’s a fairly new feature, is when you draw new annotations, instead of changing the colours individually, you can now use the colour picker.
The colour picker changes the colour of your annotation to something that is in the viewer, where you are hovering your mouse over. The mouse cursor basically is the colour picker. So, I click on here on this arrow and my text will go blue.
I’m very pedantic when it comes to centering things and make sure they are in the right position so they don’t look disordered and disorganized. Replay has got a snapping function. When you drag your annotation around it will snap to specific landmarks. For example, in the middle of another annotation, or in the middle of your video or art, specific locations in there.
You can also select multiple annotations and group them together. Right click, group them and now you’ve got your annotation locked together there.
We have got a few questions. I’ll stop for a second and have a look at this question here.
How much does Amped Replay cost? I currently have Amped Five.
Bill, I wish I could have the answer to that question. I’m only a techie guy. So, for all that kind of stuff, I’m sure, Michelle or someone, can point you to the right place and you can certainly find that information out.
Jason is asking if the timestamp is inaccurate, can you adjust it so that it shows the correct time?
That is a good question. At the moment in Replay, You can’t. You customize any textual annotation as you like, but this particular time stamping is what we call a macro.
It’s a dynamic connotation, which is taking data from the actual timestamp, extracted from the file. So, the timestamp extracted from the file is whatever the proprietary has written into that video. It might be inaccurate to start with, because it’s proprietary and it’s misinterpreted. Something that obviously we are very careful to not do.
It may be inaccurate because it’s shifted from the real time. The bad news is that you can’t do it in Replay at the moment, but you can do it in Five. The good news is being able to request to shift it, to put an offset in, so that you can show the real time. If there is a difference between the DVR time and the real time, you will be able to do that very soon. It’s in the pipeline.
A lot of new features that we are applying to our programs are mainly from our users from sources like, the Discord channel or Webinars. So, the fact that you asked here, would be a further incentive for this feature to go into the program as soon as possible.
I see David is also helping as well with the questions. Thank you very much. All right. I think I’ve caught up.
Now, what I’m doing here is I’m not losing any progress, but what I’m going to do is load another video. I’ll show you how easy it is to animate annotations. This is something that in the olden days only a video editor was allowed to do. You had to go to the video unit to do this.
It’s very easy and there are quick and efficient ways of doing it. Automatic ways of doing it and a manual way of doing it. Maybe if the image quality is not good so that the automatic doesn’t work.
So, we’ve got another bad guy here. What happened in this video is clearly they had an eye on the bag for quite some time, and now he’s decided to come and snatch it. As he does, he’s being chased by a very brave member of the public who, I believe, got it back to the owner. So, all good news in this case.
We can track the suspect and animate the tracking. We go to the annotate tab, just like I did before. But this time we want to do it in a video sequence, and therefore we want to animate our annotations.
In this instance, I’m going to go and magnify the guy because I’m also interested in his clothing as that might be important to the investigation. I’m going to do just like I did before, magnification and I’m going use better quality, bicubic interpolation and zoom in a little bit. But I want to make this smaller so the area that I’m looking at is even more zoomed in.
I then move that blue dot there and I go like this. Now for the tracking, as this subject moves towards the victim we want the rectangle to follow the subject around. It’s a process of animating or annotation basically. You can do this with all the annotations and they work exactly the same way. We can choose.
If the quality of the footage is good enough then we can use a method of automatic tracking. This is where we tell the program what pixels to look at on a particular frame, then, throughout the other frames, the program will attempt to look for those pixels in that pattern/configuration and follow them around.
So, we’ll make this border a little bit smaller, it’s little bit too big. Here we go, border thickness slider, make it a little bit smaller. I’ll press the button, track, here and you see two kinds of outline. These are not rendered on your image when you export the images, they are just visual aids. You will tell the program which areas of pixels to look at.
For example, the logo on this t shirt is quite unique. It’s got enough pixel definition in there, there’s good contrast of values, almost to the point where we can see a shape. So, I’m telling my program to follow this around. What I don’t want to do is include the arms, because the arms will move as the subject moves and that may confuse the program in tracking that suspect.
Then with the yellow one, we are telling the program the estimated direction of movement of our tracked area. We are helping our software to look for this particular region, rather than looking up, down, left and right. We’ll just look for that specific direction and we’ll make it a little bit easier and quicker to track.
Once we’ve done that, then we can go ahead and click on the track button. We can also hold the button down, double click on it and then it will go and it will be tracked. This region will be tracked and as you see, the rectangle is moving. The magnified area is on the subject constantly, until the area of pixels that I initially set as my reference is now is disrupted and longer visible because it’s obscured by the arm.
Then the process falls apart. Five is looking for it as well and can’t find it. It’s just keeping it there and the tracking is not working anymore.
Not a problem because up to this point I was happy and now I will compliment my automatic tracking with some manual tracking. Manual tracking involves the use of key frames.
For those of you who are not into the video editing words, key frames are registered positions of an annotation at a particular position in time. I will add the key frame. I’ll right click on this and then I’ll add toggle keyframe and what you see an icon in there is kind of like a visual aid which tells you that there’s a keyframe at this particular frame.
So, what happened is at this particular frame, frame 222 of the video, the annotation is at this particular position and it has been registered. Then I’ll move my playhead across, all the way up to here, which is where I want my annotation to stop. Then I’ll move my blue dots to the new location where I want it to be, at this particular point in time, and add a new keyframe.
Now we have two keyframes at two different positions in time and at two different locations. There will be a linear movement in between the two. So, they will be joined in a line. If you go back, you’ll see that’s exactly what happens.
Of course, this object is not traveling in a straight line. So, once I’ve got my keyframe in there, then I will have to refine it a little bit. Go into this whole section here and keep adding more keyframes. There is a keyboard shortcut for doing this, which is the U button. You will find this so much quicker than having to right click and select the right options from the menu.
I do this for as many times as I need to, to ensure that this suspect is inside of the rectangle. Here I’ll put it in the position in there and put a keyframe in there. Maybe one in here and I’ll put a keyframe in there, up to the point where I am happy. Now I want my annotation actually to finish there, so I right click and select set until this frame. My annotation will stop here and now I’ve got my subject being tracked fairly easy.
You will see that when you start doing this you know a few times it will be very quick and efficient. Now that I’ve done this, I’m going to show you quickly how to top and tail a clip, which you can do very easily in Five.
What do I mean by top and tail? You might have a video that is very long, this video is not very long actually, it’s just short of 20 seconds, but you may have an hour long clip. Of this hour clip, you’re only interested in 20 seconds where something like this may happen. So, you put your playhead to wherever you want your video clip to start, then click on the button, start range. Then you put your playhead where you want your sequence to end, for example here, and then you click end range. Now you’ve got like a shade in here, which is basically your highlighted region.
Then you can look at the old range, stretch it, and see the range that we just selected. When you go and export it, that’s the video that will be exported. It will be the video that you topped and tailed.
Sometimes you may not do annotations. You may just want to top and tail a clip and dish it out. It’s very easy. You import it, do your range and then export your original video. You can also export the actual clip exactly as it was in the original. Just a section of it, if you like, in a process called lossless stream, or you can just export the processes, if you do annotations etc. Just like I did now, then you have your process stuff in there.
I want to show you, and then I’ll pass on the word to David, how easy it is in Five to do an audio reduction. You can do this with both video and audio because Replay supports audio only now. That’s recent thing, before you needed to have a video, but you can just have just audio. When you have audio, you just have your audio waveform.
So, earlier when I said you can zoom into your audio specific audio section, it becomes useful when you want to do some reduction. So, for example, I want to do some quick reduction. What I mean by that is taking away chunks of audio from this file and replacing them with silence or with a standard tone etc.
I go into the annotate tab, to audio reduction, then hold down the alt button on your keyboard and drag the section on your timeline that you want to remove and it will be highlighted. Then you can set the volume of your tone. You can do all that and then that will be replaced. Once you’ve done it, you can hover over it and trim it etc and add as many annotations as you like.
On all of your annotations, you can add comments etc. All of this information, times and comments of your annotations, will be in your reports when you later export it.
Finally, I’ll show you just quickly and easily you can do some basic clarification.
For example, I’ve got this video and I’ll drag it in there. Click on the announce button. In here you can correct things like interlacing or technical issues caused by analogue to digital conversion. Five has got two ways of doing this. It does it automatically. It detects whether a video, for example, is interlaced or not by the metadata in the video and acts accordingly.
The same with aspect ratio. The aspect ratio is the division between the horizontal and vertical resolution of your video. You can set it manually or you can do an automatic adjustment. The data is taken from the metadata of that file. You can do rotating, cropping, all the stuff that you would expect an image processor to do with light correction, sharpening and resizing with whatever interpolation method that you choose.
That is pretty much it for Replay.
I’m going to pass the ball to David from Avon and Somerset. He will give you some really good information on how the program has helped them out and will also show you some statistics, which might be very interesting to see.
While I do that, I’ll keep an eye on the questions. Thank you very much for your attention. I hope you enjoyed it. I’ll stop sharing my screen and I will pass the ball to David, if you can hear us.
David Matthews: Hello. Thanks Emi. I just want to apologize to everybody. I don’t have my camera working today, so you’re just going to have to listen to my dulcet tones, I’m afraid.
Let me start sharing my screen quickly so we can get this show on the road. Good stuff. Let’s get started then. Good afternoon, everyone. Or good morning or good evening. Don’t know where everybody is coming from today.
Just want to say thank you to everyone for taking the time to see Emi and I today. So, as you can see on screen, my name is David Matthews and I’m the digital video unit manager for Avon and Somerset police. Which is a member of the Southwest Forensics Collaboration, which covers pretty much the Southwest of England.
My team itself is a pretty small team. We cover a fairly large geographical area by UK standards anyways, and we’re responsible for the complex recovery processing, analysis, enhancement, and court presentation of all multimedia evidence. So, the presentation that I want to go through with you today is, largely going to provide you with a bit of a high level overview of how Amped Replay has supported our force with their investigations.
I’m going to spend most of my time walking you through the business issues that we were faced with, which led to the decision to move ahead with Amped Replay as a product, as opposed to some of the other products that are on the market. I’ll talk about the features in Amped Replay which have helped us to remain legally compliant.
Then lastly, I’m just going to go over a few stats, as Emi was talking about, to show how the system has helped us in fairly high level numeric terms. I’m not going to be getting into the weeds of it. If you wouldn’t mind not throwing questions at me during the course of the presentation. I’ll pick those up when we get to the end, because I may answer some of those questions as we’re going through.
So, to give you a bit of context to the whole thing. In July 2022, our force was faced with what was pretty much locally referred to as the perfect storm. We were faced with a host of internal and external issues, which needed to be worked on for a whole host of various different reasons, all of which were going to impact on our ability to investigate CCTV.
The first one being the Forensic Science Regulators Code, which is a statutory document, brought in to ensure that any and all forensic science activity in the UK is completed to the standard expected of the Forensic Science Regulator. In addition to that, we have the NPCC, or National Police Chiefs Council, framework for video evidence. I notice we’ve got a few people from that group on the call today. Andy, I see you there.
That is another statutory document which supports the code by going into further detail on how CCTV evidence must be managed. Whether that be the delivery of competency training for some staff or full ISO 17025 accreditation for others.
Another one of the issues that we were facing was our criminal justice unit, or our case building team, were seeking to significantly increase or over double their full time equivalent staff levels. The CJU roles themselves were updated to own multimedia preparation and redaction for case files. On top of that, we also introduced a new blended working policy in force, allowing for those CJUs staff to work from home.
So, essentially what we’d done is created a situation where we’re dramatically increasing the size of a department, increasing the type of work that they’re going to be doing, so they’re going to be getting a lot more involved in the video and CCTV side of things, and then allowing them to work from home.
But if they’re going to work from home, how are they going to do that? Then the last thing that we were faced with was The National Enabling Program. Essentially what that is, is a national IT change process to bring all forces in the UK up to a standard, secure, modern cloud based system for all of their IT.
So, any of the products that we were going to purchase within Avon and Somerset to deal with CCTV and video evidence needed to be compliant with that NEP rollout. We’d also introduced restrictions on general software use within force.
On top of that, we were going to make a decision to remove the majority of our standalone computers for this sort of thing, where historically we would have had standalone terminals in every single office around our whole force area for CCTV processing and review, we decided to remove those.
So, bit of a difficult situation to be faced with, and why did we choose Replay?
After a thorough examination of the market and available software tools and through some of the own testing that we’d done locally in my department, we were going through the process of reviewing the forensic tools that we were going to be using. We landed on replay as being the most appropriate choice to meet all of those needs.
It’s a process driven and simple to use software. Meaning that the training and competency requirements could be really easily met. It’s configurable, so we could ensure that the tools provided to our officers met the requirements of the FSR code in the MPCC framework by tailoring the build itself to meet those requirements, like I was speaking about in the comment section a few minutes ago.
It can also be deployed across our network, meaning that the management of that software by our IT team then becomes a simple situation. And crucially, going over what Emi has just been speaking about, it is a forensically sound application.
On that simplicity side of things, what we really liked about it was that it had the drag and drop feature for being able to get videos into it. It sounds like a really simple thing, but when you’re a regular frontline police officer who doesn’t routinely have to work with multitudes of CCTV playing applications, what we often get asked in my department for is technical support on how do I get this thing playing.
So, just having a system to be able to drag and drop the files onto it and have it automatically decode and load those files was a massive selling point for us. The system itself has a simple interface which leads the user through that process. So essentially what Emi is just saying again. So being able to import the footage, being able to review it, apply any optimizations or basic enhancements to it, get your annotation done, and then export a report.
Then there’s lots of training material, which is updated regularly through the Amped software blog.
The system owner itself can add and remove features. Entire tabs can be switched on and off in the system if you so wish, and individual filters themselves can be switched on and off. Custom groups of different features can be created for specialist teams. Crucially, there is no ability for users to add or remove features themselves, and we’re able to deploy it across the network.
Essentially what that means is what we have at the moment is a streamlined version of Replay deployed to all of our frontline officers.
So, I’ve sat down with some of my colleagues and we’ve reviewed the FSR code and we’ve reviewed the MPCC framework and we’ve taken a look at what are those processes that are going to be suitable for our frontline officers for them to be able to continue doing their work without having to concern ourselves with them being non-compliant with the type of work that they’re doing.
So, the system gave us the ability to be able to cut out some of those features so that we don’t have to worry about those things.
The system itself operates in a hierarchical, review conversion system process, where it’ll start with your original format. If it needs to do a conversion, it’ll opt for a streamed copy and then go through to a transcode. That’s a process that I really liked. Source files obviously being unaltered, high quality forensic reporting, and again, the inability for users to alter those export settings.
Removing the opportunity for people to be able to mess around with bit rates, to be able to mess around with formats and all of that on their export settings was an absolute must from our perspective, but also a must from our customers perspective, our frontline officers. What they need is a system to be able to do their jobs, to be able to review, redact, annotate where necessary and export without having to have significant technical expertise in how video works.
So that was a massive selling point for us. So, how has it helped?
November 22, if you see the numbers there on screen, around that 338 mark. That was pretty much the average amount of exhibits that were submitted to my office, leading up until that point. Some months it would be a bit lower, some months it would be a little bit higher, but on average we’re sitting around that three, 338 to 350 exhibit mark.
December 22, we ramped up all of the testing with our primary CCTV stakeholders who were working on this project whilst we were testing it. They were made up of our burglary squads, our major crime team and our incidence assessment unit.
So, the primary teams within our force who we’d identified as the sort of main stakeholders for the system. We ramped up all of their testing on it. Which gives you an idea as to why those numbers have come down.
In January 23, we then sent out our communications to our customer base to let them know that the system was coming and to inform them of the training that they needed to complete and the processes that they had to go through in order to secure access to the software.
Then in February 23, that’s when we released the software. The 127 number that you see at the end is the result of that reduction in exhibit submissions through to my departments in the lab. That has consistently stayed around that mark since we deployed Replay.
So, from around 330 to 350 exhibits on average per month down to around 120 to 140 exhibits per month since loading the system into the force network.
Essentially what we’ve seen overall is a 20 percent reduction in the submitted cases to my department. A 50 percent reduction in the submitted evidence items to our department. So, where those two numbers don’t line up means that we’re still getting roughly the same amount of cases submitted to our office, we just have less exhibits attached to those cases, meaning that we can get through those cases much faster.
The turnaround time for my department has now been reduced from around 12 weeks. From an exhibit being submitted to completion, to around three. Many weeks, we can now get it done within one and two.
Most of our officers now have the ability to immediately investigate their crimes rather than waiting for their evidence to be processed by my department. The feedback that I routinely get from our officers out on the ground is that they actually feel listened to and that they’ve got a system that works for them to help them with their jobs.
Emiliano Polito: Okay. If there are no other questions and I really like to thank David for his really interesting insight and also for the interactions from our users, which has been really good. I’ll put out these slides here, for people so they can get in contact with me or with the company.
Talking about training and education, we have our blog, which is available from our website, from this address here. It is full of articles that are not just product based, but over the years have become a knowledge base with anything to do with video forensics.
In the blog, the easiest way to find articles is by using the search engine. For example, if you’re looking for some more information about interpolation, we were talking about earlier, start typing that word in the engine and it will come up with a bunch of articles for you to educate yourself.
We tend to provide this information to users when they have a specific problem because we know we don’t have to explain it again as it is already somewhere in the blog.