Setting Up a Microsoft Azure Instance for Running Magnet AXIOM Cyber
Your company has a Microsoft Azure environment, and your forensics lab uses Magnet AXIOM Cyber. The next step is to combine the two by running AXIOM Cyber in Azure! Not quite sure how to get started?
Don’t worry. This practical guide will provide some tips along with step-by-step instructions on how to set up your Azure instance.
This guide is by no means intended to be a replacement for Microsoft Azure user documentation (which you can check out here: Quickstart – Create a Windows VM in the Azure portal – Azure Virtual Machines | Microsoft Docs) but rather the things you can do in Azure to securely and efficiently get it ready for running AXIOM Cyber.
Before You Get Started
You’ll need to make sure you have a few things in place for AXIOM Cyber:
- A version of AXIOM Cyber that is at version 5.0 or higher
- An AXIOM Cyber licensed for CLS (Cloud License Server). If you’re interested in changing your licensing plan of AXIOM Cyber, reach out to your Sales rep and they’ll be happy to help.
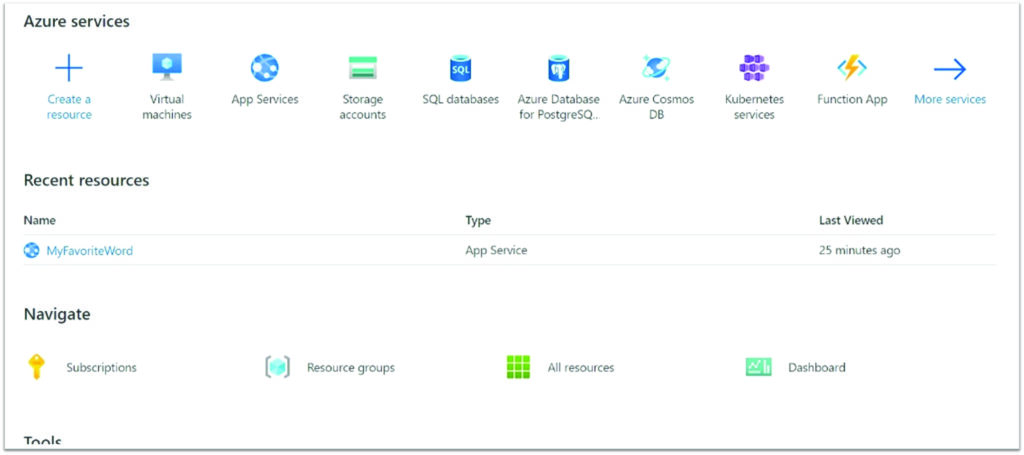
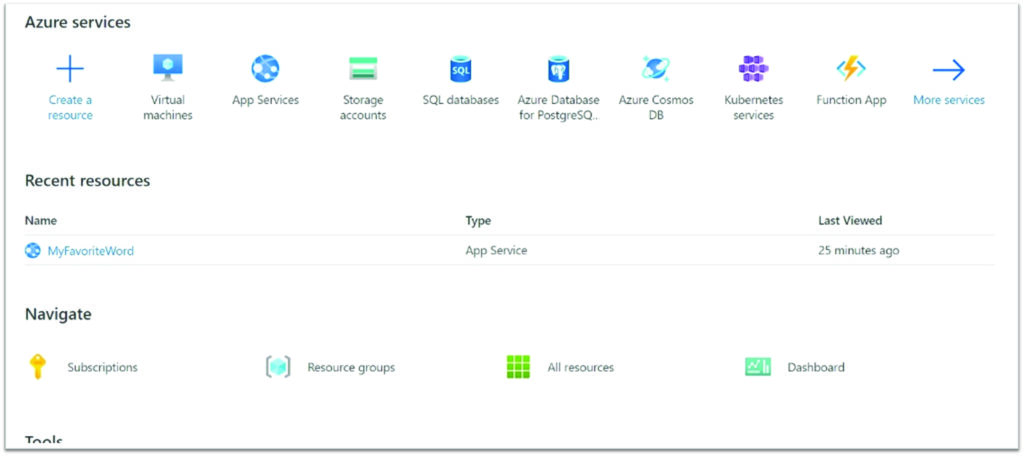
Ok, now that that’s out of the way, the first thing you’ll need is login credentials for your organization’s Azure Services Manager. Click on Resource Groups that will launch you into creating a new Resource Group.
Setting Up Resource Groups
We believe one of the key benefits of setting up Magnet AXIOM Cyber in an Azure VM is that you’ll have the ability to perform remote collections of off-network endpoints. If that’s something that you’re interested in doing, the very first thing you’ll have to do is ensure that your Resource Group is set up properly so you can actually perform the collection.
What are Resource Groups? Azure provides a definition of a Resource Group in their Azure Guide to creating custom roles[1]:
Azure Active Directory (Azure AD) roles and Azure roles are often confused when you first work with Azure. Hopefully, this table here can make things a bit clearer.
| Azure roles | Azure AD roles |
| Manage access to Azure resources like VMs, storage, networks, and more | Manage access to Azure Active Directory resources like user accounts and passwords |
| Multiple scope levels (management group, subscription, resource group, resource) | Scope only at tenant level |
| Role information accessible through Azure portal, Azure CLI, Azure PowerShell, Azure Resource Manager templates, REST API | Role information accessible in Azure admin portal, Microsoft 365 admin center, Microsoft Graph, Azure AD PowerShell |
Azure AD roles provide the mechanism for managing permissions to AD resources like user accounts and passwords. Azure roles provide a wealth of capabilities for managing Azure resources like virtual machines (VMs) at a granular level.
You may have to coordinate your creation and the location of your Resource Group with your IT department or System Administrator.
Creating Custom Roles
If the role you need doesn’t exist, you can create a custom role. Microsoft has a detailed walkthrough for creating roles, but basically these are the steps you’ll want to follow:
- Determine the permissions you need. You can start with an existing role and modify it for your needs
- Decide how you want to create the role (Azure Portal, Azure PowerShell, Azure CLI or the REST API)
- Create the role (easiest way is to use the Azure Portal)
- Test the custom role
Creating an Azure VM Instance
Creating an Azure VM instance is a multi-step process, however we’ve tried to simplify it for you and guide you through it in the following pages.
Microsoft has also tried to make the process as easy as possible too and provides a wizard-like experience to help get you setup.
To begin the wizard, you want to click the second button in the top left labelled “Virtual Machine” from the Azure Services page.
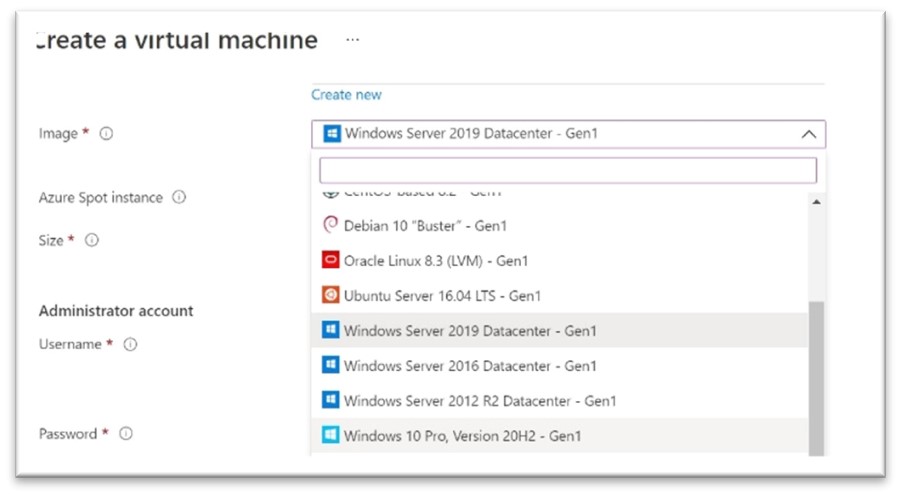
Step 1: Create A Virtual Machine
A Virtual Machine (VM) is your base image. You have to specify an VM when you launch an instance.
Because we’re going to be running AXIOM Cyber on this Instance, you’ll want to select Microsoft Windows Server 2019 Base or Microsoft Windows 10.
Step 2: Basics
Azure VMs have one operating system disk and a temporary disk for short-term storage. You can attach additional data disks. The size of the VM determines the type of storage you can use and the number of data disks allowed
You’ll be presented with a slew of options for VM Types.
Choose the right VM for the job that you have to do. Are you just doing analysis or examination of data? You’ll probably want to go with a D8s_V3. If you’re processing data, you may want to go with something a bit beefier to get through the job faster, so you’d choose a D8s_V4.
By choosing the right instance you’ll save time and/or cost. The choices for instances are seemingly limitless and you can choose to pay by the hour or even by the second! The region you select can also affect your cost.
We’ve made it a bit easy for you and through our own testing we’ve identified a few instance types that we believe are ideal for running AXIOM Cyber depending on what you want to do. We recommend choosing these instance types based on the purpose that you need it for and how much budget you have:
Magnet Forensics completed testing of Magnet AXIOM Cyber in an Azure virtual machines on both Windows 10 Pro and Windows Server 2019 operating systems.
Please choose the VM that meets your computing and budget requirements. For guidance, we recommend either of the following configurations:
| Virtual machine | Operating system | Instance | vCPU(s) | RAM | Temporary storage |
| D8s_v3 | Windows 10 Pro, Windows Server 2019 | General Purpose | 8 | 32 GiB | 300 GiB |
| D8s_V4 | Windows 10 Pro, Windows Server 2019 | General Purpose | 8 | 32 GiB | N/A |
For more information about these instance types, including pricing, visit azure.microsoft.com/en-us/pricing/details/virtual-machines/windows/.
Step 3: Disk Selection
Each VM will have a choice of hard drive options. In the dropdown menu, you can choose from two types of SSD, an HDD or an Ultra Disk
There is also the choice for Ultra Disk. This is best for IO-intensive workloads, and transaction-heavy workloads. This might be a good choice for processing cases with a large amount of evidence items.
You have a lot of choices on disk size – from 4 GiB to 32767 GiB or somewhere in between. Keep in mind that large size does come with a price; the default size set is 1024 Gib. This is regardless of if you have chosen HDD, SSD, Premium SSD or Ultra Disk
Step 4: Networking
Define network connectivity for your virtual machine by configuring network interface card (NIC) settings. You can control ports, inbound and outbound connectivity with security group rules, or place behind an existing load balancing solution.
There are many different settings here that you can configure, you’re going to leave them all as they are except for one:
Network Interface / Public IP: Next to “Virtual Network”, click Create New and name the network. You can leave the Subnet on default. Next to Public IP, click Create New. This will open a box on the right-hand side of your screen. Name your IP address and click OK at the bottom. Make sure that RDP is enabled (port 3389).
The reason for this is that to ensure that you can successfully perform an off network remote collection using AXIOM Cyber, you’re going to need a public IP address to create the remote agent. If you don’t have a public IP address, you’d only have an internal private IP address and that wouldn’t work to go over the routed Internet and actually collect from an endpoint that could potentially be on another continent.
To move on to the next step, click “Next: Management”.
Step 5: Management
Configure monitoring and management options for your VM
Management allows a host of diagnostic and identity configurations. The default is fine, but you can configure this as needed by your organization.
To move on to the next step, click “Next: Advanced”.
Step 6: Advanced
This tab allows the user to add additional configuration, agents, scripts, or applications via virtual machine extensions.
To move on to the next step, click “Next: Tags”.
Step 7: Add Tags
Tags are name/value pairs that enable you to categorize resources and view consolidated billing by applying the same tag to multiple resources and resource groups.
Adding Tags is another optional step, however if you’re in a cloud-savvy organization you may want to consider using Tags to more easily keep track of costs or budget allocation or to make searching for instances easier.
Add any tags that you may want or leave them blank. Click “Next: Review + Create”.
Step 8: Review and Create
Make sure everything is set up as you want it to be and change anything if necessary. Once everything looks good click “Create”.
Congrats! You’ve set up your VM. That wasn’t so bad, was it?
Installing AXIOM Cyber on Your Running VM
Now that your VM is up and running, the next step is to get AXIOM Cyber loaded on to it.
Before you get started with running AXIOM Cyber in Microsoft Azure, you’ll want to make sure that:
- Your virtual machine must meet the minimum requirements for Magnet AXIOM Cyber listed in the System Requirements: Magnet AXIOM Cyber article.
- You have CLS licensing of AXIOM Cyber in place. To learn more about licensing AXIOM Cyber in the cloud, read this blog post: Three Reasons to License AXIOM Cyber in the Cloud.
Connecting to Your VM
You have two options for connecting to your VM: you can either do it with Microsoft Azure Bastion or through using a public IP.
Azure Bastion is a new fully platform-managed PaaS service you provision inside your virtual network. It provides secure and seamless RDP/SSH connectivity to your VMs directly in the Azure portal over SSL. When you connect via Azure Bastion, your virtual machines do not need a public IP address.
Here is a walk-though of using Azure Bastion to connect to your RDP session: Connect to a Windows VM using Azure Bastion | Microsoft Docs.
If you are connecting through an IP, it’s a pretty simple process. In the Azure portal, you go to the properties of your VM, and at the top, click Connect. This will show you the IP addresses assigned to the VM and give you the option to download a preconfigured.rdp file that Windows then opens in the RDP client. You can choose to connect over the public IP address of the VM in the RDP file.
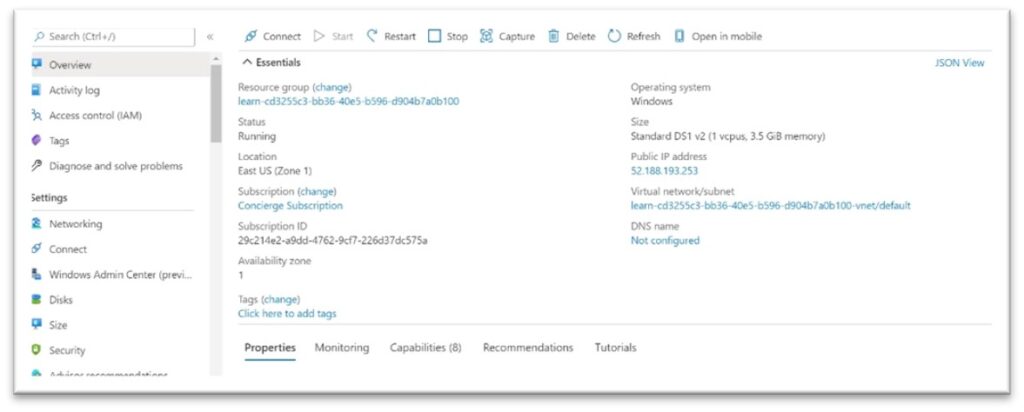
In the Azure portal, ensure the Overview panel for the virtual machine that you created earlier is open. You can find the VM under All Resources if you need to open it. The overview panel has a lot of information about the VM including the ability to:
- See whether the VM is running
- Stop or restart it
- Get the public IP address to connect to the VM
- See the activity of the CPU, disk, and network
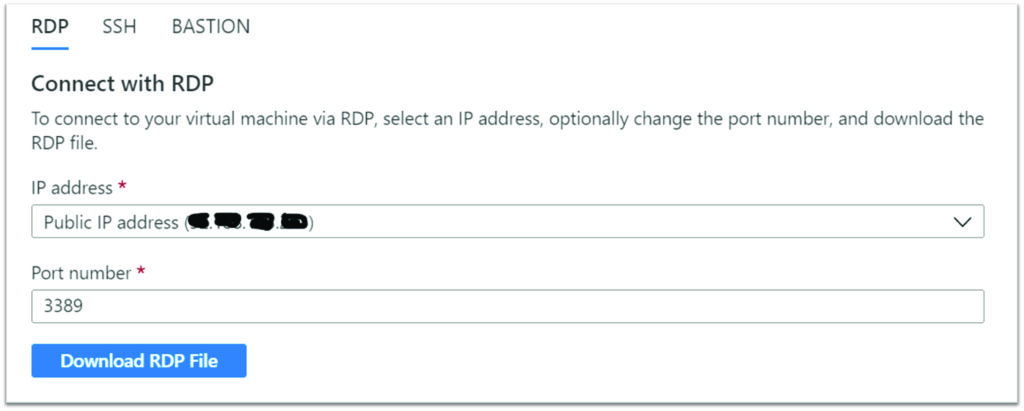
Click the “Connect” button at the top of the pane. Select “RDP” from the dropdown.
In the “Connect with RDP” pane, note the IP address and Port number settings, then click “Download RDP File” and save it to your computer.
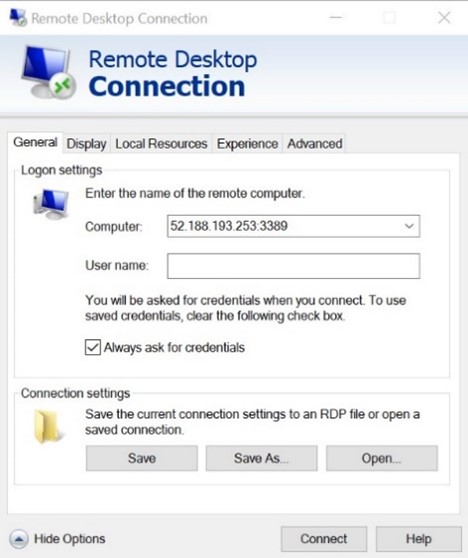
Before we connect, let’s adjust a few settings. On Windows, find the file using Explorer, right-click and select Edit. On MacOS you will need to open the file first with the RDP client and then right-click on the item in the displayed list and select Edit.
You can adjust a variety of settings to control the experience in connecting to the Azure VM. The settings you will want to examine are:
- Display: By default, it will be full screen. You can change this to a lower resolution or use all your monitors if you have more than one.
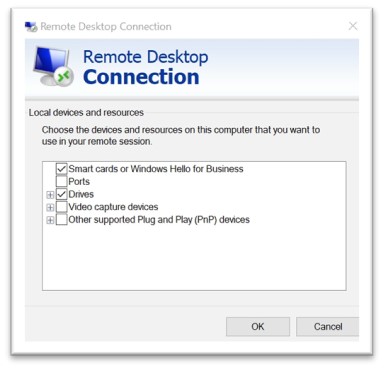
- Local Resources: You can share local drives with the VM – allowing you to copy files from your PC to the VM. Click the More button under Local devices and resources to select what is shared.
- Experience: Adjust the visual experience based on your network quality.
Share your Local C: drive so it will be visible to the VM.
Switch back to the General tab and click Save to save the changes. You can always come back and edit this file later to try other settings.
Next, we’ll connect to your instance using an RDP client. In the lower left, you want to click on “Connect” which will take you to a new window “Connect to your instance”. There are two tabs, choose the RDP client tab and you’ll see the option to “Download remote desktop file”, which is exactly what you’ll want to do.
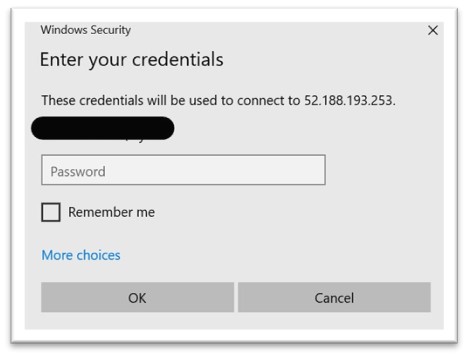
Once you’ve downloaded the remote desktop file, open it up. When you do, you’ll be presented with another window that has some of your credentials on it and then you’ll enter your password that you created earlier, and you’ll enter it here.
That’s it! You’re now able to remote desktop into the VM that you’ve set up in Azure.
Installing Magnet AXIOM Cyber
Now that you have your fancy new VM all set up, the final step will be to actually install AXIOM Cyber onto your VM.
Download the latest version of AXIOM from the Magnet Forensics Support site.
We have two approaches we can use to install software. First, if this VM is connected to the Internet you can open a web browser in the RDP session, download the software, and install it. Second, if you did not enable Internet connection, you can copy it from your local machine over to the VM to install it. Let’s look at this latter approach.
Open File Explorer. Click on “This PC” in the sidebar. You should see several drives:
- Windows (C:) drive representing the OS.
- Temporary Storage (D:) drive.
- Your local C: drive (it will have a different name than shown below).
With access to your local drive, you can copy the files for AXIOM Cyber onto the VM and install the software.
Initialize Data Disks
Any additional drives you create from scratch will need to be initialized and formatted. The process for doing this is identical to a physical drive.
Launch the Disk Management tool from the Start Menu. You may have to go to the Computer Management tool first, then Disk Management, or try searching for “Disk Management” in the Start Menu.
It will display a warning that it has detected an uninitialized disk.
Click “OK” to initialize the disk. It will then show up in the list of volumes where you can format it and assign a drive letter.
Open File Explorer and you should now see your data drive.
RDP allows you to work with the Azure VM just like a local computer. With Desktop UI access, you can administer this VM as you would any Windows computer: installing software, configuring roles, adjusting features and other common tasks. However, it’s a manual process – if you always need to install some software, you might consider automating the process using scripting.
Even though the download package is for Magnet AXIOM, you will indeed activate AXIOM Cyber when you enter your AXIOM Cyber license key.
You’ve officially virtualized your forensics lab (or part of it at least) in the Cloud!
Now you can enjoy all the benefits of using the Cloud to run AXIOM Cyber including being able to perform remote collections of endpoints that aren’t connected to your corporate network.
Other Resources
Like we said earlier, this guide is not meant to be exhaustive. Hopefully, it gave you what you needed to get AXIOM Cyber up and running in Azure.
Here are few other resources which may be helpful for you:
Quickstart: Create a Windows virtual machine in the Azure portal: https://docs.microsoft.com/en-us/azure/virtual-machines/windows/quick-create-portal
To connect with a member of our Sales team, email [email protected]
Follow us on Twitter @MagnetForensics
Technical Advice Disclaimer
Magnet Forensics is dedicated to engaging with the DFIR community through our blogs and whitepapers. However, properly addressing technological issues often includes numerous variables that require independent assessment and strategies designed for each specific circumstance. Since Magnet Forensics cannot have complete insight into all variables involved in a specific situation, this blog/whitepaper is for informational purposes and should not be read as professional advice recommending techniques or technologies to address your specific situation. We do not accept responsibility for any omission, error, or inaccuracy in this blog/whitepaper or any action taken in reliance thereon.


