Hey there, detectives. Welcome to Oxygen Forensics How-To series, where your Oxygen Forensic training team will provide you with detailed insight into focused areas within Oxygen Forensic Detective.
For this video, we are going to dive into using the Hex search feature to search through file content at a hexadecimal level to gain a better understanding about a particular file and its validity. In addition, we will discuss a little bit about what Hexadecimal is and why it can be important to an investigation. Let’s get started.
Hexadecimal, referred to as Hex, is a base 16 system used to simplify how binary (all those ones and zeros) are represented. Base 16 is a number system using 16 characters from 0 to 9 and A to F. Binary, of course, is a number system that contains two symbols, zeros and ones.
Essentially values represented in Hex are more human friendly as compared to reading and interpreting values in plain binary. Really, who wants to decipher all those ones and zeros? Especially when those values can be more easily represented.
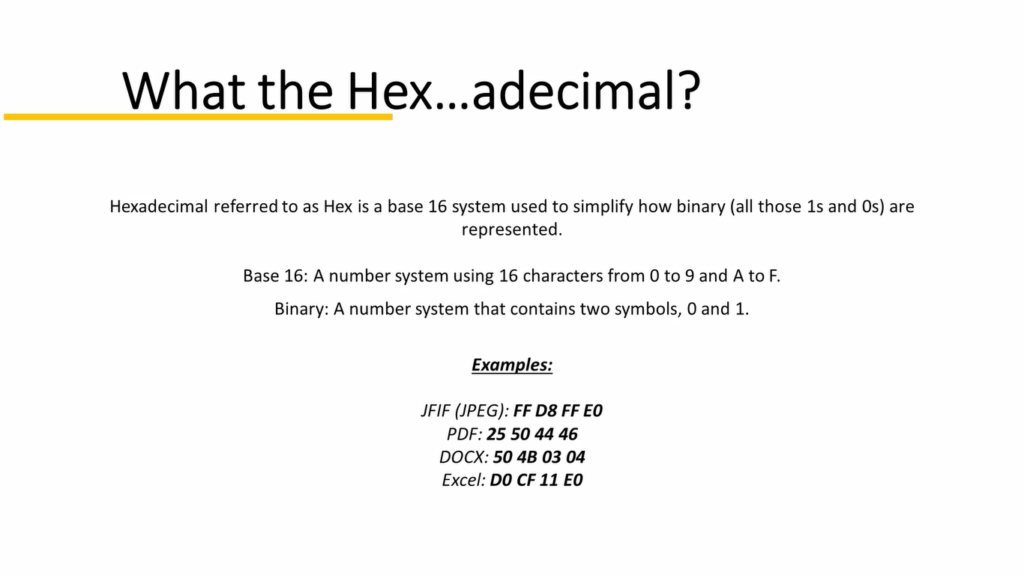
Though Hex, at a glance, can be intimidating, Hex searching allows you to look at paired groupings associated with files that make up their file signature. This file signature is directly associated with the type of file that it is. Specifically its file extension. Oftentimes in instances where files are corrupt or deleted, this signature can essentially be broken. This break or incomplete file may not parse out completely with whatever tool you’re using. This is where searching for specific file signatures with Hex searching comes in.
A simple way for using Hex searching is to look for and identify files that have been simply renamed from its original file extension to one completely different. This signature mismatch can also result in some programs’ inability to properly identify the type of file that it is. Let’s dive into Detective and take a look at Hex searching.
Using Detective’s Hex search feature is relatively simple. The same as you would for any text or keyword searches: you would navigate to your case, and then to the specific device that you like to search. Granted, you could search through the case overall or by specific device. In our instance here, we’re going to go through the specific device.
Now we come up to our search window. If you notice up here, we have added these new tabs for Hex and Hex lists. Let’s look at our Hex. For this particular search, I want to look for a JPEG.
So knowing what that file signature is, I’m going to input it here. I want to search against all files, which as you can see through the drop down, there’s several different options for where we can search this particular file signature, and a maximum number of matches within each file. I want to keep this relatively low to speed up the search. And it’s as simple as that. Press search and let Detective do its magic.
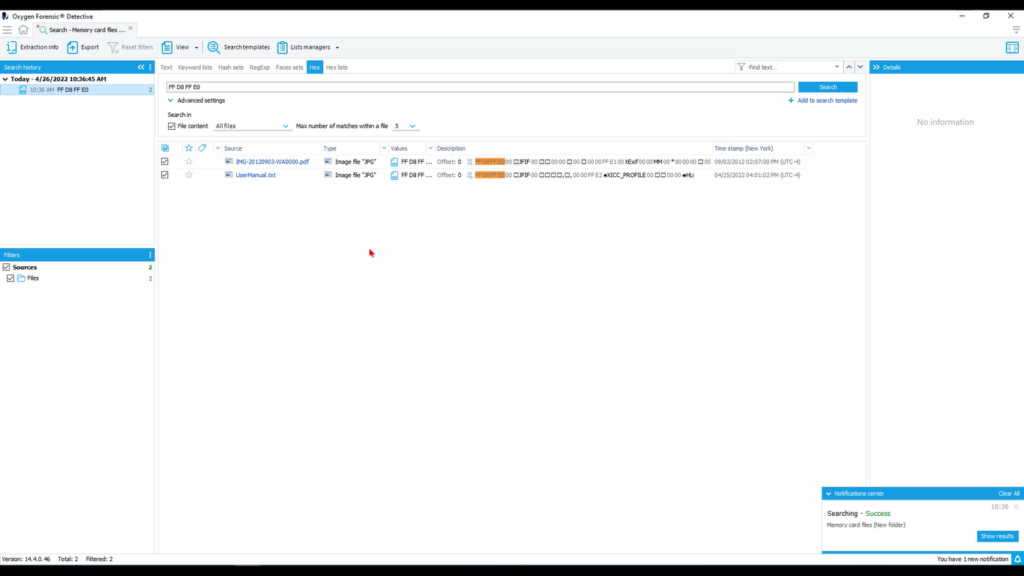
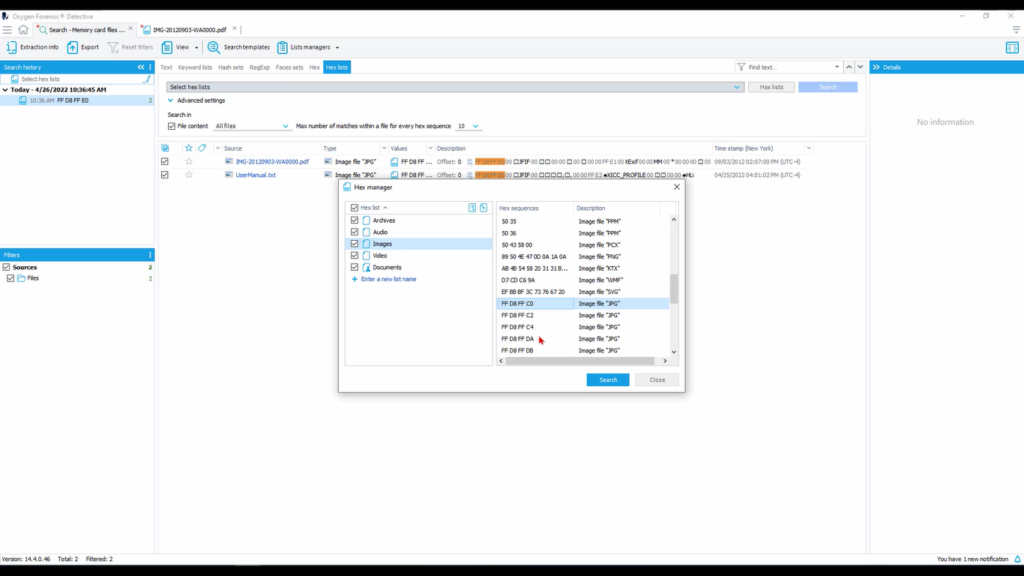
Because this was not particularly a large device it searched really quickly here. So, now we see our two different results here. Now we notice something different: we have the file extension of these two files that’s different from the file header, and this is something that we see often where the signature or the extension for a particular file does not match what that file header looks like, or that file signature. So through Hex searching is a really innovative way to help further identify and pare down on what it is you’re looking for in the validity of particular files.
Now that the search is finished, we see we have a PDF and a text document that showed up. However, it’s been identified as a JPEG file here through Detective and additionally in the Hex, we see that this file signature is indicative of a JPEG itself. So let’s go ahead and open up this PDF.
So we see here, when we select it on column 3, that it is in fact a picture that shows up. We have the file information here. So I wanna look at it in Hex itself. So I wanna right click and go “open in file viewer”. On the top left is our Hex tab. And now we can view this in Hex and actually look at that file signature and what it means.
So this can be a little bit intimidating when looking at it, if you don’t know what it is you’re looking at. Thankfully there’s dozens of resources online for understanding file signature tables and file header tables, so you could help yourself identify particular file types that you’re looking for.
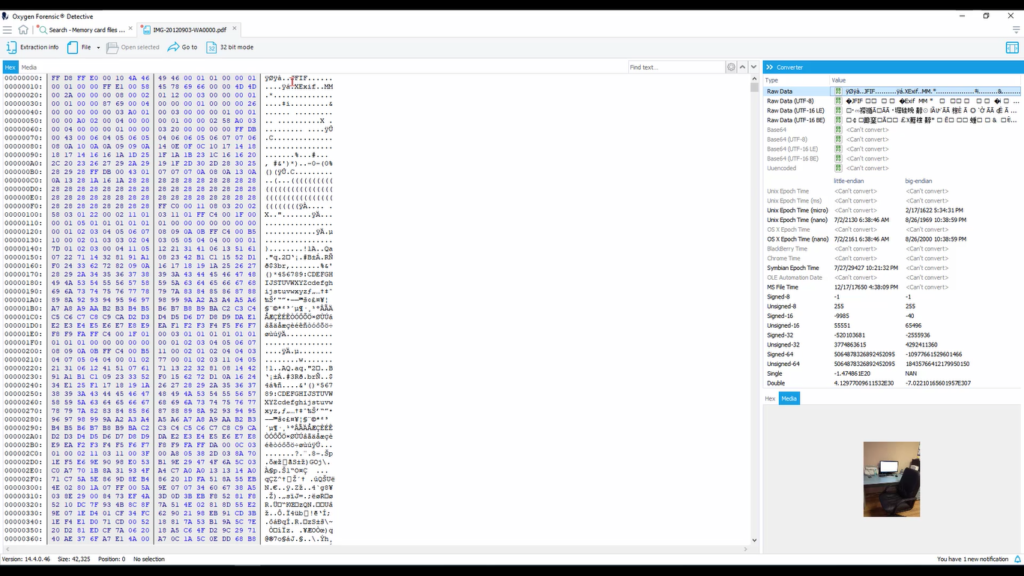
In our instance here, we search for a JPEG and this is how it’s represented. We understand the Hex here and it’s represented and it really not so great readable format. But then it identifies it here as a JFIF, which is an image format that uses the JPEG compression.
There are other ways that we can search for images or videos or documents within our Hex searching. So if we go back into our search, we look at our Hex list tab. This provides us with a lot more options for searching against a device or a case. We can select our particular Hex list between archives, audio, images, video, and documents.
To get a better understanding of what is being searched against in each of these categories, let’s select our Hex list. Now we can specifically see under each category what Hex sequences and their descriptions are being searched against. So what we searched against earlier under images is right here. And there are several different JPEG formats, as we can see, within Hex sequences.
Based off your scope and what the available options are for you within your investigation, you may only be able to go after one particular type of file header or file signature. This Hex searching allows you to get as granular as you needed in your search against the device or within a case to pare down or to identify the specific items that you need within that case.
Let’s run a search (quick one) on a little bit bigger of a data set. So I wanna close up my tabs and clean up my view. And now I see I have a RAM capture. So under this RAM capture, there’s a lot of information and it could potentially take a very long time. As you see there’s over 3 million files within here. So what I want to look for is where things may be deleted, corrupted or inaccessible by some other programs.
So let’s look at the recycle bin. It’s one of the first places we look as investigators for that low hanging fruit. So here we see a .OCB file that’s been identified by Detective as what you see here, a PDF. So I want to look a little bit further and see what particular about this in Hex may identify to us that it is a PDF.
So I want to click in column 3, the link here, and now we see this Hex sequence that is being identified as a PDF. So let’s take this, right click and “copy as Hex”. And I want to search against that. So if we look at our Hex list and we look at our documents, we notice that that particular sequence is not here under documents. So I want to add it.
And now this is another type of file signature, or Hex sequence, we’re able to search against for another type of document. And I can add that description for PDF. Click away, it saves, and I only want to search for documents here. And now let’s search.
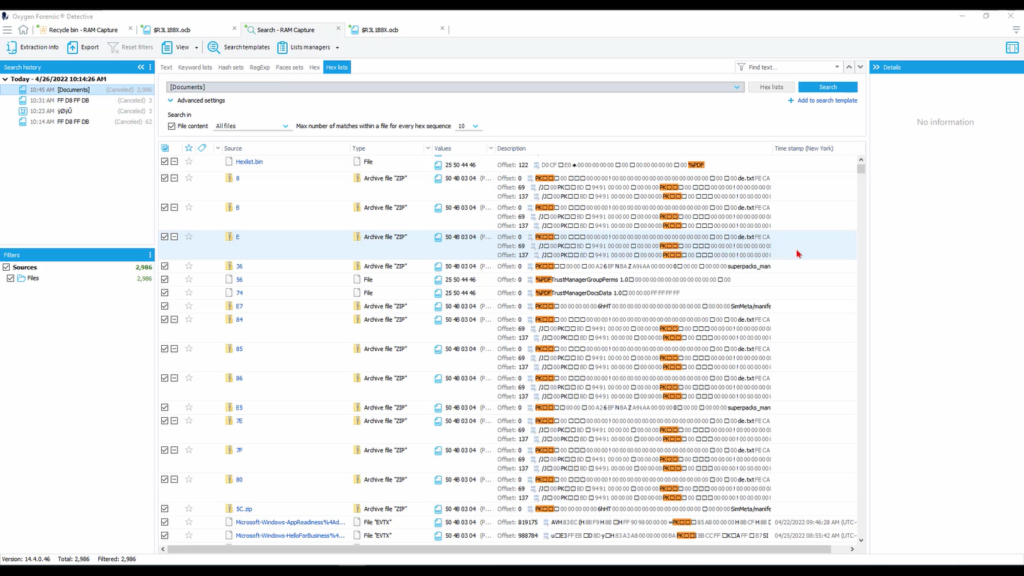
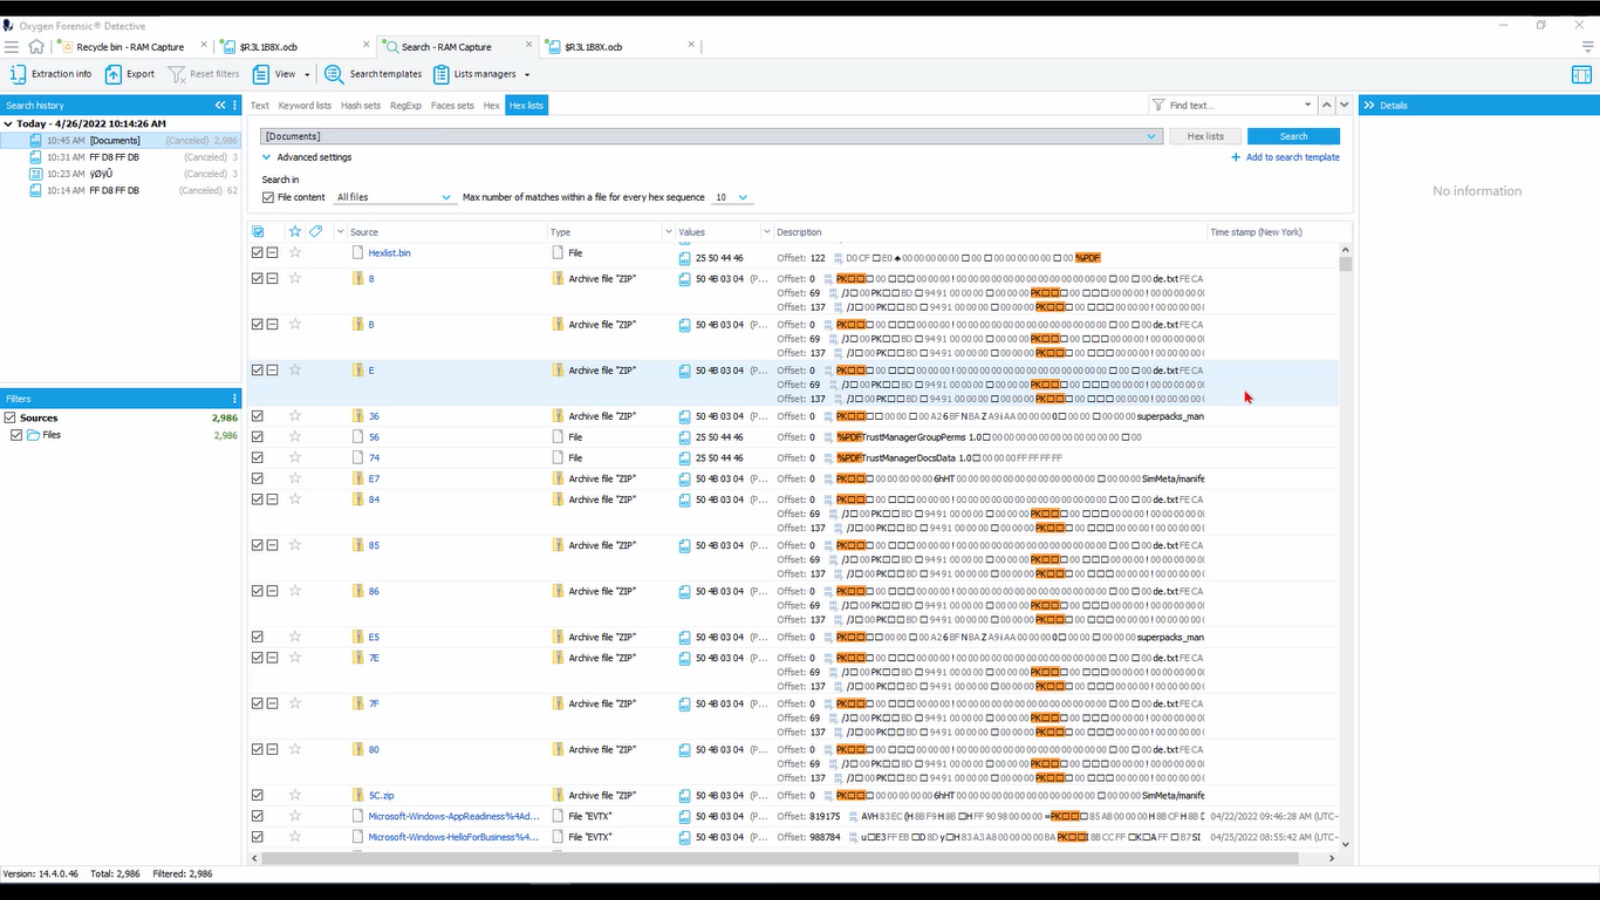
Now that our search is finished, we can see several results are present here in our column 2. Notice that the particular Hex sequence we searched for is found not necessarily at the header of each file, but within, indicative of that particular file that we’re searching for being embedded within another file, whether that be an archive or a PowerPoint or another type of document.
Using the Hex and Hex list search features in Detective is an easy and simple way to enhance your investigation, to become more granular and to provide even more specific reporting based off of scope and investigative need.
Thanks for stopping by. For more information about future training events, please visit us online and contact us.


