by Blake Sawyer, Amped Software
For Law Enforcement across the world, one of the biggest hindrances to actionable evidence comes from CCTV. There are sites devoted to providing codecs, of which there are hundreds, and IT departments that spend most of their time managing the many players from each DVR manufacturer. In my old casework, I would handle close to 80-90 video requests a month, most of the time coming from proprietary CCTV video. One tool that helped me as a full-time video examiner was Amped FIVE. Through daily use, we were able to get images and video clarified and out to the officers and media, as well as keep our backlog at a minimum.
That said, there was not a lot of time to devote to tricky video cases because there were so many cases coming in. A tool that recently came out geared towards empowering investigators, and non-technical video staff, would have been a great help. Amped Replay is Amped Software’s newest solution developed specifically for detectives, patrol officers, and other first responders to conduct a first-level analysis of their video evidence empowering them to:
- Convert and play videos from proprietary CCTV/DVR formats, body-worn, dashcam, mobile phones, covert video, drones, social media and more
- Apply quick corrections to images
- Redact and annotate images for investigations and media release
- Produce still images and clips complete with a transparent, easy-to-understand, technical report
Replay is a great tool to get into the hands of officers so that they can easily play proprietary video in a way that is forensically sound, easy to use, and provides quick results. Below is just a quick example of how adding Replay into your department can help IT, the officer, and the video expert.
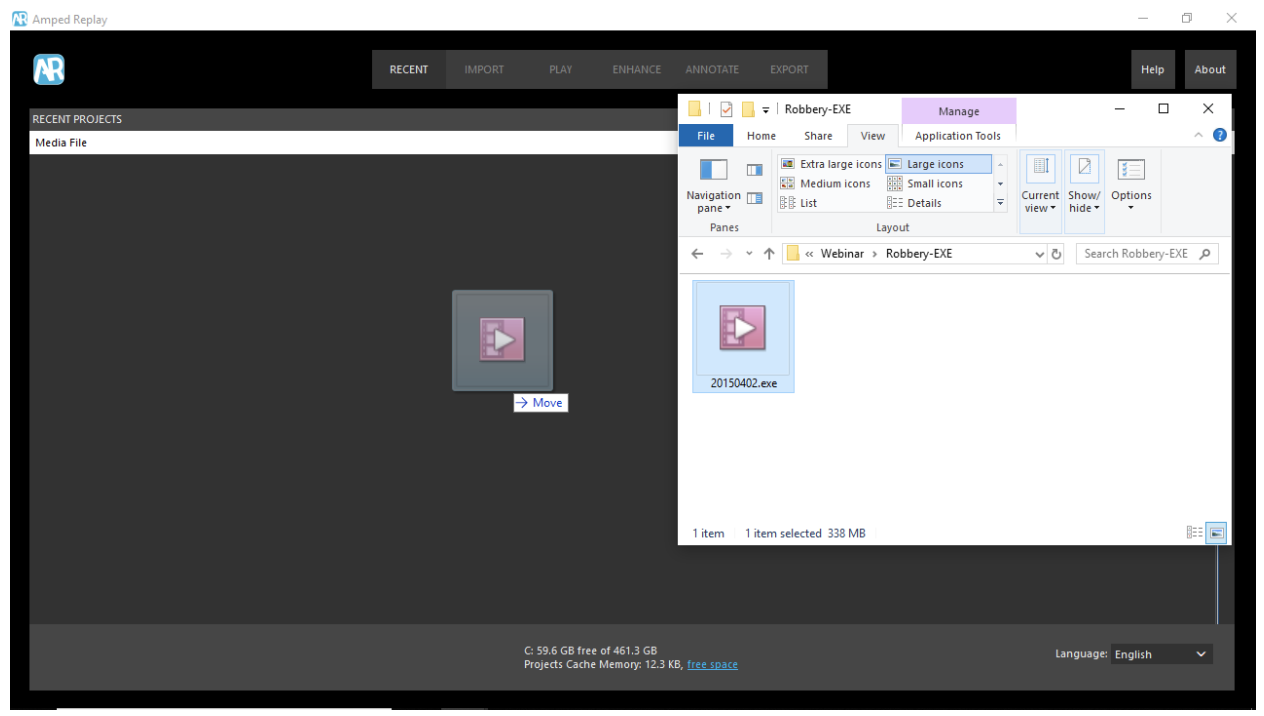
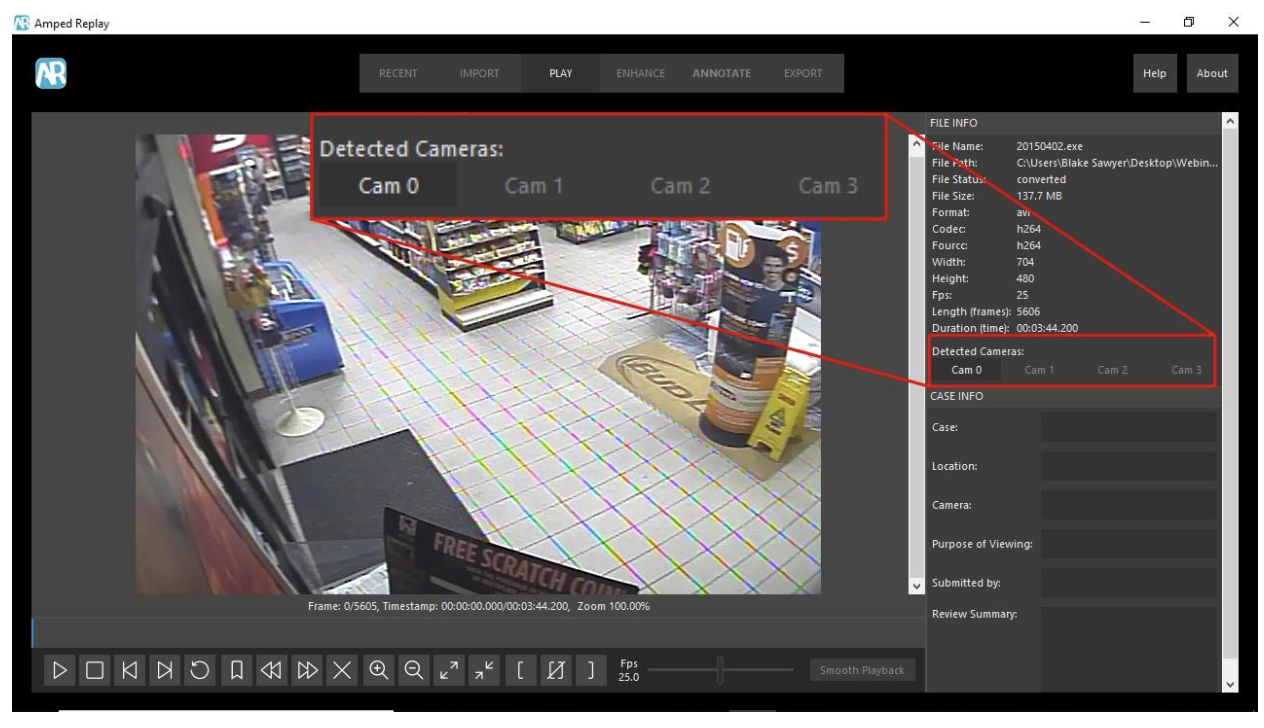
By installing Replay, the IT department no longer has to manage the hundreds of proprietary players and installs that come from each manufacturer. Replay handles over 350 proprietary video formats, including many of the big names in the industry. All the investigator needs to do is drag-and-drop a file into Replay. It really is just that simple. Replay then goes to work preparing the video for playback, pulling out the camera streams within the file, and adding them to the Play window. In my example below, I have an .exe from a robbery with 4 cameras playable in the proprietary player. Replay identifies all 4 camera videos inside the .exe and adds them to the Play window.
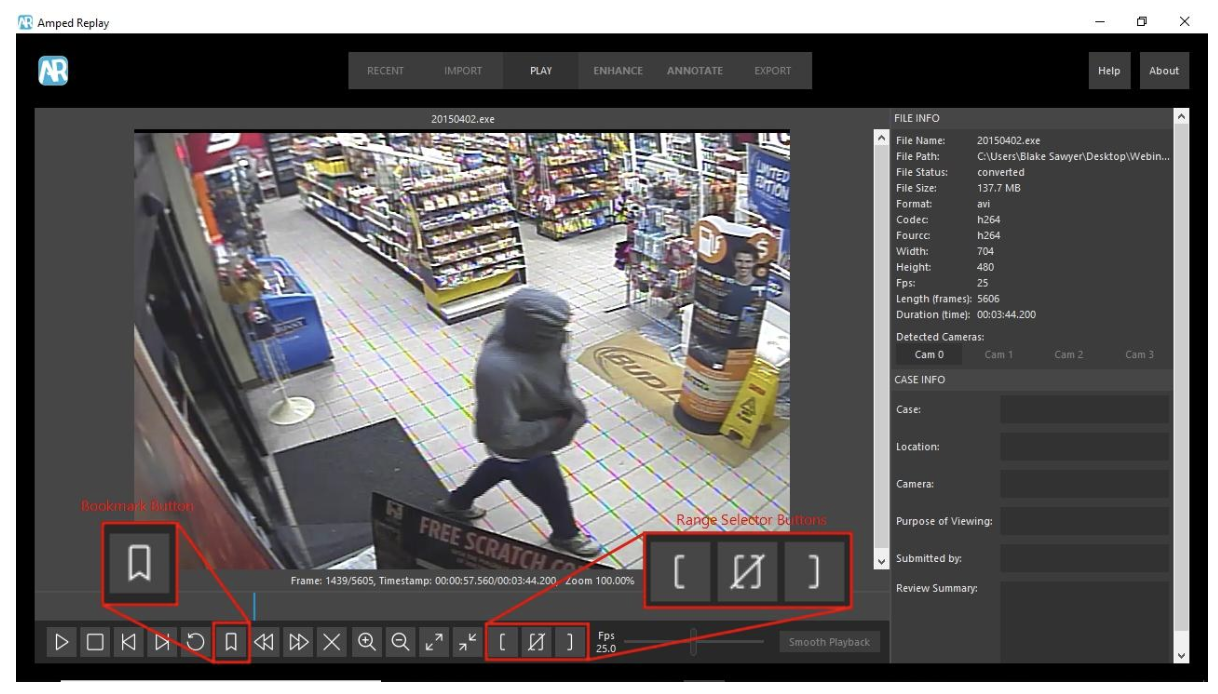
From here, you can go through each camera, use the “M” Key to create a bookmark of images you may need for your investigation. In this video, Camera 0 shows the suspect enter and exit the store, Camera 1 shows the suspect arrive and leave on foot, Camera 2 shows the beer aisle, and Camera 3 shows the robbery and the suspect. Using the M key and the range selection tools, I can quickly create still images and sub-clips of these events. If I needed to, I could export these clips, send them out to patrol in a bulletin, or send it to the information office for social media.
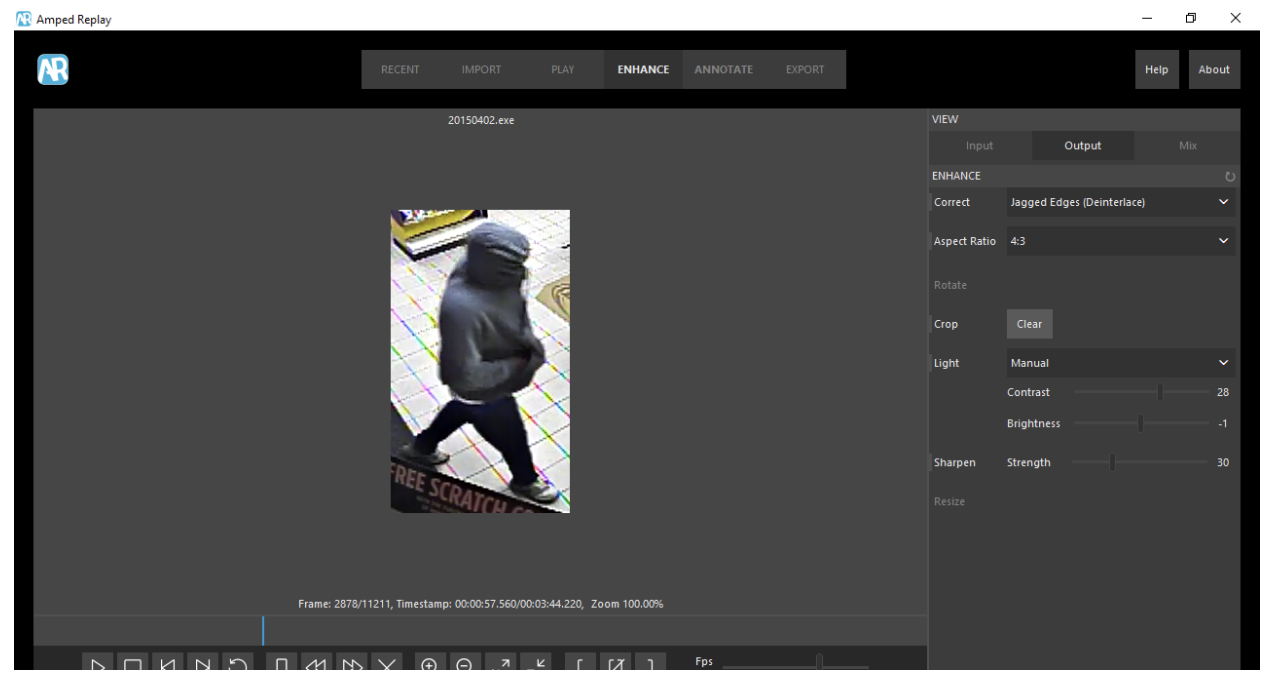
The problem is while the entrance camera shows good images of the suspect’s shoes, there are several issues related to the jagged lines of an analog camera, and there is a limited amount of contrast. For that, we will go to the “Enhance” tab. At “Enhance” you can quickly make minor corrections to an image, as well as crop and resize a section. Unlike things Jack Black can do when hunting down Will Smith, “Enhance” will not be able to do anything questionable or unscientific. In fact, this section is simplified even from our more comprehensive Forensic Image and Video Enhancement software so that information isn’t even accidentally misinterpreted by the investigator. In this case, I had to Deinterlace analog video, fix the aspect ratio, adjust the contrast, crop out most of the image, and enlarge the image.

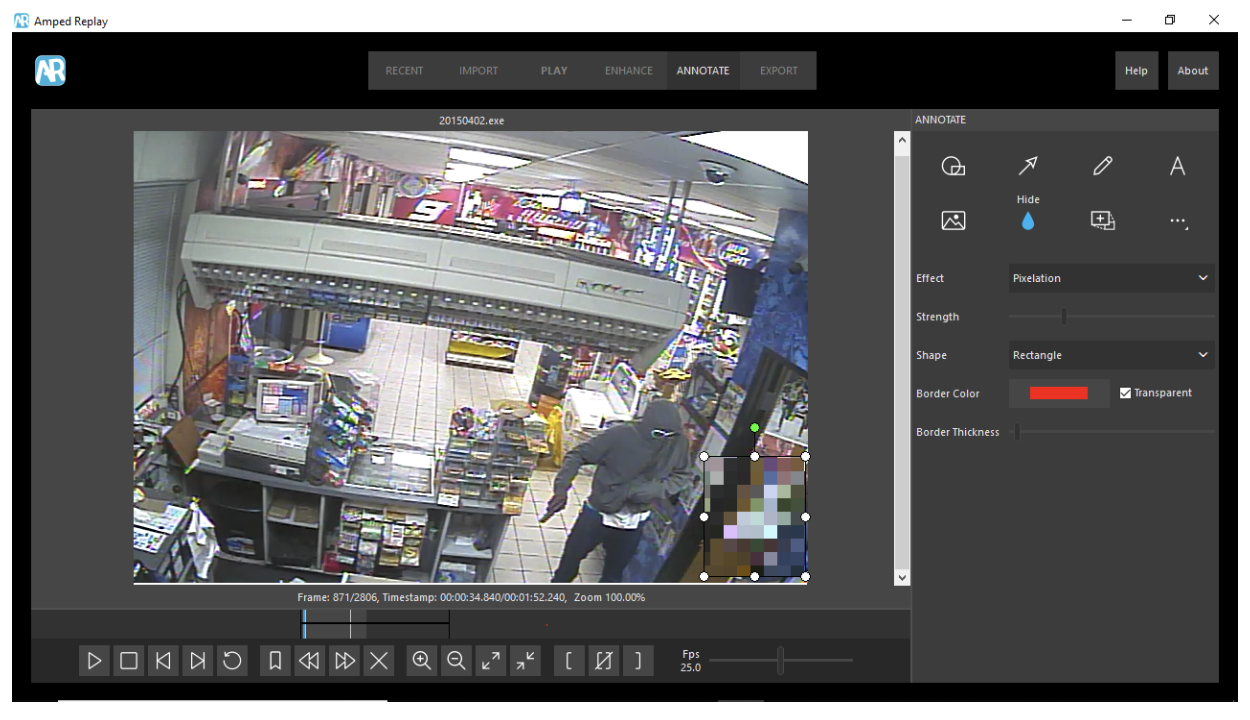
Next, I need to put out the video of the suspect for social media but want to hide the victim to help protect them. This is as easy as going to the “Annotate” tab and choosing “Hide Selection”. From there, you draw a box around what you want to hide, and then follow the subject with your mouse as it moves. That’s it! The software tracks your mouse and moves the blurred section as you do.
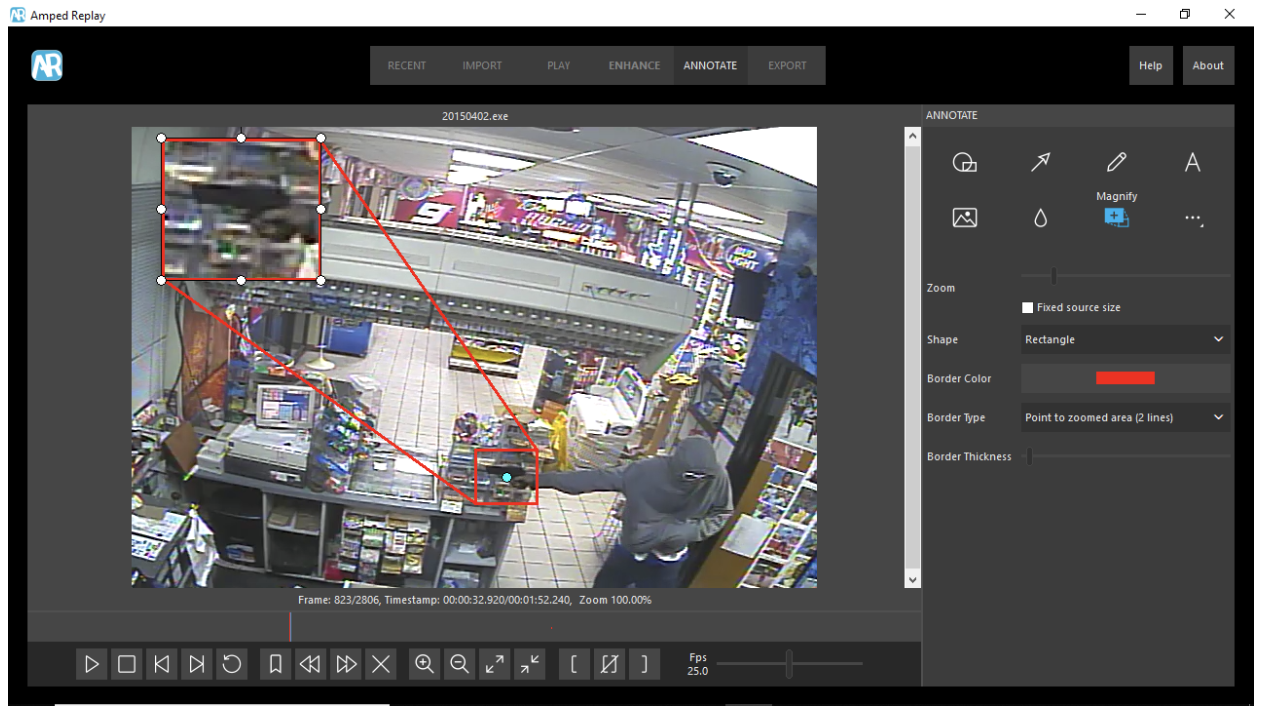
One last thing that is always helpful is to call attention to key pieces of evidence. In this clip, the suspect claims that the weapon is fake and has the orange ring that shows it to be a pellet gun. By using the “Magnify” annotation, we can quickly zoom that section to show it better. Just like with “Hide Selection”, you can track the object with the “Magnify” tool simply by following it with the mouse.
Once this is done, all that’s left is to get these images and clips out for release. It doesn’t help us to simply be able to watch evidence and mark it up, if no one else can do that as well. This is easily done in the “Export” tab. You can choose to export your current image or all the bookmarks, and then export the original or annotated clip. All of these options will create compatible images and clips with any standard software.
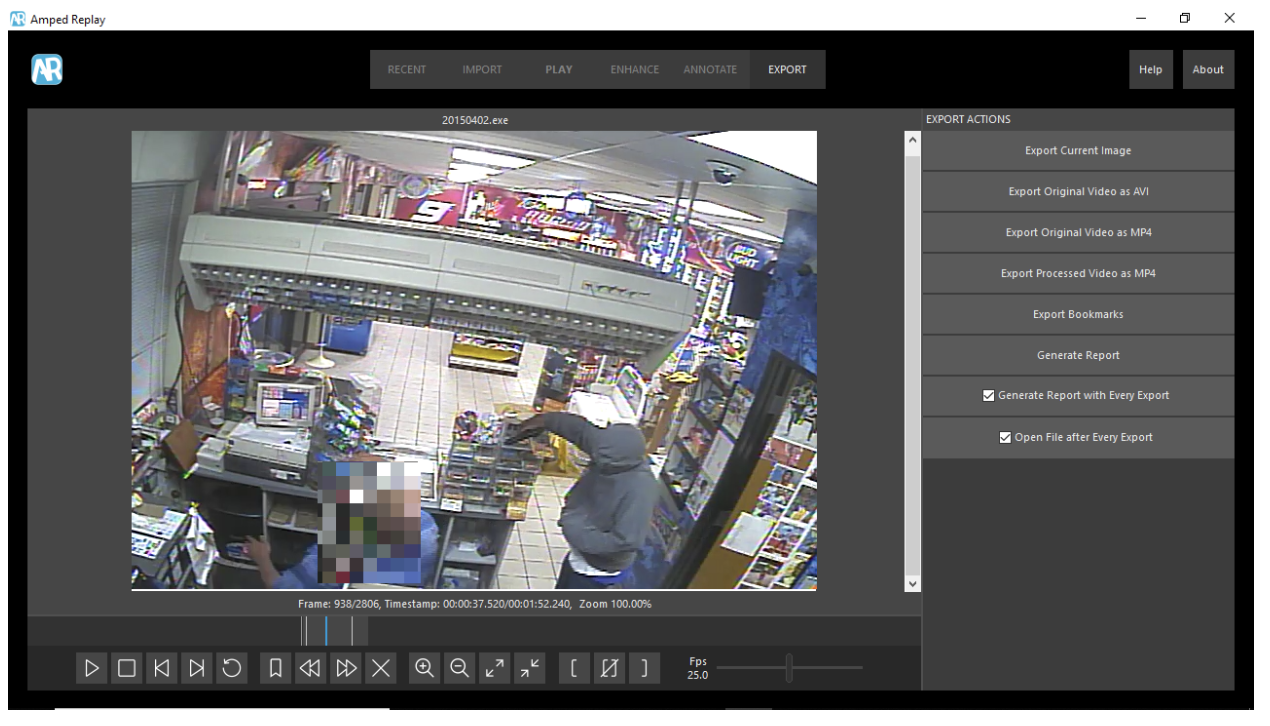
It also does something that is pretty unique, and is a reason why having a purpose-built tool is crucial for Law Enforcement. When anything is exported, it also generates a technical report, which shows the images and videos that were marked up, as well as the original file information and a File Hash. This gives the original video a bit of a digital fingerprint that helps maintain the chain of custody of the files (crucial for authentication). It also tracks and documents the steps taken in Replay so that when the case goes to court, they are easily understandable and repeatable.
The Idea is that Amped Replay needs to be fast for everyone, not just the video expert, and easy enough to use so that your IT doesn’t have to keep coming by to install updates, drivers, or codecs. With all these features, it makes it a great tool for Open Records or Investigator units It is also a great triage tool to help reduce the backlog in your Forensic Lab that often gets bogged down in the “I can’t get this to play” doldrums.
If you are interested in seeing Replay for yourself, reach out to us at ampedsoftware.com/contacts or tune into our webinar on December 10th.