In this latest ‘How To’ article, Amped Software will show you how to use Variable Motion Deblurring, one of this year’s new filters within Amped FIVE.
One of the biggest challenges in Forensic Video Analysis (FVA), is the restoration and enhancement of motion blur. As an object moves within the field of view of a camera, the electronic shutter controls the image data being captured at that moment in time. A fast shutter, for example 1/500s, will produce no blur. A shutter setting that may be linked to the frame rate, such as 1/30s, would produce considerable blur. The reason that many cameras have a slow shutter speed is to allow more light onto the camera sensor. This results in a much more visible view of the scene.
A good article to understand this can be found over at IPVM here.
If only all our vehicles and people moved very slowly!
The consequence of slow shutters therefore is motion blur, and as any forensic video analyst will tell you, blurred footage that is then compressed, is frighteningly common.
If the compression is low enough however, thereby retaining pixel definition, the blurred pixels can be restored.
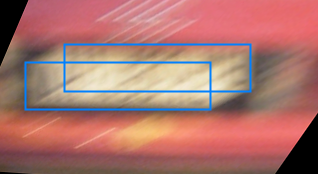
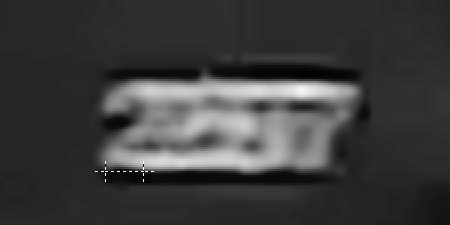
In the following image, the licence plate is stretched throughout the period that the image was captured. The key point though is the identification of the pixel definition. The differences in light, dark or colour that form the detail required to be restored. Without pixel definition, the licence plate would be all one single color, and no amount of deblur is going to bring back that data.
Amped FIVE has had ‘motion deblur’ since the beginning but it was only suitable for a single image or video frame. When dealing with multiple frames that had a different amount of blur, the trick was to save them out as an image sequence and work on each frame individually. It produced great results but was quite time-consuming. Variable Motion Deblurring to the rescue!
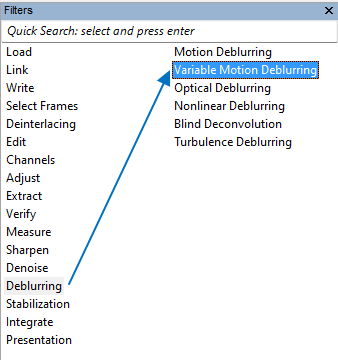
The filter can be found within the Deblurring category.
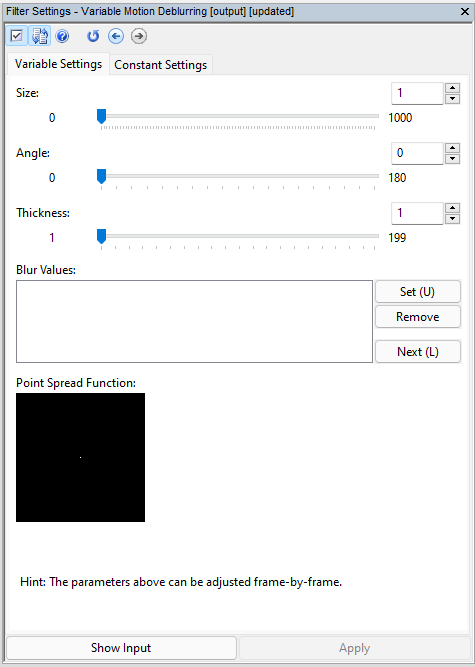
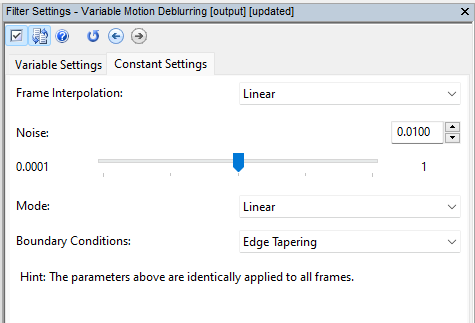
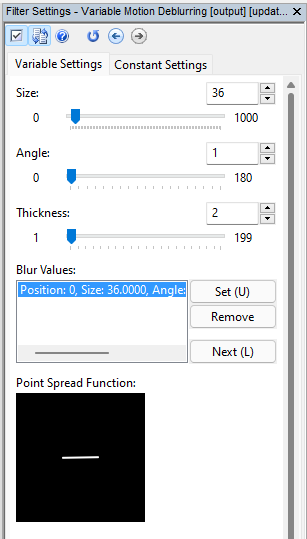
The filter is split into two distinct functions. The Variable Settings, those that can be changed on a frame-by-frame basis, and then the Constant Settings which will stay the same throughout the range.
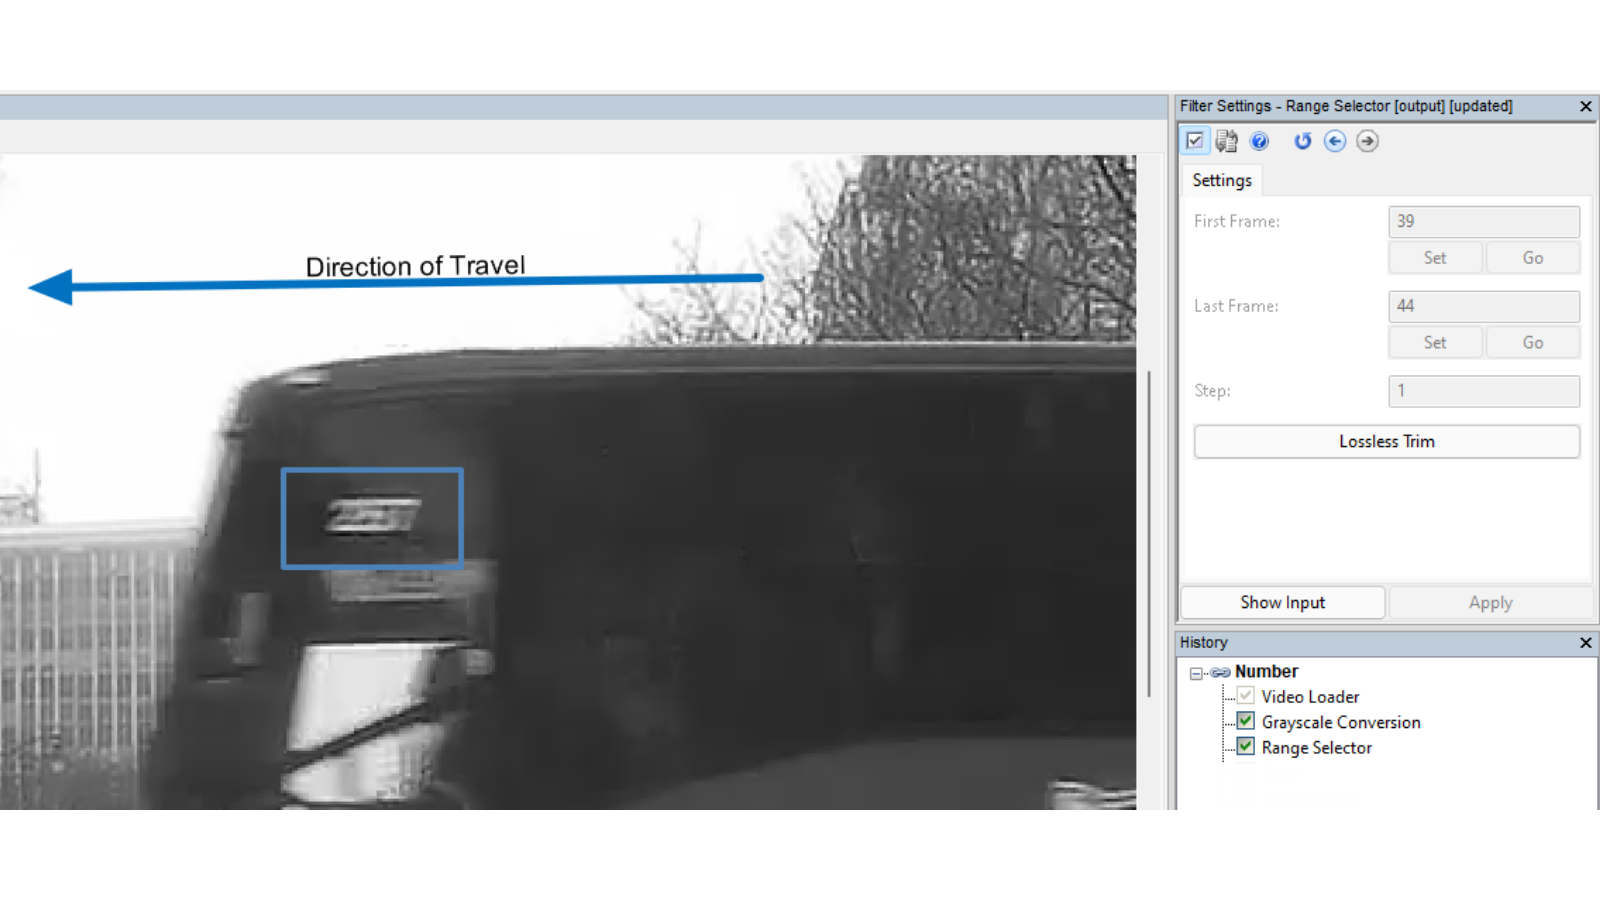
To help us understand the functions better, let us look at this short dashcam clip of a bus travelling from right to left across the field of view as the vehicle containing the dashcam is approaching the junction. The number on the side is blurred across several frames.
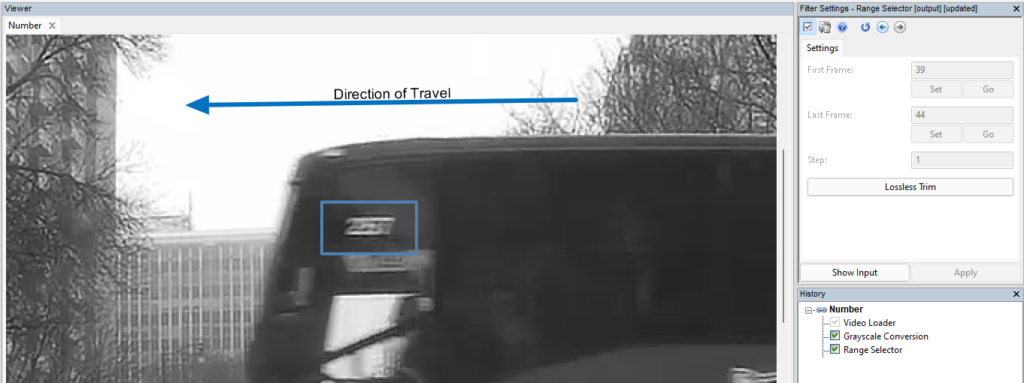
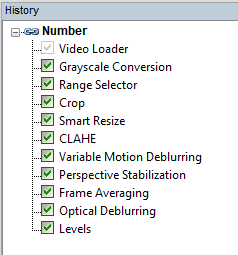
After converting to greyscale and selecting the range of frames, further image preparation is required before applying the Variable Motion Deblurring filter. In this example the Crop filter has been used, followed by a Smart Resize, and then CLAHE.
As soon as Variable Motion Deblurring is selected, your tool automatically changes to the ruler, allowing the selection of a line from one pixel to another. The purpose of this is to mark our blur length and angle.
After selection, the blur values are entered for that frame, but they can be manually adjusted by using the sliders within the Filter Settings.
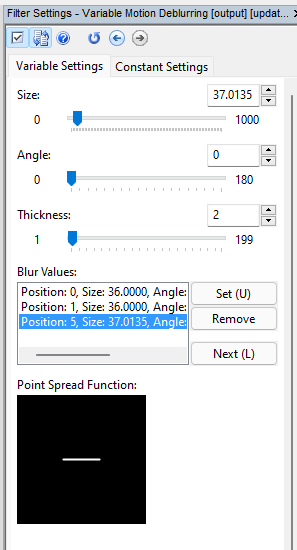
Now comes the fun part: by moving to the next frame in our selected range, it’s possible to adjust the size, angle and blur thickness for each frame. It may not be required to change every frame, and the filter is flexible to allow individual frame selection: variable parameters will be automatically interpolated for intermediate frames unless we explicitly ask for keeping them fixed from within the Constant Settings tab.
After moving through the six frames in our selection, we have adjusted the blur parameters on 3 frames (O,1 and 5).
All of the images are now ‘deblurred’, but it is often necessary to conduct some further processing in order to exploit all of the deblurred pixels and integrate all of the frame data into a single restored image.
As the bus in the example is moving, stabilization is required. However, the vehicle with the dashcam is also moving, which changes the perspective and size of the number in each frame. We therefore require perspective stabilization.
You can read more about this filter here, or in another Forensic Focus article here.
After using Perspective Stabilization, and integrating the stabilized frames together with Frame Averaging, a couple of final small filters produces the result.
The chain used here, and variations of it, can produce results in cases where you may have once believed not possible. You may only recover 2-3 digits from one camera, but then another 1-2 digits from another camera.
Rebuilding the pixel data in this example was fairly easy, but by learning how the filter works and understanding how it is integrated within a filter chain, Amped FIVE users are able to turn blurred noise into restored and actionable data.