Hello and welcome everybody to this video about Quin-C. Today we will be talking about a widget called Simple Review.
Simple Review is a widget which has been designed for examiners whose everyday job is to run the index searches or keyword searches; perform tagging, bookmarking, viewing, labelling and exporting data. So if you are one of those users, Simple Review is going to be very helpful to you, and you can use it in your everyday job, to make the work more efficient for you.
So we will take a look at first of all how the Simple Review has been designed to run. Simple Review has been designed to run in a full-screen mode. So that means, if you are a user who has been assigned the Simple Review widget, you will not see anything else, but just the Simple Review and its interface.
In order for a user to be a Simple Review user, you have to define a separate role which basically will include a specific role setting which can be applied to all the users who you would want to act as Simple Review users.
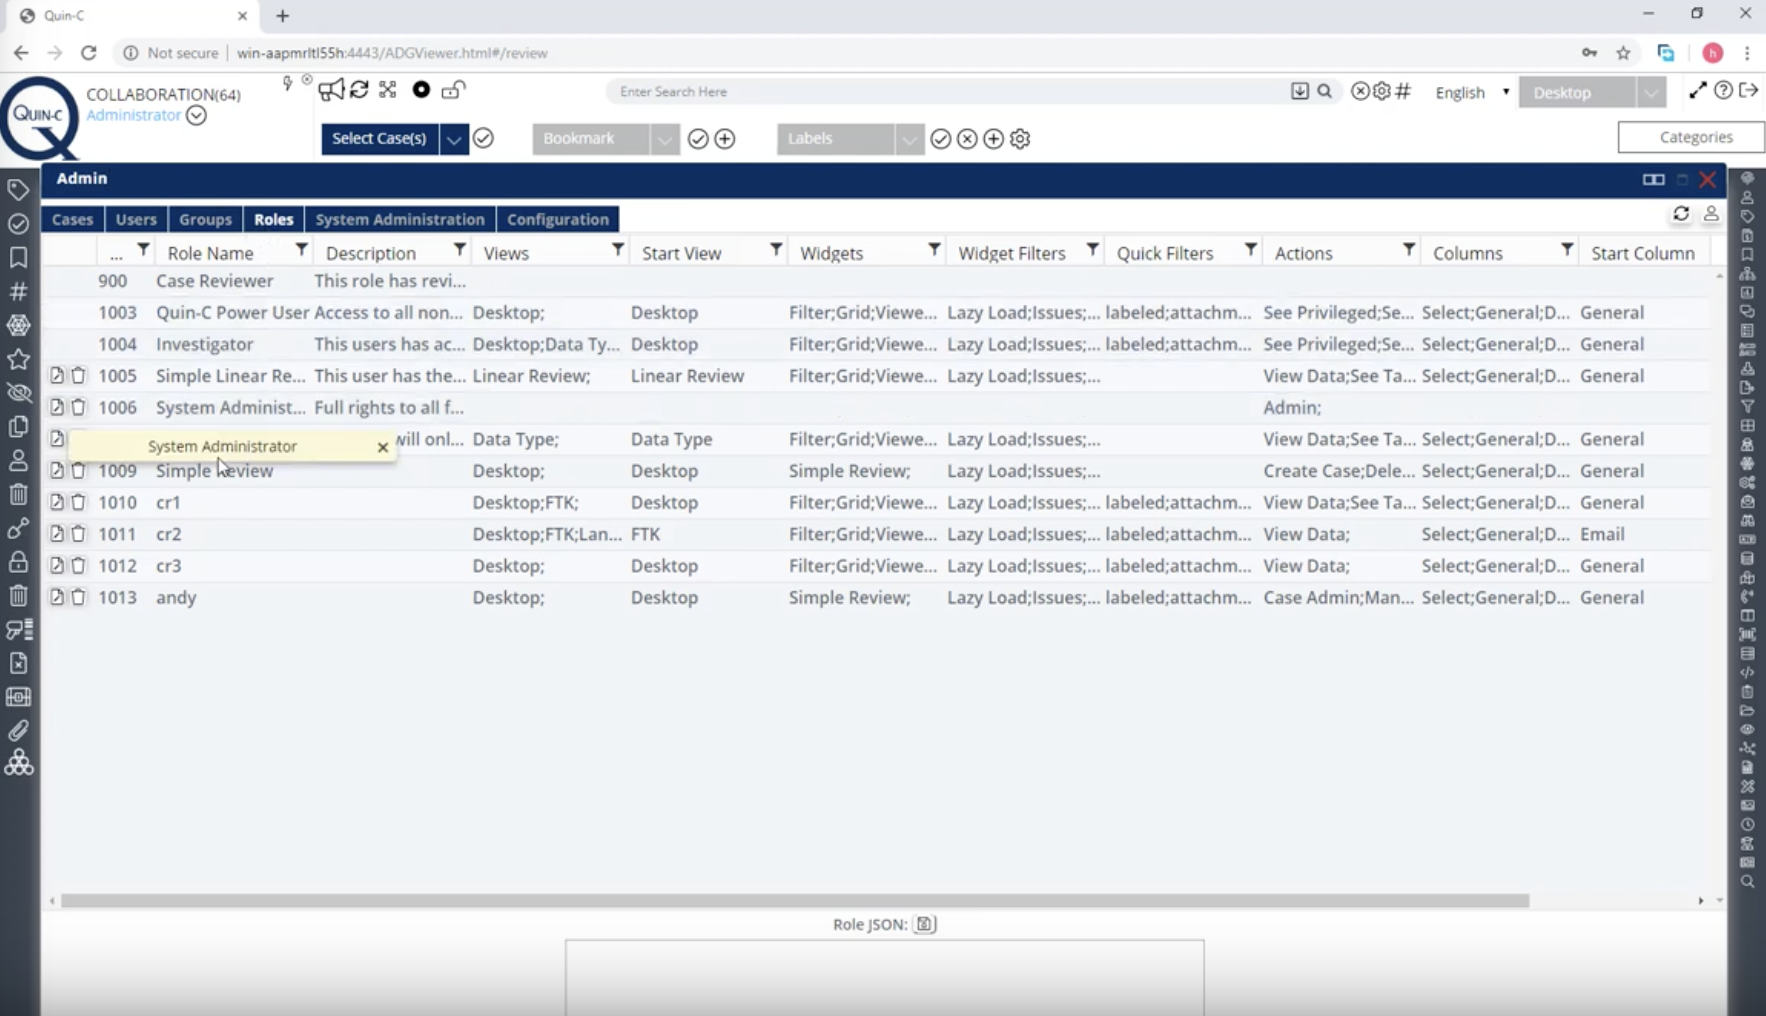
So let’s take a look at how we can define this role for the simple users. If you go to the Admin widget and Roles, you can create a new role only designated to the Simple Review users. I have got here one role called ‘Simple Review’, and as you would know, there are two very important things to make any user work in Simple Review mode.
First of all, you can only assign them one view, and nothing else should be assigned to them. Along with that, you also have to ensure that their start view is the desktop view. When it comes to assigning the widgets to them, you can only assign them one widget – that is the Simple Review widget – and you do not have to assign them any other widget apart from this. If you do assign them any other widget, they will open Quin-C in the normal Desktop view and will not act like a Simple Review user.
You can choose to include as many widget filters as you want, and the rest of the selections depend upon the users and their administrators. So that is how you define a role for a Simple Review user.
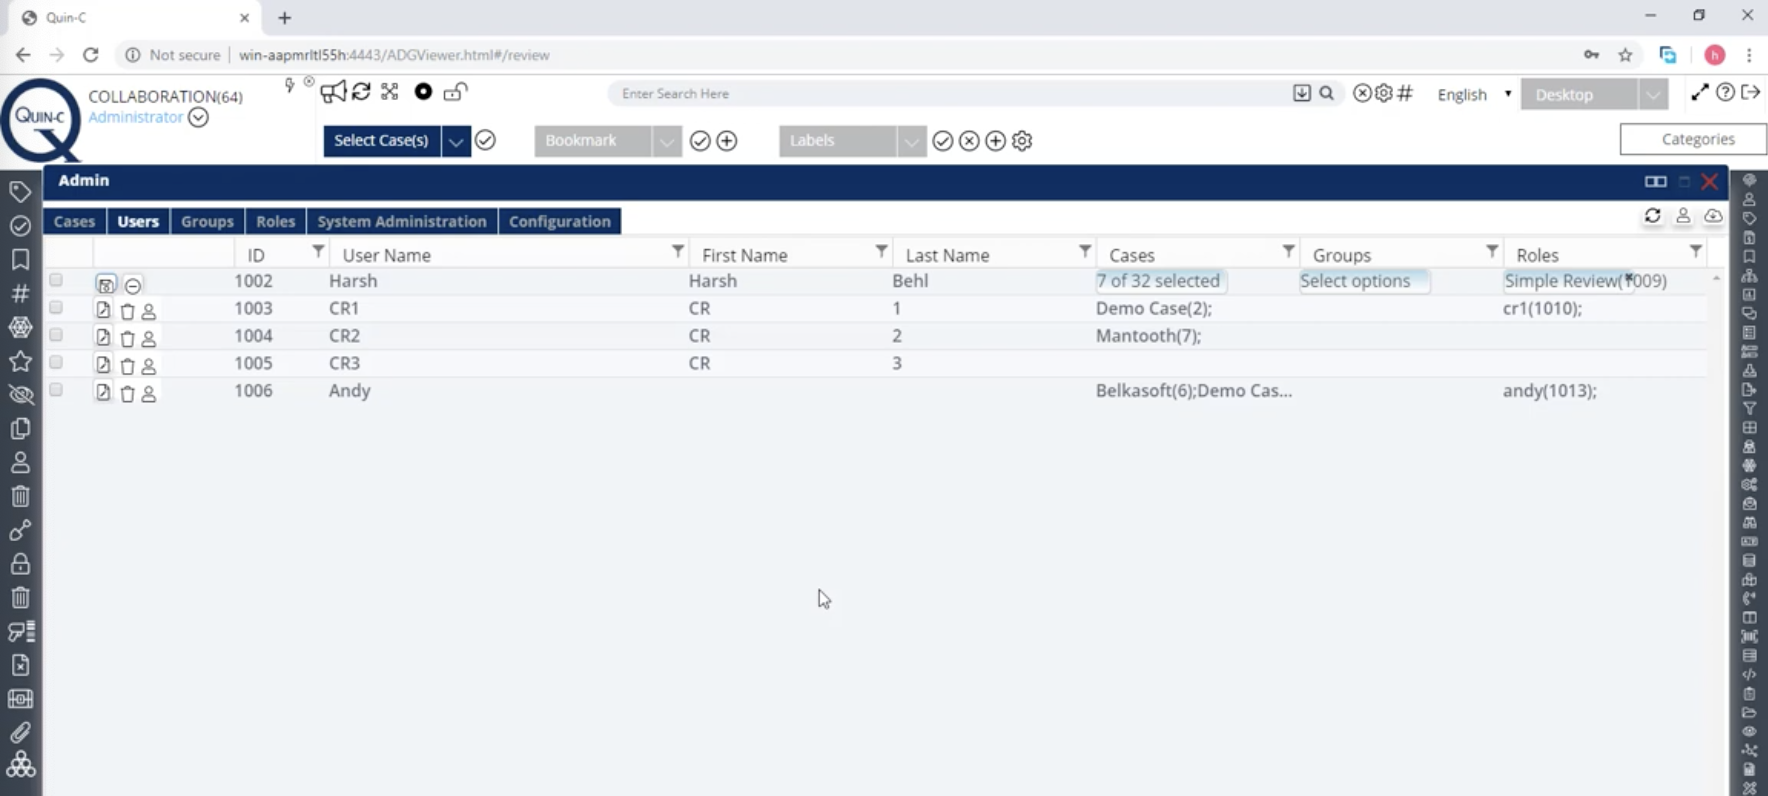
Once you have defined a role for a Simple Review user, the next thing you have to do is assign that role to any user who you would want to act as a Simple Review user. In my case, I have made a user called Harsh, and you can see that he’s been assigned the Simple Review user, and has been assigned a few cases out of all the cases which I have.
That is it. Once you have done this, a user will act like a Simple Review user. And when he or she logs in to Quin-C, they will see a totally different Quin-C.
So, let’s see how does a Simple Review user work within Quin-C?
If I run Quin-C within Simple Review mode, I will simply log in as the user who has been assigned the role of Simple Review. So this is how Quin-C’s Simple Review interface looks like. It shows you the user who is logged in; the number of cases assigned to that user; and it also welcomes you with the three pie charts.
The first pie chart is based on the size of the cases. So, the bigger the case, the bigger a chunk it occupies on the pie chart. The second is based on the file categories you have in your cases, so if you have more PDFs in your cases, that will occupy the bigger chunk of the pie chart. And the third one is based on the tagged objects. So whichever case has the most tagged objects, that will occupy the bigger part of the pie chart again.
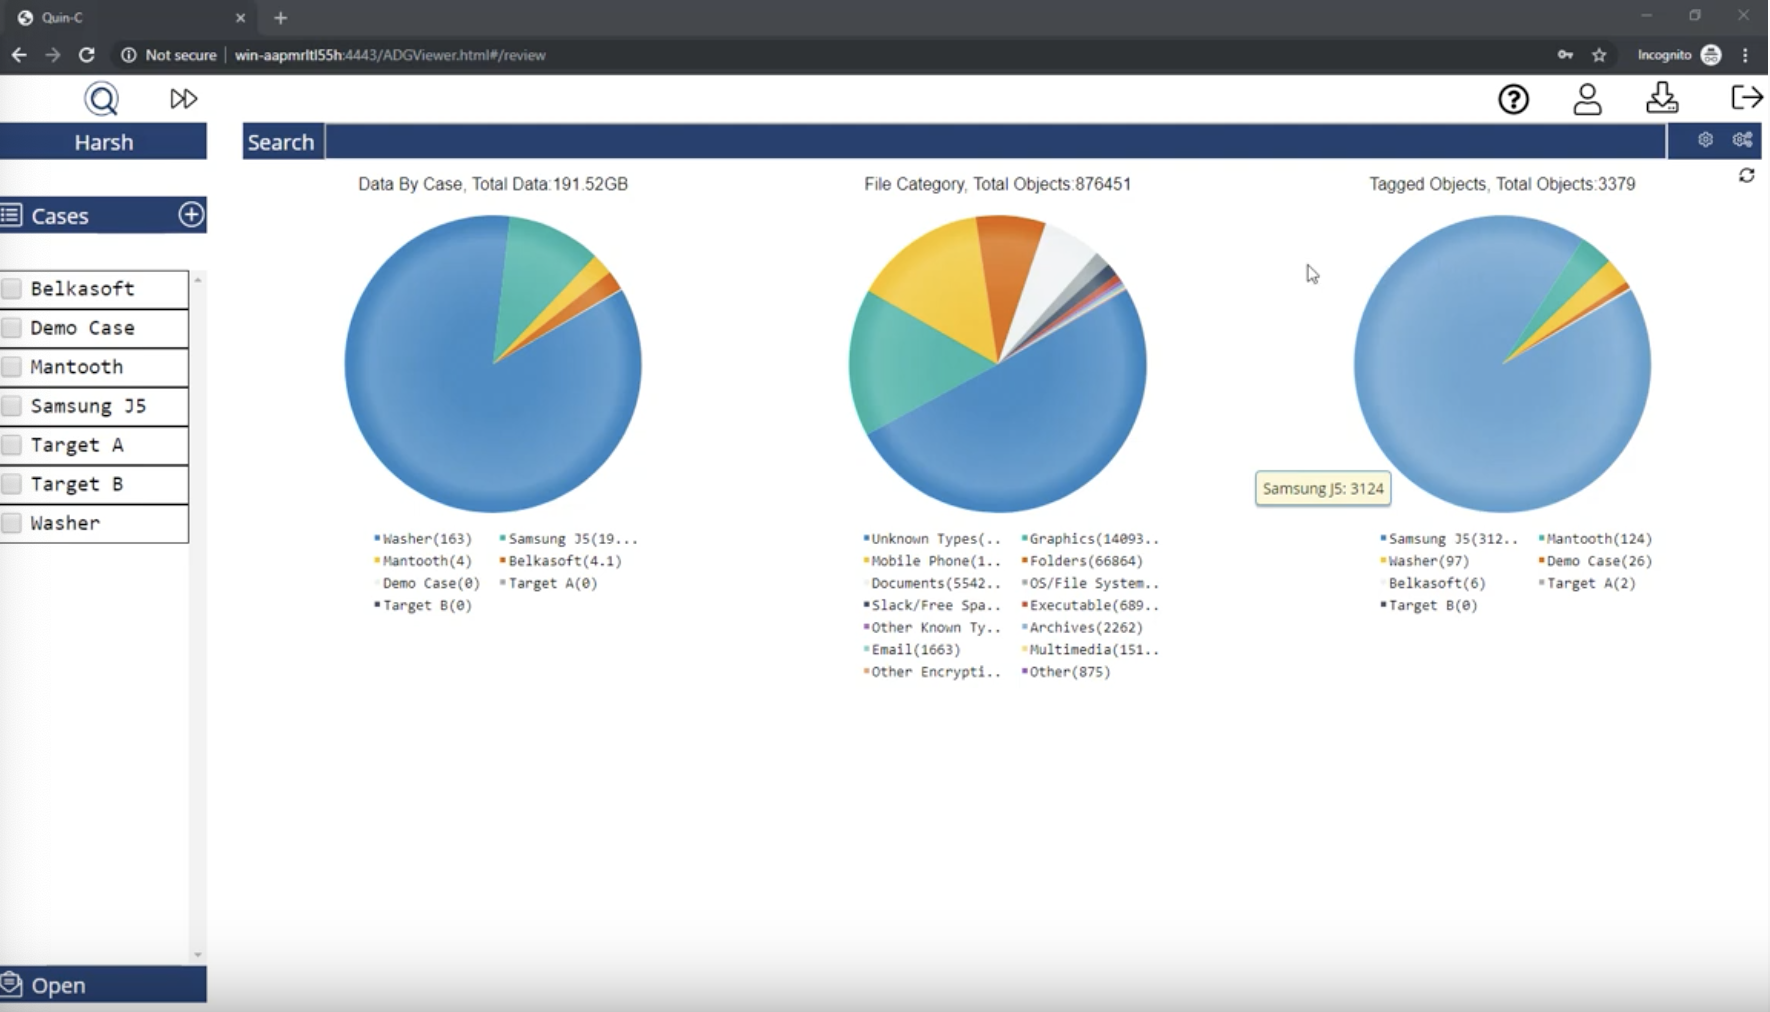
If this case list goes really long, you can search for any case by typing in the search bar. Also, you can apply an advanced search to it. You can search for a case by its name; by the creator; creation date; last modification date; and so on. You can make them case-sensitive, exact match, or not searchable.
We have also included two other widgets on this page. So those two widgets are auto-tagging and tasking. Auto-tagging widget allows you to automatically tag for the search terms you are interested in, and for any number of cases which you would like to perform that tagging.
Tasking allows you to search for all your tasks which have been assigned to you. You can search for your tasks just by looking at the Tasking widget, which shows you a list of all the tasks which have been assigned to you; or any comment which has been made along with the tasks.
Once you are done with this screen and you decide to work on the case which you want to, you can select one or two cases you would like to work on. Once you have selected the two cases you would like to work on, you can simply open the cases by clicking this forward button at the top; or you can also click ‘Open’ right at the bottom of the screen.
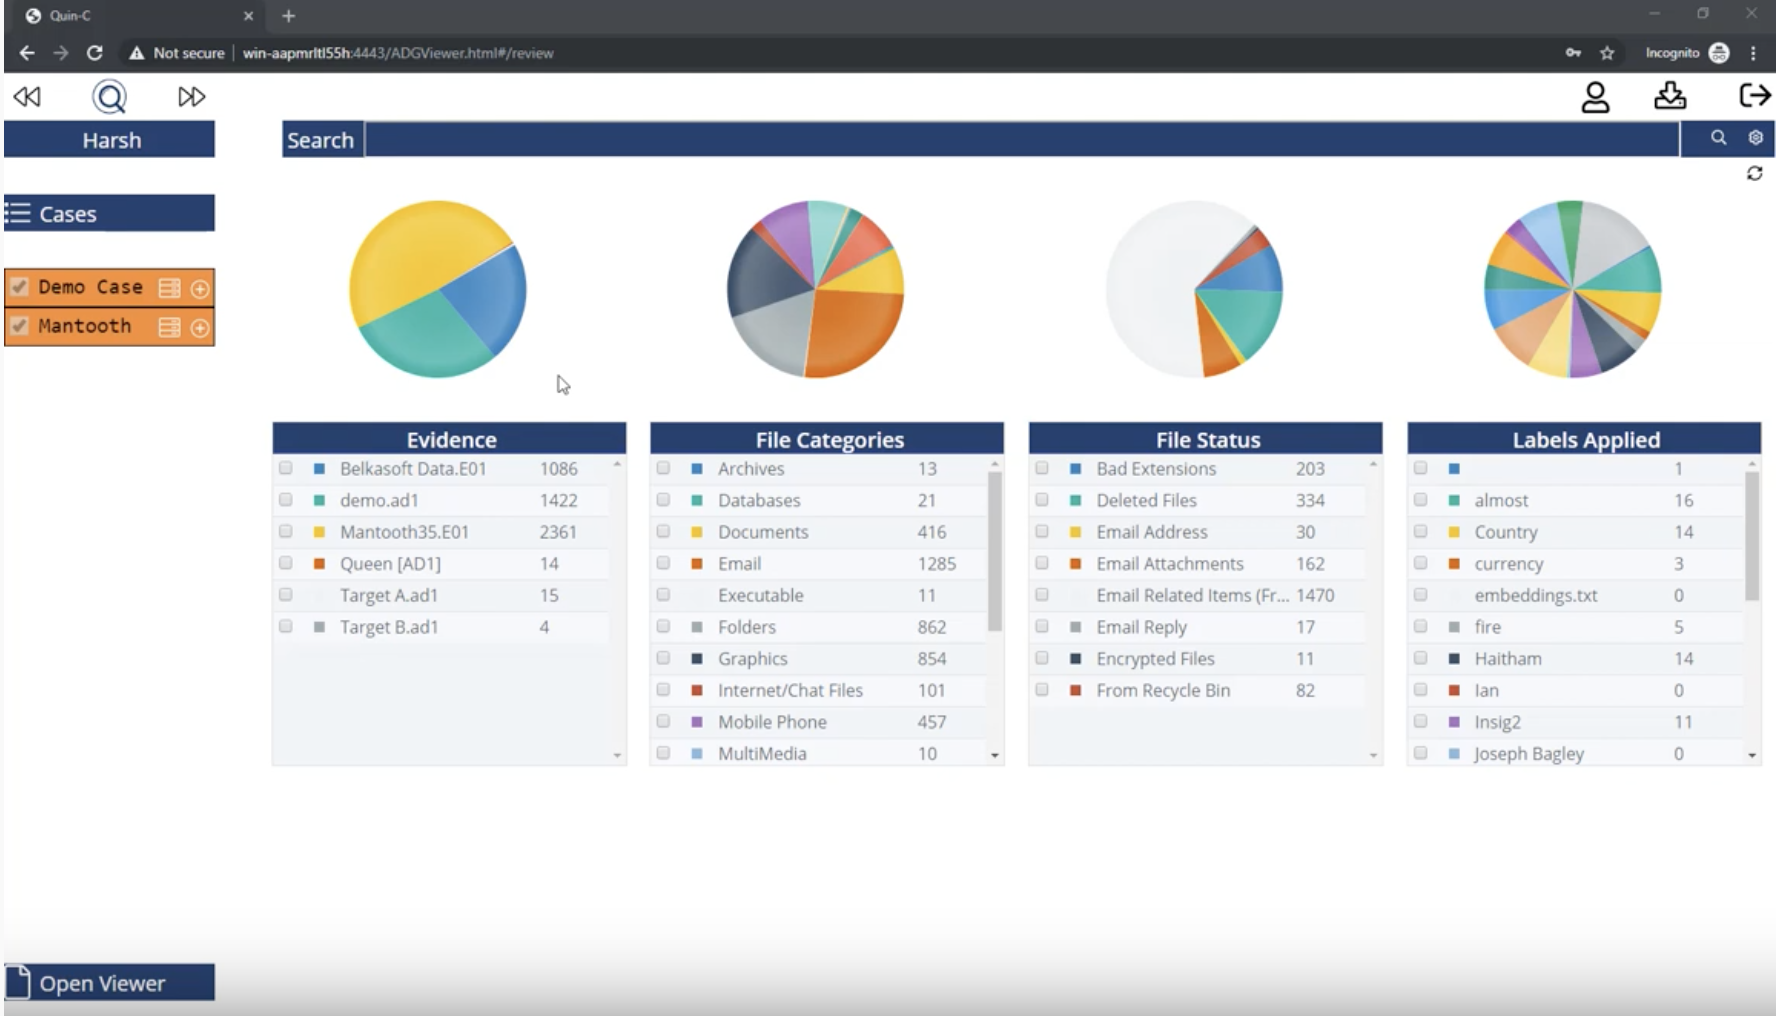
Once you click on them, the case starts loading, and this is how the case finally ends up loading. This is a very interesting and helpful screen for the Simple Review users. They can see the list of evidence which they are working on in these two cases which they have loaded; they can see all the file categories here; they can see the file status, as you would remember this from FTK; and they can also see the labels which they have applied.
Also, at the bottom of the screen we have placed a few widgets which we believe are the best and suits the most work flow of Simple Review user. And they can simply open the widgets from here and use them as and when required.
As explained earlier, Simple Review has been designed to perform the most basic review, tagging, bookmarking and exporting features, but not just that – it also allows you to apply filters; compound filters; much more easily and intuitively.
As an example, you can see that in this case, or in fact in these two cases, I have got all these evidences, and file categories etc., and if I’m only interested in looking at documents, I can simply choose to see the documents and open them. Again, you have two options to see the documents: either you can go forward from the top left of the screen, or you can simply click ‘Open Viewer.’ Either of them works the same way.
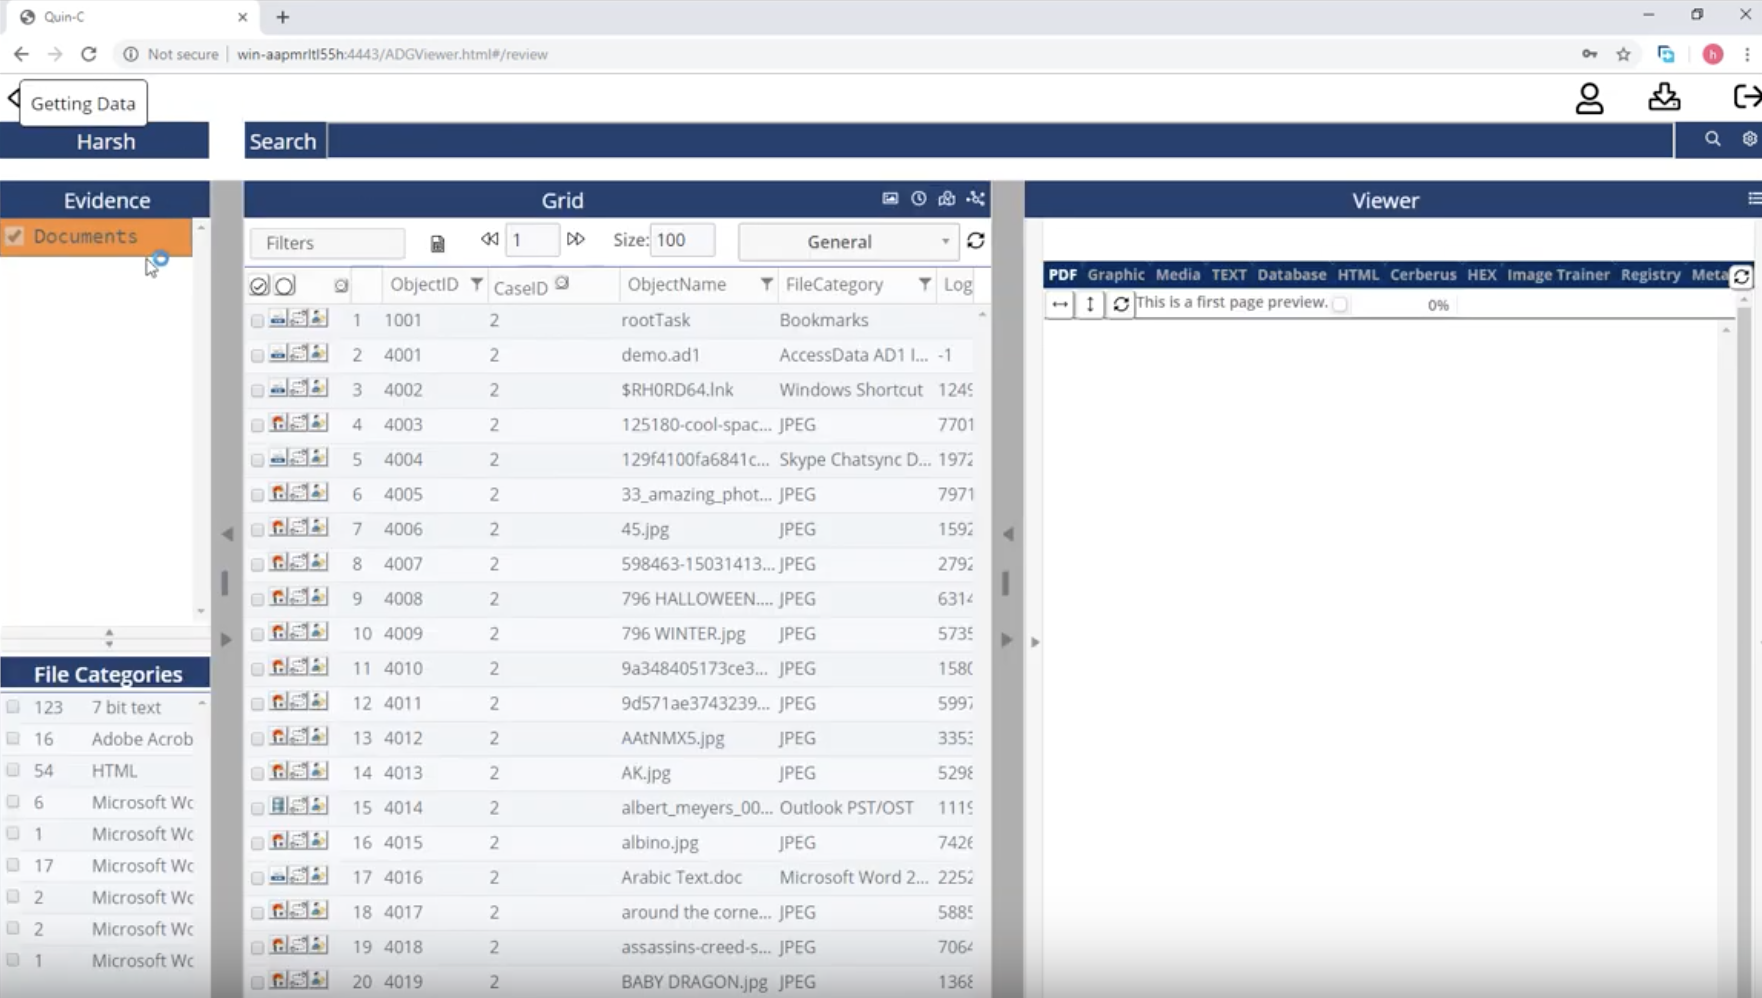
Once you click on them, the whole screen then loads the documents from all of these evidence sets, and you will only be left with the documents in this screen. This is again an interesting screen, and a different version of the screens which you would typically see in Quin-C.
You have what’s right of the screen a viewer which is always enabled in this view; and then in the middle you have the grid; and on the left you see all of your filters which you have applied. If you can click on any of these documents, to see the documents within the grid, and that is how you can simply see the documents based on the labels which you have applied.
If you have anything to search for, you can simply search here in the search bar. And within the search bar we have this cog wheel, which symbolises advanced search. If you are performing an advanced search, you can choose to apply all of these Boolean variables, or Boolean operators, to it. Also, you can search for features like synonyms, stemming, fuzziness, phonic; and you can also do a Regex search.
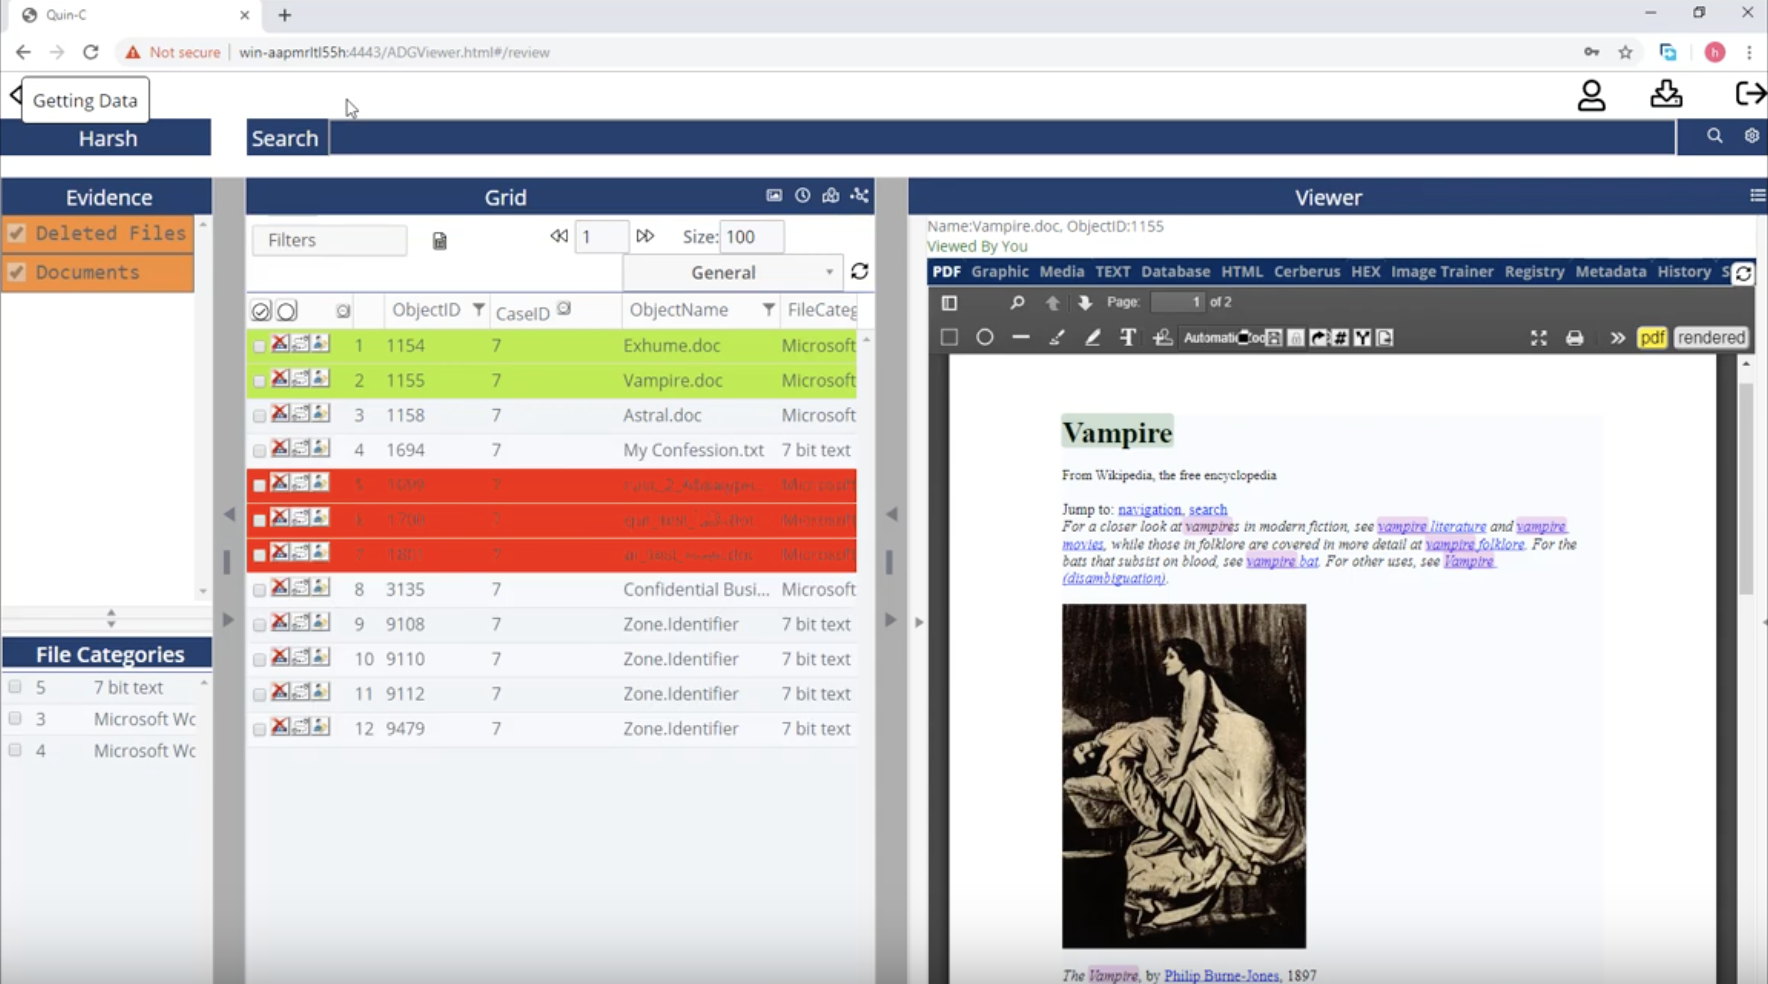
You have the ability to run a search from here. So in this case, if I was to run a search for the word ‘vampire’ I can simply search for the word ‘vampire,’ I can type it in the search box and hit Enter, and then it automatically filters down to the documents which have the word ‘vampire’ listed in them.
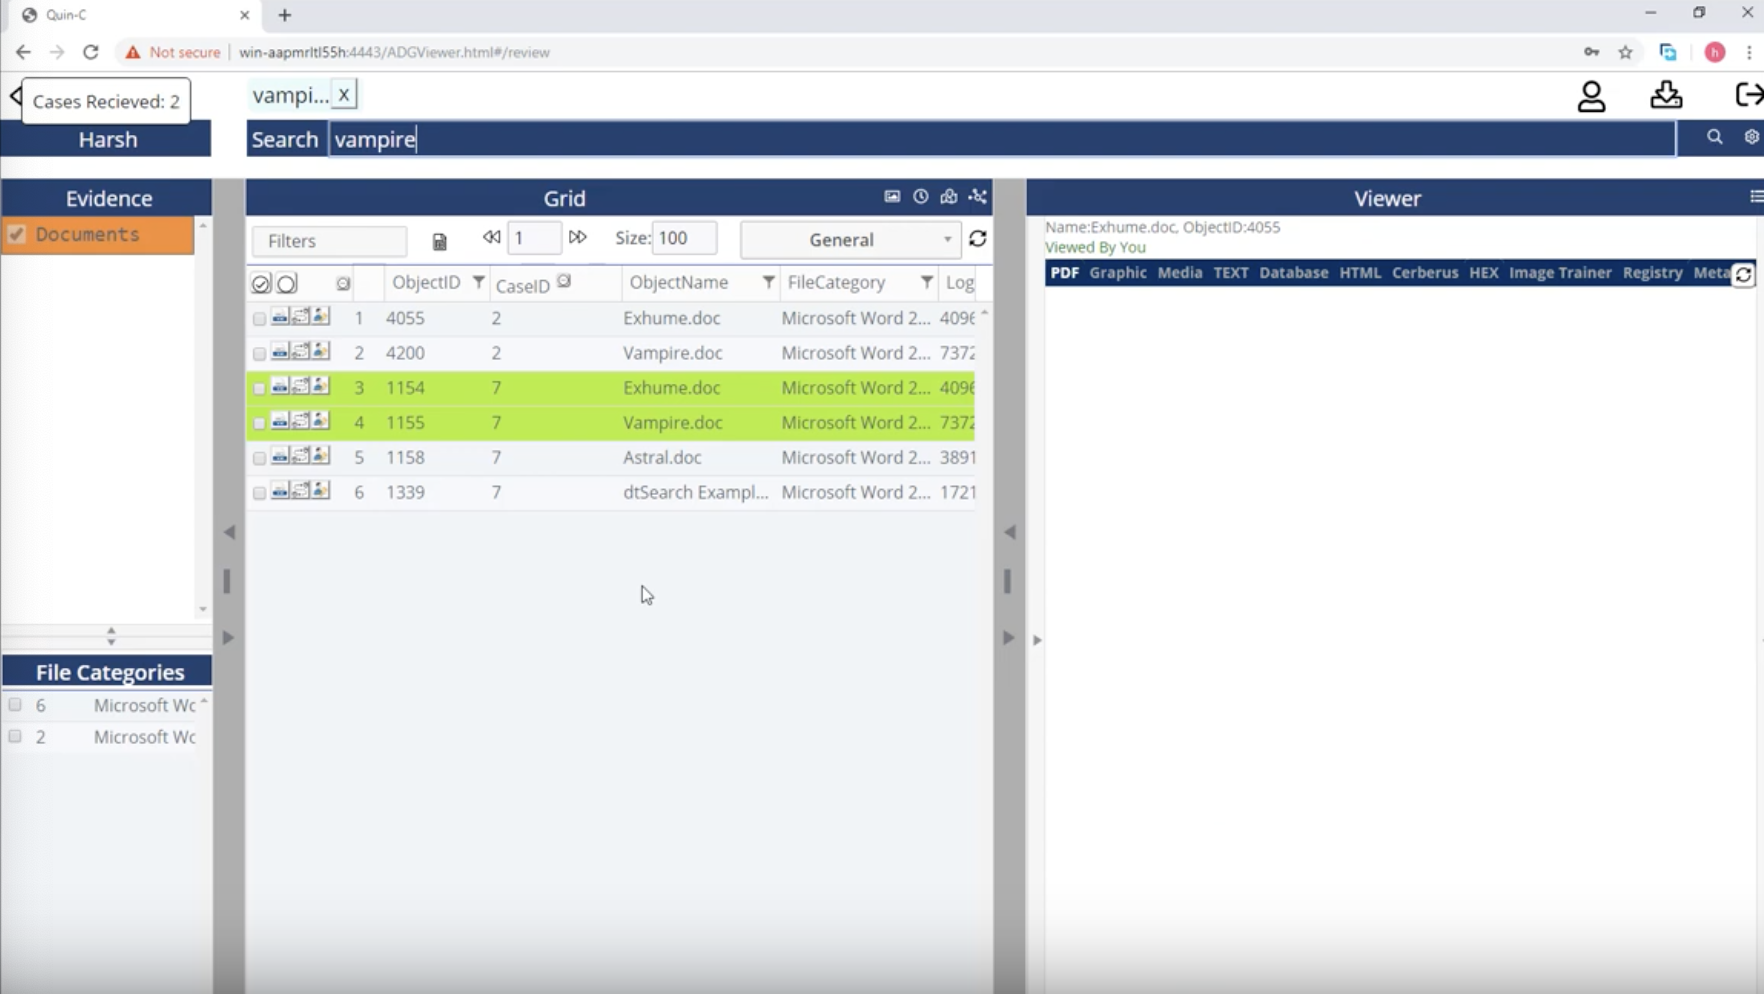
I can then choose to click on any of these documents, and as you can see, it’s now displaying the first document, which is in the grid, and it also highlights the word ‘vampire’ wherever it’s found there. This is one way of searching and tagging.
But another important way in which you can perform searching is, if you go back to the previous screen where it shows you all of your file types, evidence status, etc.; here also you have the ability to search for any term. So if I was to search for the same term, ‘vampire,’ here again, it will then filter down just to the items which contain the word ‘vampire’, and then you will see these charts representing the true form of where they found the word ‘vampire.’
So you can see that, within these evidence sets – within the Belkasoft evidence set – it is three places where ‘vampire’ has been found, and similarly for other evidence sets: in Mantooth it has been found nine times, and in Demo just the two times.
If I am now interesting in looking at the documents which have the word ‘vampire’ in them, but on top of it I want to apply a filter of deleted files – so that means I want to search for the word ‘vampire’ but only in deleted documents – then I can apply these labels and simply move forward. Once I move forward, the evidence list here will show you the filters which you have applied, and the grid will only load the documents which are first of all deleted, and then they are a part of document set, and again they have the word ‘vampire’ in them.
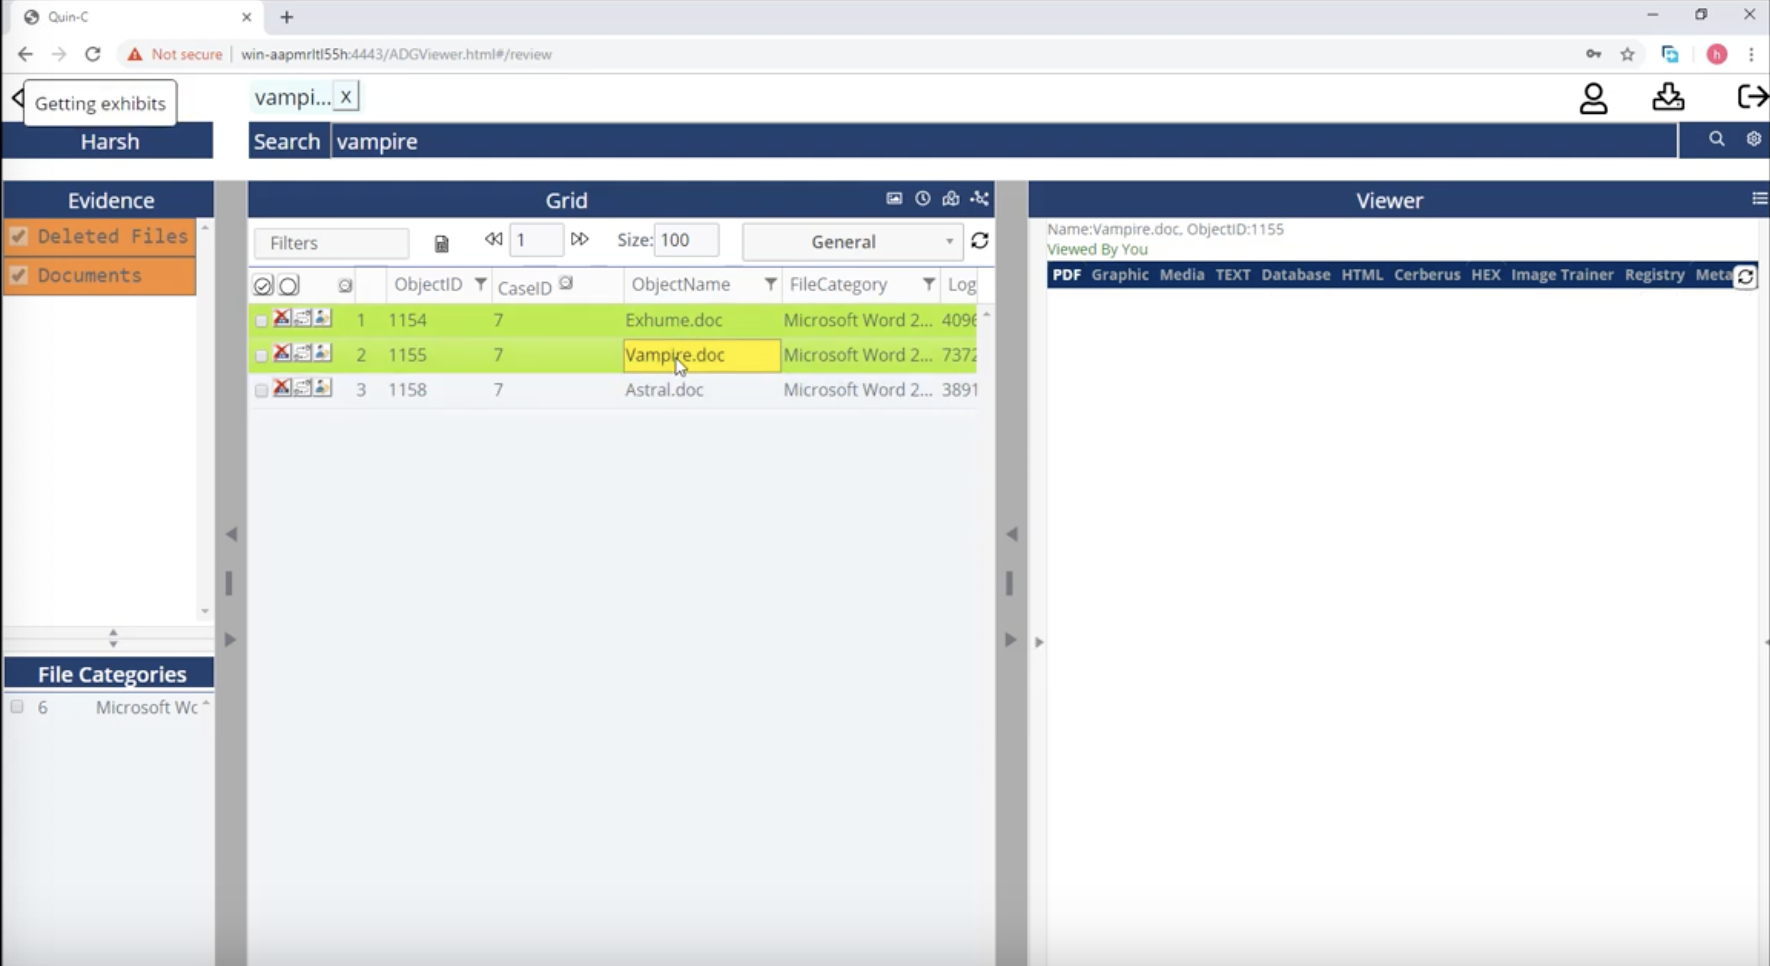
So you can see here how it represents this; you can simply then choose to bookmark this document, to label this document, or simply export this document. In order to do this, we have provided a really simple view within the simple viewer.
These three columns, they are all retraceable. So you can simply retrace this by clicking on this bar here towards the left; and then the left bar just collapses. So you can see that this whole column collapses when you click on this arrow.
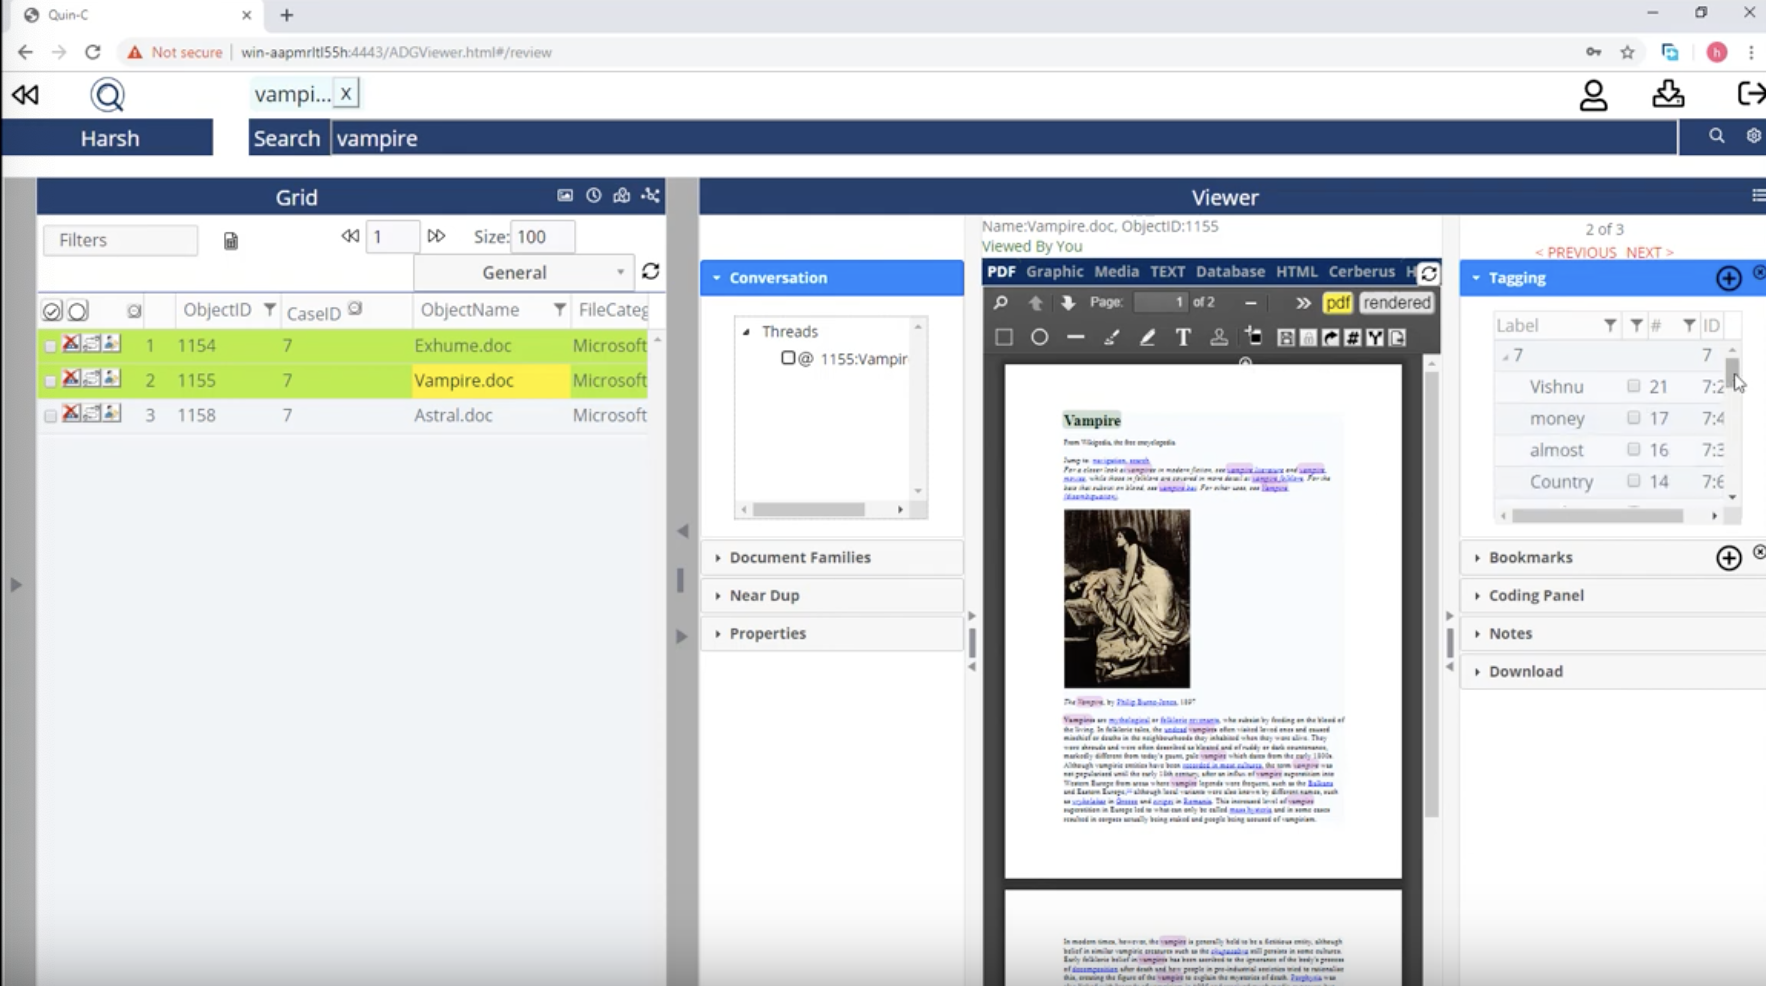
Again, as soon as you click on it you will realise that the viewer has expanded its capabilities, and if you just expand it a little bit more, you will see that now, here, you have an expanded viewer which on its left shows you the conversation; any document families; the near duplicates to this document; and the properties of this document.
At the same time, on the right, it allows you to either apply the labels to this document; bookmarks to this document; you can use your coding panel; or you can simply download this document. So if I was to apply a bookmark to this document, I can simply choose the bookmark I wish to apply, and I can do a bookmark of this. It also allows me to write a comment against the bookmark, but in this case we can apply a label to it, and in this case I am going to call this vampire document as a part of, let’s say, ‘money.’
So once I click on ‘money,’ you will see that it shows you that the labelling job has begun, and then that’s it, the labelling has been applied. These are one-click labelling and bookmarking, so as soon as you click on it, it will start applying the labels and bookmarks.
Similarly, you have an option to download the document or basically exporting the document out of the case. As soon as you hit ‘Download this document’, it will download only the document that you have in the viewer. If you were to click on the family, it would then download the whole family of documents.
So that is how you can simply keep loading up your documents in the grid, keep applying labels, and keep moving next. If I was to click on ‘Previous’ then it will show me the previous item in the grid, and then you can do the same to that document, and then you can see any labels or bookmarks which it has applied already.
So it’s pretty easy: you can simply apply your bookmarks or labels and keep moving next from within the viewer itself. That is why it’s a really easy and simple view for the users to use.
A few other things in this view which you should notice: you can obviously turn off the filter from here, and then it loads the rest of the things within the grid. There are some other widgets which we have included within this viewer as well, and they sit right in the grid. So one of them is Social Analyzer, you’ve got your Maps, Timeline, and you’ve got Thumbnails.
So if there were lots and lots of images which were loaded in the grid, and you were interested in looking at the thumbnails, all you need to do is simply open the Thumbnail widget from here. It loads up like this – you have it on half of your screen but you still have a view of what is behind – and then you will have a view of all the thumbnails in the Thumbnail view.
If you were examining emails in the case, or any kind of communication data, you can simply launch Social Analyzer from here, and you can use Social Analyzer as you would normally use it in Quin-C. It shows you all the kind of communication data it can extract from this case. You can simply choose to pass all the contacts from it, then based on your own interest, you can choose anybody you are interested in, and as soon as you click on the contact of your own interest, it develops the communication matrix for it and visualises it on the screen for you.
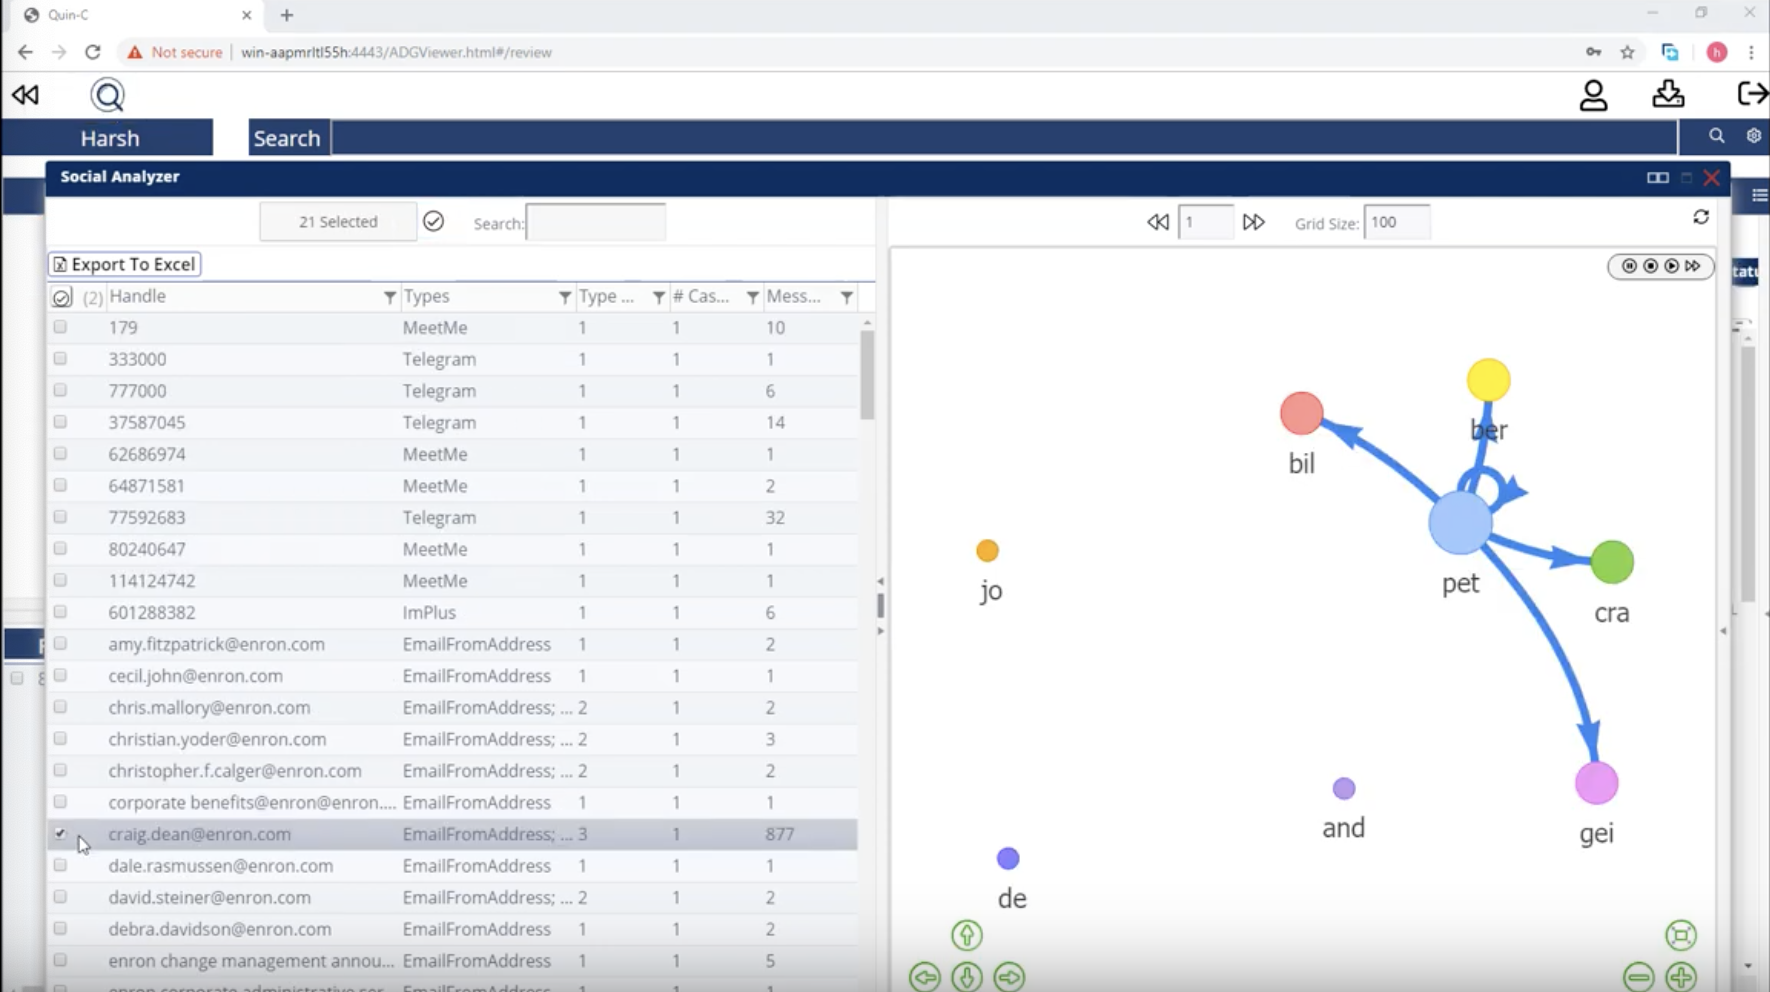
You can here see how this guy has been communicating to others in this case. You can choose to expand the labels, if you like; if you don’t, you can choose not to expand them. And then you can click on any of these entities and see the emails which were exchanged between these parties.
So again, if there was any sort of timeline filter which you have to apply, so that you can see if you want to apply a timeline filter, so that you can always look at the data from a specific date and time, you can do that within Simple Review as well.
And then you can look at any sort of data widget identifies over the map, or anything which has geo-coordinates assigned to them, and then you can use them.
So this is, in a nutshell, what Quin-C Simple Review has been designed for. It’s designed for users to perform their searching; look at the documents; and then simply tag them, bookmark them, or export them within the case. You can also see that we have a report widget here, where you can keep generating your reports if you would like to, and based on your own reports you can take them back to examiners, to your other investigators, or to your administrators.
So this is what Quin-C Simple Review does. We will be looking forward to expanding some capabilities of Simple Review in the near future, but this how it works as of today. Thank you for watching this video. Have a good rest of your day.
Find out more about Simple Review at AccessData.com.


